GamersPlan

Elden Ring: Altus Plateau Sites of Grace – All Sites

Altus Plateau is a region in the Elden Ring that is extremely essential for the storyline as it consists of multiple sites of grace and quests related to them. All of the locations in the Altus Plateau hold significant importance.  In this guide, we have marked out every single site of grace that you can access in the Altus Plateau and also how you can get to the Altus Plateau.  All Sites of Grace in Altus Plateau Before we head to any site of grace in the Altus Plateau, we actually need to reach the Altus Plateau itself. For this, you can use the Grand Lift of Dectus. The lift is located near the eastern area of Liurnia. The Grand Lift is actually locked at first and requires you to use two medallions on its platform to get access.  Another way to reach the Altus Plateau is the Ruin-Strewn Precipice. But for this specific route, you must defeat boss Magma Wyrm.  Either way, when you are at the Altus Plateau, there are many different sites of grace that you can discover. Here is the full list:  Altus Highway Junction (1) At Altus Highway Junction, there are many important spots where you can find tons of stuff. Additionally, you will encounter Boc the Seamster close to the Altus Highway Junction site of grace. The coordinates to this site of grace are: -100 and 85.  Altus Plateau (2) This is the main site of grace of the Altus Plateau. Here, you can rest and refill everything that has been exhausted. This site of grace is located at the coordinates: -104 and 76.  Altus Tunnel (3) The Altus Tunnel is another location that can be found in the Altus Plateau region. You won’t find any NPC in here but you can definitely grab some useful stuff. The coordinates for its site of grace are: -91 and 90.  Bower of Bounty (4) At Bower of Bounty, there is not any important stuff but close to it, you can find many important things such as Mirage Riddle and Mirage Rise. The coordinates for its site of grace are: -88 and 85.  Castellan’s Hall (5) Castellan’s Hall is another important location in the Altus Plateau. If you are looking to get some high-value items then you should definitely visit this place. Also, there will be a boss waiting for you in the Shaded Castle. The coordinates for Castellan’s Hall site of grace are: -79 and 78.  ErdTree-Gazing Hill (6) This hill area has a site of grace and there is nothing useful on the exact location. But you can find other useful things around it. Reach this site of grace at coordinates: -99 and 72.  Forest-Spanning Greatbridge (7) This is another area where you can find the site of grace. Here, you have options to explore various spots and find things such as Gold Mask, Finger Reader Cone, Waygates, and other stuff. Also, there are some NPCs that you can meet. Reach this site of grace at the coordinates: -89 and 89.  Perfumer’s Grotto (8) It’s another area at the Altus Plateau where a site of grace can be found. You won’t see any NPCs or merchants here but you can definitely find some valuable items like Perfume Bottle, Golden Rune, Crystal Cave Moss, Budding Cave Moss, and others.  Reach this site of grace at the coordinates: -100 and 96.  Rampartside Path (9) This area is actually connected with Abandoned Coffin in terms of boss fight. The dragon boss you met at the Abandoned Coffin respawns in this area. Additionally, there are a few different spots where you can find lootable stuff. The Rampartside Path site of grace is located at coordinates: -92 and 94.  Road of Inquity Side Path (10) At Road of Inquity Side Path you can discover another site of grace related to the Altus Plateau region. You can get to this site at the coordinates: -77 and 87.  Sage’s Cave (11) This is another useful location in terms of items. You can get items such as Stonesword Key, Skeletal Mask, Golden Great Arrow, Shield, and many other items. The coordinates for this site of grace are: -92 and 69.  Sainted Hero’s Grave (12) We have another site of grace at Sainted Hero’s Grave. This place has quite a high number of items that you can find here, compared to the rest of the places. Reach this site of grace at the coordinates: -97 and 86.  Windmill Village (13) At Windmill Village you can interact with an NPC named Millicent. Also, you can grab many useful items such as Human Bone Shard, Golden Seed, Rune Arc, Festive Garb, Fire’s Deadly Sin, and others. This site of grace is located at the coordinates: -79 and 94.  Windmill Heights (14) Lastly, we have a site of grace at Windmill Heights. To reach this site you must follow the coordinates: -78 and 96.  So, these are all the Altus Plateau sites of grace. 

Elden Ring: Gate Town Bridge Site of Grace – Third Shabriri Grape

elden ring gate town bridge site of grace

Gate Town Bridge is another important location in Elden Ring where you will meet Hyetta. There is not much to find here but the interaction with Hetta is extremely important for your journey. Additionally, you can rest at the site of grace here.  In this guide, I have covered a full walkthrough that takes you to the Gate Town Bridge site of grace and also the spot where you can find Hyetta. So, let’s dive in.  Gate Town Bridge Site of Grace Location  Accessing the site of grace at Gate Town Bridge is quite easy and it’s actually located on the broken bridge on the eastern side of Liurnia Region. This is just like the other sites of grace in the Elden Ring such as Temple of Eiglay, Abandoned Coffin, and Rampartisde Path. But, for now, here’s a full walkthrough for Gate Town Bridge. I would suggest starting off from the Liurnia Highway North site of grace. We will travel on the stoned path. On this path, you will find many corpses, plus some of the groups will be fighting as well.  As you go further on the route, you will encounter a ghost army as well. After that there will be one huge ghost enemy, you can choose to kill them all or move on without having an interaction.  Either way, you will have to go on that stoned path and keep following it. Make your way through the huge cliff and cross the jungle area. You will reach the end of the route, the bridge is broken and there is also a site of grace right on that bridge.  Interact with it and save your progress. It is important because we know that’s how we discover the lost grace. Hyetta’s Questline on GateTown Bridge Gate Town Bridge is a super important location because it is the place where you have to meet with Hyetta to continue her quest.  Once you have rested at the site of grace, head towards the north side of the map. And just a bit ahead near the cliff, Hyetta will be standing. Here, you can interact with her and start the conversation.  She would ask for Shabiri Grape. If you have got the third Shabriri Grape with you then you can give it to her to make progress in the questline. But, if you haven’t obtained it yet then you must follow the steps below.  Obtaining the Third Shabriri Grape This third Shabriri Grape can possibly be found at a location based on the choice that you made at the end of Irina’s Letter Quest. This quest involves the interaction with Hyetta’s father, Edgar. He would drop this third Shabriri Grape.  Now, based on the decision that you made earlier in Irina’s quest, the location of the grape will be different. Here are the possibilities.  If you chose to kill Edgar at the end of Irina’s quest then his corpse can be found right at the exact same spot where the quest ended, because his father came at that spot. So, this exact spot is located at the entrance area of Weeping Peninsula.  The closest site of grace to this point is the Bridge of Sacrifice. Travel to this place and find his corpse where you defeated him. From here, you can pick the third Shabriri Grape.  Now, the other possible location is Revenger’s Shack. This is only possible when you spared Edgar’s life then you will find him here. It’s time to finish him off and get that grape.  Upon reaching the Revenger’s Shack, head straight in there and look for the corpses. You won’t see Edgar in here but you can make him spawn by two different methods. You can either perform a rest or loot the corpses to spawn Edgar at your location.  Either way, as soon as he appears, take him down and get that third Shabriri Grape. Upon collecting the grape, head back to Hyetta at Gate Town Bridge and hand it over to her. Your quest will now make progress.  FAQs Where is Hyetta at the Gate Town Bridge?  When you reach the Gate Town Bridge, look at the right side of the bridge. She will be standing just under a cliff. Here you can interact with her and start the conversation.  She will be looking for you to give her the third Shabriri Grape. If you haven’t got that yet then make sure to follow the steps mentioned above and get it from Edgar.  Where is the Grape Near the Gate Town Bridge? The Shabirir Grape that needs to be given to Hyetta at the Gate Town Bridge is actually obtained from her father Edgar.  You can find him either at the Revenger’s Shack or at the entrance area of Weeping Peninsula.

Rampartside Path Site of Grace Elden Ring – Full Walkthrough

Rampartside Path is another location in Elden Ring that has a site of grace, it has a connection with the Lansseax Dragon boss who first appears at the hill near the Abandoned Coffin Site of Grace and then respawns close to Rampartside Path Site of Grace.  You can reach Ramprtside Path Site of Grace from Windmill Village Site of Grace, that’s in my opinion the easiest route. Here’s the full walkthrough.  Route to Rampartside Path Site of Grace Starting from the Windmill Village Site of Grace, head down the route that’s on the South-Eastern side. Follow the stoned path and turn to your right as the trees on the right side end.  Jump down the cliff to reach the lower ground. Move a bit ahead and jump down from another cliff. Now, keep moving along the cliff on your left side. You will see some graves on your right, there will be another route going up on the left.  Follow that route and you will reach the upper ground, move just a bit ahead on your right and you will see the site of grace in between the trees.  Touch that site of grace and your lost Rampartside Path Site of Grace will be discovered. At this point, the map will show you the exact saved location of the Ramprtside Path Site of Grace.  There will be lots of different creatures around the area. A high number of wolves can be seen, also some birds will be there. You can kill all of them to collect the drops. Apart from this, multiple items will also be lying in the area, they can be collected as well.  Moreover, the coffin area which you just saw before the site of grace also has some items. Check each one of the coffins and you will definitely find some rewards there. If you are lucky enough then chances are that you may get some valuable items like runes and other stuff.  Ancient Dragon Lansseax and Rampartside Path Site of Grace Rampartside Path is the second part of the Ancient Dragon Lansseax boss fight. The battle starts near the Abandoned Coffin Site of Grace and ends up at Rampartside Path.  When you begin the fight at Abandoned Coffin, the dragon will spawn on the hilly side, and as you start fighting with it his health will reach 80%. At this point, the dragon will fly away and it will respawn at the Rampartside Path.  Bonus Tip: Lansseax is weak to Pierce attack type. Use it to quickly finish him off before he takes you down. Here you can finish him off and collect the rewards that are dropped. There will be two main items that you will get, the first is 60,000 Runes and the second is Lansseax’s Glaive. This is an extremely powerful spell, it works in the same way as the dragon’s lightning attack. Plus, it deals a great amount of damage. So, you definitely don’t want to miss this one. This is the only reason to kill this boss because Lansseax is an optional boss and you don’t need to defeat him in order to move forward in your journey. Other Important Locations Near Rampartside Path Site of Grace The most important location near the Rampartside Path is the Altus Tunnel Site of Grace. Inside the tunnel, you can find lots of useful materials plus some more secrets are hidden in the depths of tunnels. Additionally, you will get a chance to battle with two bosses, the first is Crystalian (Spear) and Crystalian (Ringblade). Apart from that, some regular creatures are also roaming in there. But, if you don’t go in the tunnels then there are some essential items close to the tunnel. These are Smithing Stones and Arsenal Charm. FAQs How Do I Get to Capital Rampart Site of Grace? East Capital Rampart Site of Grace is on the eastern side near the where NPC Boc the Seamster is located. There is also a summoning pool close to it called Effigy of the Martyr.  In order to reach Capital Rampart, you will have to travel from Rampartside Path towards the southern side and move straight on the eastern side once you near the Sealed Tunnel.  The exact coordinates to Capital Rampart are -99 & 116.  So, that’s all for this guide. Also, check out our guides on Forsaken Depths & Temple of Eiglay. You would definitely love them.

Forsaken Depths Elden Ring Site of Grace, Location & Boss Fight

forsaken depths site of grace elden ring

Forsaken Depths in Elden Ring is quite more of an optional location and it’s a lot different from many other locations such as Temple of Eiglay and Abandoned Coffin. It is secretly hidden down the depths which can only be accessed from Subterranean-Shunning Grounds.  Forsaken Depths has various things to do like defeating the Omen boss called the Mohg and find out tons of rewards in the sewers. In this guide, we have uncovered everything that you need to know.  Route to Forsaken Depths In order to explore the Forsaken Depths, you need to head to Subterranean-Shunning Grounds. This exact place is located in Leyndell, Ashen Capital. When you are visiting for the first time the main door will be locked which works as a shortcut. So, first, we will unlock that door and it will be a bit longer route.  Unlocking Shortcut Once you have entered the Shunning Grounds there will be a site of grace in front of you, from this point head straight and turn on the left side, you will encounter various enemies on this path, it’s your choice to take them down or simply move on. Go straight from this path, and at the end, you will see an opening in the ground, jump in and follow this route. Take the first right, these will be the sewers. It will be a bit dark in there, a torch will help you along the way. Just keep on moving in the same sewer skipping the first two exits, the third exit will have a bar-type door, so enter through it.  Follow the same sewer until the end and you will reach into a small room with a ladder.  Head straight through the huge wooden door and drop down the ledge on your left side to the lower floor. Go downstairs and take the exit on your right. Follow the path and exit through the doors, take the left route, and follow the sewers next to the stairs.  Take the first right inside the sewers, go straight, and take the second right. It takes you to a huge room with an enemy in there. Quickly traverse the room and climb up the ladder. Cross the wooden bridge and open the wooden doors. There you have the shortcut opened. This is the exact place from where we started, rest at the site of grace to save the shortcut progress.  Heading to Forsaken Depths Now, once the door is open, get back to the wooden bridge and jump on the huge pipes. Keep running on the pipes and head to the point where it ends. Now, jump down through the right side on the lower floor.  Traverse the wooden structure and enter through the opening on the right side. Jump down on the pipes again and enter through the opening. Follow the sewer, skipping the first two exits. Take the third exit which will be on your left.  Jump down turn back, and continue the sewers that take you to the lower side. Climb down the ladder and you will end up in a huge room. There will be an elevator on the right side. This elevator takes you into the depths and exactly to the Forsaken Depths.  Exiting the ladder and heading straight into the door in front takes you to the boss area. Here you can start the fight with Mohg. But before you do that, rest at the site of grace which is just in front of you as you exit the elevator.  Forsaken Depth Mohg Boss Fight Compared to many other bosses in Elden Ring, Mohg is quite more powerful but it is also weak against various types of attacks which makes the fight sort of easier.  Mohg has resistance to fire, so you should avoid these types of attacks. Instead use the following attack types, standard, stack, slash, and pierce. As the fight starts, Mohg will have blood loss around it which can be used as a weakness against it. Equipping Lord of Blood’s Exultation talisman will grant you a boost of 20% attack power. This will only happen when there will be blood loss.  This boss fight is divided into two phases, the first phase ends when Mohg’s health reaches 50%. During the second phase, it will cast a spell called Bloodboon Ritual, healing itself and inflicting a blood loss effect on the player.  This second phase gets a bit tougher but you have to take advantage of its weaknesses and use the corresponding attack types to quickly finish it off.  FAQs  Where is the Elevator to the Forsaken Depths?  The elevator that takes you to the boss area in Forsaken Depths is located in the depths when you head down from the huge sewer pipes located next to the wooden bridge of the Subterranean-Shunning Grounds wooden door.  You will have to follow the sewers and take the routes inside that go towards the lower area, eventually you reach the end of the sewers where you will see a ladder, that takes you to the room with the elevator.  If you liked this guide then you will definitely love our guide on how to store runes & Astrologer class guide!

Abandoned Coffin Site of Grace Elden Ring: Full Guide

abandoned coffin site of grace elden ring

Abandoned Coffin in Elden Ring is located in a place where you will face some major threats. But, this exact spot can be rewarding as well. It is situated near the hilly area of Altus Plateau, a place where a boss also spawns.  Paying a visit to Abanondoend Coffin can be extremely rewarding but you have to look out for things with a little extra attention since there are many hidden items. There is also a site of grace near Abandoned Coffin which makes it easier for you to clear out threats in the area. Let’s dive deeper to find out more! Abandoned Coffin Location  Reaching the Abandoned Coffin is not that difficult, it is just close to the Altus Plateau. I would recommend you get on the Altus Plateateu and move along its right-side edge until you reach a point that leads you toward the lower level.  Now, from that point get on the lower ground and head straight, just keep moving along the right-side wall and enter through a narrow path. You will encounter a wolf on this route. This exact route takes you to the Abandoned Coffin location.  Ancient Dragon Lansseax Boss in Abandoned Coffin As you reach the Abandoned Coffin area through the Altus Plateau, look for the site of grace. Rest at this point and prepare yourself for the boss fight with Ancient Dragon Lansseax. Defeating this dragon will reward you with 60,000 Runes and a special type of Dragon Cult spell called Lansseax’s Glaive.  Now, the most important part is how to defeat this ancient dragon. There are actually two different spots from where you can start the fight. The first one is the Abandoned Coffin Site of Grace and the second one is the Rampartside Path Site of Grace.    Since you are on the Abandoned Coffin Site of Grace, the dragon will appear near the hill from where you came down, the exact spot is close to the wolf on the narrow path.  Once the dragon appears at the Abandoned Coffin Site of Grace, fight with him and do enough damage that his health reaches 80%. The dragon will retreat and it will appear again when you visit the Rampartside Path Site of Grace. Here, you can finally finish him off and collect the items he drops.  This dragon boss uses lightning attacks, he will spawn a huge red lightning in his hand and wave it around covering a huge area in just a single strike. Apart from that, he will use a fire breath attack. Both of these attacks are quite powerful. And the entire fight is absolutely amazing based on its appearance and all.  When it comes to fighting style, It is recommended that you take advantage of the hilly area and choose higher ground. However, the dragon is weak against pierce attacks. So, it’s more like a close-range fight if you want to defeat him with his weakness. For this purpose, you can make use of various weapons like thrusting swords, great spears, and even bows.  Exploring the Rest of the Abandoned Coffin Area Abandoned Coffin has multiple spots that can be explored to collect various rewards. Defeating enemies around the area can help you gather a good amount of runes. Additionally, there are various stacks of items hidden throughout the abandoned hilly area. It’s worth checking out each part of the entire location at least once.  Clearing Out Omens The entire Abandoned Coffin area is filled up with Omens, they are a great source of runes. So, I would definitely recommend you kill each one of them. Traverse the entire area and look for omens wherever you can.  Some of the omens roam on the ground level while some roam on the coffins. Ranged attacks or spells can be used to push them down.  Collecting Important Items & Other Rewards Runes aren’t the only rewards you will get as a reward in Abandoned Coffins, there are many other rewards like Lightning Ram Ash of War, Golden Runes, Dragonbolt Blessing, and Scarced Tear.  All of these items are placed at different spots around the Abandoned Coffin area. Stormcaller Church is a small area located within the Abandoned Coffin, look out for it as there is a chest that contains Dragonbolt Blessing.  Some of the stuff is quite easy to find like Lightning Ram Ash of War, which is found standing in open ground. You can spot it with its glowing light. While some items are hidden, you can still find them with a bit of extra effort.  Golden Runes are quite useful items and you should not miss them at all. They can help you store runes or more specifically they work like rune generators. Using them will grant you a certain amount of runes instantly. The rest of the items are essential too, so pick up as many of these as you can.  Most of the Golden Runes will be in the coffins around the area. Check thoroughly each one of the coffins in the entire area. If you are lucky enough then you might get the best variations of Golden Runes. The ones that yield the highest amount of runes, although it’s pretty random which one you are gonna get.  Apart from the Golden Runes, some other items are also hidden in these coffins. Most of the time it will be a lot easier to identify which coffin has an item because they will be glowing.  FAQs Where is the Abandoned Coffin in Elden Ring? Abandoned Coffin area can be accessed by following the route near the Altus Plateau. It’s actually located at a lower level from the Altus Plateau. So, you have to move on the route that takes you down from the plateau. You need to get to two floors lower from the plateau. Once you are there, just follow the right-side wall when you turn towards the southern direction. You will eventually reach at a point where a narrow path can be seen. This … Read more

Store Runes Elden Ring: Perfect Ways to Save or Bank Them

store runes elden ring

Runes work as the currency of the Elden Ring, you can get it through several ways but there is a high risk of losing them at any point. And unfortunately, we cannot store or bank them directly. But there is a workaround that can help us save our runes.  In this guide, I have covered the possible ways of saving our precious runes. We are not directly storing them, instead, we have a few ways of investing which will help us when we need those runes.  Ways to Save or Store Runes in Elden Ring Losing your hard-earned stacks of runes can be frustrating and that’s why most of us often look for ways to store them or either bank them somewhere. If we die at any point, all the collected runes go in ash.  The most challenging thing is we cannot store them anywhere. It’s just with us until we spend them somewhere like buying different stuff or upgrading things. And yes, you guessed it right we are going to invest them so that they can be saved.  So, here are some ways that I found super useful when it comes to saving the runes.  Store Runes with Sacrificial Twig Now, we all know that we lose our collected runes whenever we die. But, we have an item in the game to tackle this situation. But this costs you some of your runes. So, in order to stop losing your runes upon death, get yourself some Sacrifical Twigs. These are the items that protects your collected runes from losing when you die in a battle. Each of the Sacrificial Twigs costs 3,000 Runes, and they are one-time usable items. So, try to use them when you have collected a huge amount of Runes. You can purchase it from various merchants across the Lands Between. One such merchant is Twin Maiden Husks who can be found at Table of Lost Grace. Rune Items One of the best ways that I found is stacking up rune items, these are the consumables that give you a certain amount of runes when consumed. So, it’s a perfect way of storing runes without having worries of losing them.  Now, there are a variety of consumables for this specific purpose. One such item is the Golden Rune. It has variations, and each one of them gives you a different amount of runes. Such as the best variation can yield 10,000 runes. The lowest amount you can get from a variation is 200 runes.  Now, if you don’t know where to get these consumables then let me tell you, they are obtained primarily through looting. Hundreds of corpses are spread around the Lands Between that have Golden Runes. The best way is to search the spots near the sites of grace such as Rampartsite Path, Gate Town Bridge, and many others. Another option is finding them in glowing skulls, they spawn at random spots around the map.  Other ways include defeating enemies, looting from hot-air balloons, treasure nobles, and chanting winged dames. These are the possible of getting your hands on Golden Runes. In my opinion, you should definitely pick them up and store them in your inventory whenever possible.  Spend Your Runes Another way to save your runes is by spending them on different activities. Since runes work as the main currency in Elden Ring, we can use them to purchase lots of items and even upgrade or alter your character’s stats.  This is a great way to invest your runes early on before they get lost. I would recommend you to spend them on purchasing useful and important items and also upgrade the stats. This is definitely one of the essential parts of your journey. You have to buy new weapons and other items from time to time.  As you move toward new spots and discover new enemies, the threats get stronger and this requires some ultimate weapons and boosted stats. There is no better way of saving your runes than to spend them.  So, what you can do is head straight to the merchants and get yourself loaded with some high-end weapons. These merchants also offer various other items like ammunition, consumables, tools, and various others.  As for the upgrade, you can rest at any site of grace to get access to the leveling menu. Here, we have the option to level up our character and this will boost stats like Attack Power, Defense Power, and various others.  Runes Mod This is a bit different method because it requires you to install mods from external sources. There are several different mods for this purpose. Some can get you unlimited runes whereas others multiply your existing runes by up to a thousand times.  This one is pretty different from the traditional way of getting runes or saving them. And most of the players want to keep the experience fully natural without adding any mods. So, you might find it unuseful. But for those who are okay with mods then this might help you.  FAQs  Is There a Way to Store Your Runes in Elden Ring?  Well, there are actually multiple ways to save your runes but this is actually in a different form. The runes in their original form cannot be stored anywhere, rather you can spend them or invest them in leveling up. Ultimately, that’s the purpose of runes in Elden Ring.  Another great way of saving those runes is by picking up consumables like Golden Runes and other similar items that unleash runes when you use them. These can consumables items can definitely be stored and used whenever the runes are needed.  How Many Runes Can You Store in Elden Ring?  You cannot directly store runes but there is an alternate way of storing them. Rather than keeping the runes in their original form, look for the Golden Runes in the Lands Between. These come in different variations, and each of these variations can be stored up to 999. So, these … Read more

Astrologer Guide Elden Ring – Master Ultimate Astrology Class

astrologer guide elden ring

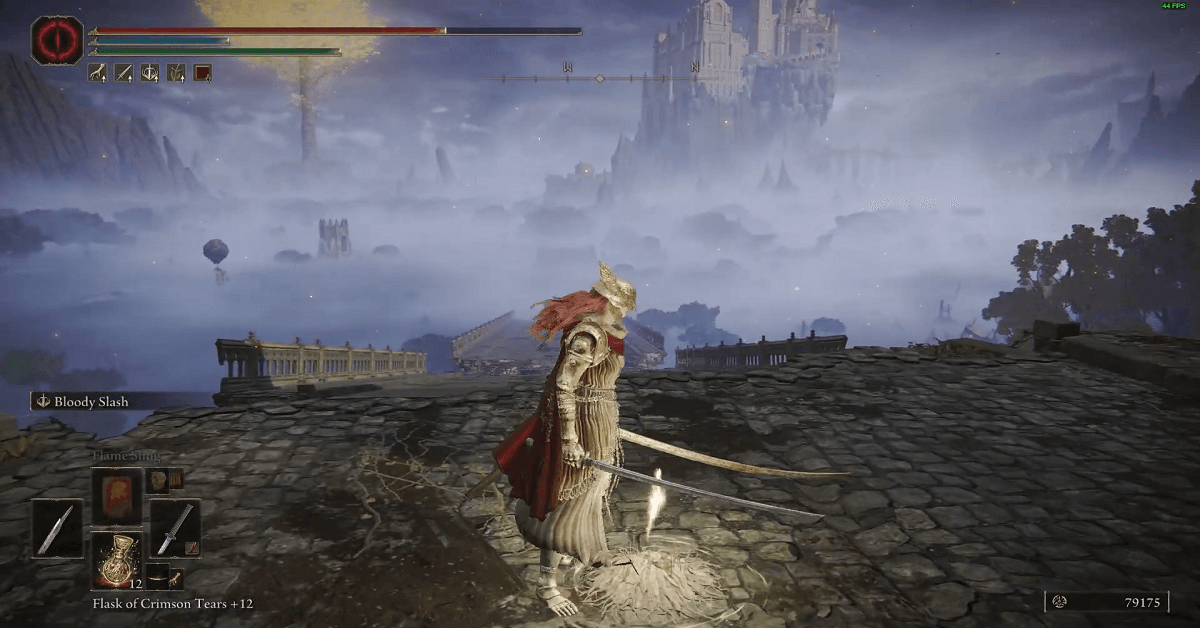
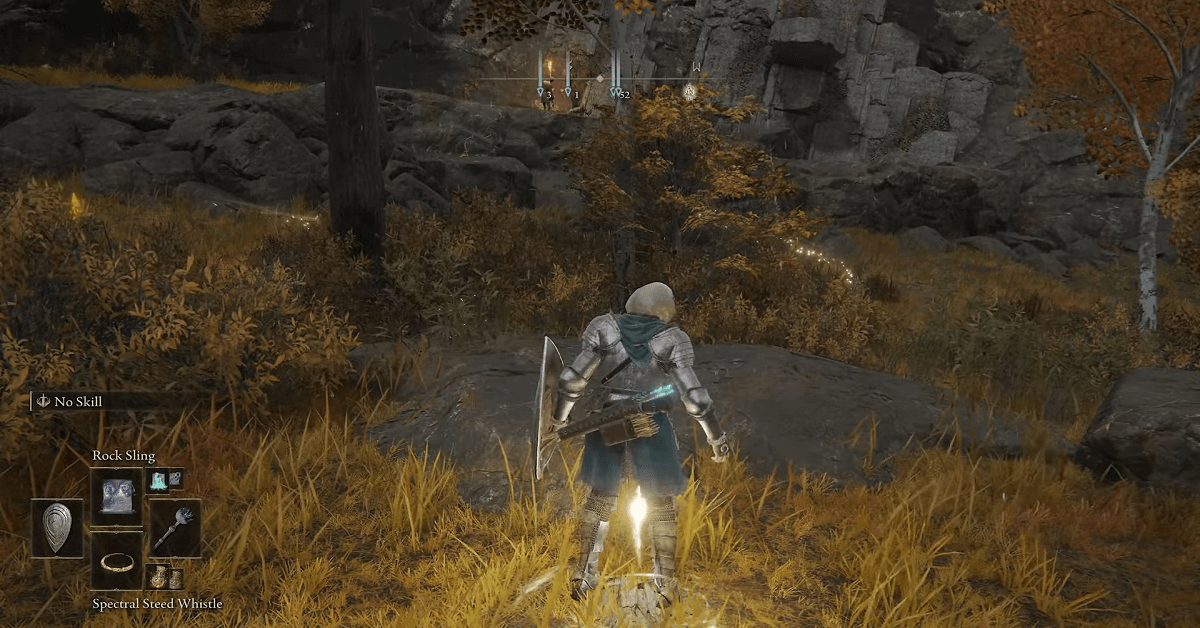
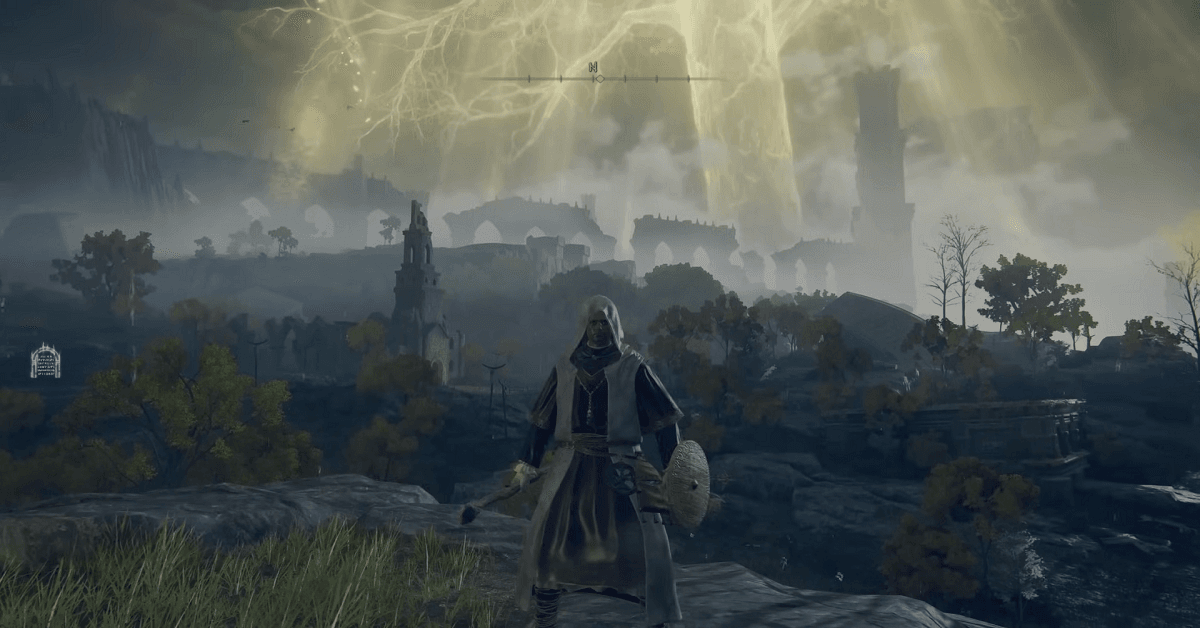
Astrologer in Elden Ring is one of the best classes to start with in my opinion. But, there are some essential points that you should take note of. The way you build this astrology class will define its power.  In this guide, I have shared my experience with this build and how I managed to make the most out of it. You can too follow the same and boost your journey in the best way.  Astrologer Build Elden Ring The early stages of Astrologer in Elden Ring are pretty basic since there is not much choice in weapons and other equipment. But, as you make progress, there is a lot you can do to make it much more powerful.  Starting Weapons, Gears, and Magic To be honest, we don’t have that many things at the beginning. And that’s the only downside this class has. But, this never makes Astrologler build the worst class. There are a ton of customizations and upgrades that you can do later on.  But, for now, let’s see what we have got to kick-start our journey. For the items that you can hold in hands like the weapons and shields, we have initially three of them.  Now, it’s up to you whether you want to go with the staff or sword. Because this is just the beginning, the real deal will begin when you start leveling up and upgrading your items and stats. That would be the time to get your hands on the best one. Just wait because I have also covered the best item when you have grown enough.  As for the spells, you would have two options. You can pick any of them, here are they.  Again, these are just for the start. There is no issue in picking up any of these. Get the one you think that will work for you better. In case you don’t know, let me tell you that both of these sorcery items are designed to primarily target low-end enemies. Moreover, the resource usage is also pretty low so you can use them without worrying about it.  Lastly, we have a set of gears that consists of various items. Each one of the gear items comes with different stats. So, these are quite essential things when you are planning to work on your character’s stats.  Another important thing is their weight, which plays a crucial role in your activity throughout the game. If your character goes up in weight due to the gear items then things can get challenging for you. So, you have to manage your weight wisely. But, as for the start, it’s okay to go unsorted. Here’s what’s waiting for you.  That’s the whole set of outfits that an Astrologer uses.  Building Up Ultimate Astrologer Class  When you have gained enough experience in the game and you are now good to go with overall mechanics. It’s time to work on your character’s class build. Astrologer build mainly revolves around magical spells.  So, it’s essential to focus on ranged spell attacks rather than melee attacks. However, a few melee attacks can come in handy during close fights. So, what we are going to do is focus on a build that works greatly for magical spells while being helpful in close fights as well.  Weapon & Staff The key weapon for an Astrologer is a staff. It is what helps you cast powerful spells on your enemy. So, we have a few different choices here. The thing to notice here is that these will get unlocked as you move up in the story, defeat different bosses, and do other activities.  Here are the ones that will work best with the Astrology class.  Personally, I like to use Meteorite Staff. It’s just a perfect thing that exist in the game, especially for the Astrologer build. Pairing up this staff with one of the best spells in the game which is Rock Sling. This is the ultimate combo that you can get.  Along with this magical staff, you can pick any weapon like the one that you can use for close-range attacks. It can be a sword or a pike, but not the shield as it can put a lot of weight on your character, which is definitely we don’t need at all.  Armor Load & Other Equipment  Armor is another important part of this build. However, you need to keep an eye on the weight that’s been adding up when you put on equipment. It’s really important.  So, for the armor, there is quite a good number of things that you can use. They all will work towards your stats. Go for the light armor set as it would not block your mobility by any means. Being an astrologer you need to move fast and dodge incoming attacks. And that can only be done if your weight is low.  The best one you can pick is the Astrologer’s Robe. That would be enough to provide you with decent protection, plus it won’t affect much on your weight. With this equipment load, you would easily move around in challenging fights.  As for the consumables and crafting items, you can keep some Magic Potions. Also, the items required to craft these potions will come in handy. Always look out for Crystal Buds when exploring areas, these will help you out in crafting potions.  Stats & Fighting Style  Now, it’s time to work on your stats to make the build even better. There are three main stats that should not be missed when building an Astrologer class. These are Intelligence, Dex, and Strength.  First off let’s discuss Dexterity and Strength. You don’t want to max out these stats. Instead, keep the Dex around 15 and Strength around 20. This would be the perfect combination of stat. Now, we are left with Intelligence, this also needs to be at the mid-level.  Lastly, don’t forget to keep an eye on the Vigor and Mind. These are essential for FP and HP, … Read more

Temple of Eiglay Elden Ring Site of Grace – How to Reach? Full Walkthrough

The Temple of Eiglay is an important location in the Elden Ring. This can be found on the ground floor of Volcano Manor. This exact place is an essential part of your entire journey as it connects with a few other quests from this area. Also, there is a site of grace at the temple. Moreover, you can get some great rewards from here as well. In this guide, we have explained step by step the path that leads you directly to the Temple of Eiglay. Also, there is a shortcut that we have covered, you can use it later. But, there is a slight twist, a miniboss Godskin Noble is waiting for you at the entrance of the Temple of Eiglay.  Route to Temple of Eiglay Now, there are a few different ways that takes you to the Temple of Eiglay. But, we are obviously covering the one that is easier and quicker. Along the way there will be various threats, you can choose to get past them or defeat them as they come your way.  Volcano Manor  First off, you have to get to the Volcano Manor. For this purpose you can take help from Rya’s Questline, finishing this quest will lead you to the Volcano Manor, or you can also head directly to the Volcano Manor.  Once you are at the destination, find an NPC named Tanith, speak to her and there will be a bit of conversation. At the end, she will hand over you Drawing Room Keys. It’s up to you if you want to go with her to reach Volcano Manor then take the keys from her.  Upon finishing up the conversation with her, look for the secret area which is just next to Tanith’s room. Follow the path and you will end up in Prison Town Church.  Prison Town Church to Temple of Eiglay  When you are just outside the Prison Town Church, you will have multiple ways leading to the Temple of Eiglay. The first one is just to your right which goes all the way behind the buildings and ends up at the spot where the elevator is located.  But we are using the much easier way. When you are standing outside the Prison Town Church look just in front of you, there are some houses. We are using their rooftops to cut down the entire long route and head directly to the lower level.  Just jump over the houses and keep moving forward, you will encounter some enemies here. Finish them up and move ahead. Keep jumping across the roofs on the left side and you will eventually see a staircase in front of the houses.  That’s where you want to get. Jump off from the roof and take the stairs. Now, take the route to your left and head straight ahead. There will be an entrance into the building, take that and go straight, enter the next room, and take the stairs to the lower level.  Exit the stairs and get through the entrance on the left side. You will end up in a room, now exit this room from the main door which will be in front of you. What you will see outside of the building is lava everywhere.  Be cautious at this point, don’t jump through the ledge. Instead, slide down the ladder which is on your right side. Once you are on the lava floor look for the cage which is on the opposite side of the building you just came down from.  Jump over the lava onto the spot where the elevator is located. Now, keep on moving forward past the elevator. There will be stairs on your right, take the stairs and follow the path, and you will eventually end up on the upper floor.  Here, you will see an elevator. Get on to it and it will take you to the next floor. Now, you are very close to the Temple of Eiglay. Huge stairs can be seen from this point, an enemy would also be there. Finish him off and continue towards the temple from these stairs. Unlocking the Shortcut Now, that you are just at the entrance of the temple, wait a bit before you get in there. We need to unlock a shortcut at first so that it can be easier for next time.  So, instead of heading into the temple take the path just before the left of the entrance. Just a bit ahead there is a huge level on your left. Interact with it to acctivate the bridge that connects the temple to Prison Town Church. That’s it now let’s get back! Entering the Temple of Eiglay Enter the temple from the main entrance, and head straight. The miniboss Godskin Noble will spawn. Defeat the boss and you are good to go.  Upon defeating him you will be free to explore around the temple. Also, don’t forget to pick up the most important item from the table which is Serpent’s Amnion. You can also discover the lost grace from the exact same spot where the miniboss spawns. It will become visible when he is dead.  Defeating Godskin Noble This specific boss is not that hard to kill. You just need to use the ranged and magic attacks. They are your best friend in this fight. Different powerful weapons can be used here. Now, if you want to go for a specific weapon then we have that is called Serpent-Huner. It can deal a massive damage in this fight. If you have it on you then this fight is super easy for you. Otherwise, you can follow this next strategy. Some of his attacks are ranged while the rest are melee. So, it’s a smart things to maintain distance from him all the time. During the fight, he will also spawn a circle of black fire around him. This would be quite challenging for melee attack players. Just wait until the fire goes away and then again start attacking … Read more

Malenia Elden Ring Guide – Location, Weakness & Boss Fight

malenia elden ring guide

Malenia is a boss character in Elden Ring. Unlike the rest of the bosses, she is quite popular among Elden Ring fans due to some notable reasons. She has an interesting backstory plus the rewards you get upon defeating her are worth fighting her. In this “Malenia Elden Ring” guide you will learn how to beat Malenia, where you can find her, and most importantly her weaknesses. So, without any further due let’s dive in. Malenia Elden Ring – Important Details You Need to Know Bosses in Elden Ring come with different difficulty levels which are actually based on the stats. Malenia Blade of Miquella is one of them though she is quite different from the rest of them. She is relatively much more popular in the game than any other character. We have gathered some important details on her so there won’t be any issues for you when it’s time to take her down. Malenia Blade of Miquella Location The most important thing to know is her location, Malenia is located in Elphael, Brace of the Haligtree. Now, this is a completely optional area which means it depends on your choice whether you want to head there or not. Once you have made the decision, there is only one way to reach Elphael and that is by going through Miquella’s Haligtree. This place can be a little time-consuming as there is a lot to do. Moreover, this place has quite a lot of useful stuff hidden at different points. Collecting them will require defeating the enemy’s in the area. So, if you are really planning to check out the stuff then be prepared for fights. Malenia Boss Fight This boss fight is not your average boss fight. Malenia’s boss fight has 2 phases and in each phase, she will make use of different attacks. These are just extremely powerful, you must be fully prepared and loaded with upgraded weapons and armor. The most irritating part of this entire battle is when she regains her lost health after a successful attack. This even happens when you block the attacks. Here are a bit more details on both phases. Phase 1 During phase 1, Malenia will mainly use the melee attacks with her sword. These attacks will not only deal damage but they will have the ability to make her regain HP. This is the only challenging part of this fight. Phase 2 As soon as you have done enough damage that makes her lose all the HP, a cut scene will be played. This indicates the beginning of phase 2. This time she will be much stronger with more powerful new attacks. You can see her wings now which shows that she has evolved and that’s a sign of Malenia becoming a stronger version. While she has some new attacks in this phase, Malenia will also be healing herself during the battle. List of Attacks Phase 2 is the real challenging part where she gains new attacks and becomes much stronger. During this phase, she will have an additional 4 new attacks in her moveset. Malenia’s Weakness & How to Defeat Her Malenia’s weaknesses are Bleed and Frostbite attacks. When starting the battle, make sure that you have built according to these attack types. This will make a huge difference. As we know the Malenia Elden Ring boss fight is based on 2 phases. In both phases, you can either go with the melee strategy or with the ranged strategy. Both of the strategies will work great only if you can dodge her attacks and avoid losing her health. In phase 1, try to dodge her attacks by rolling on sides. She has quick attacks that can take you down in just a few seconds, so you must be prepared all the time and stay focused on her moves. Another possible way is to counter her attacks, this can be done at the exact right moment. What you need to do is perform the attacks exactly when her attacking animation triggers. This will cancel Malenia’s attacks. In phase 2, she will start off with 80% of her max health. Just don’t forget to use the weakness attacks, they can make Malenia lose a huge part of HP on each hit. Rewards Defeating Malenia in Elden Ring will reward you with 3 items in total. These 3 rewards are worth defeating Malenia. Here are the rewards. Runes are used as the currency in the Elden Ring, and they are used to make various trades and purchases of various items. FAQs Is Malenia the Hardest Boss in Elden Ring? Malenia can be said to be one of the hardest and most challenging bosses in Elden Ring. When it comes to her power, she is an ultimate character full of abilities that any hard boss can have. Most importantly, Malenia’s boss fight has 2 phases which makes it even much harder. Plus the attacking list and her HP regaining ability are enough to make her the hardest boss in Elden Ring. Is Malenia Elden Ring a Girl? Malenia Blade of Miquella is a female character in Elden Ring. She has a family of three including her father, mother, and twin brother. She also has half-brothers and half-sisters. Malenia’s mother is Queen Marika the Eternal, her father is Radagon, and her older twin brother is Miquella. That’s a wrap for our “Malenia Elden Ring” guide. Hopefully, this has answered all of your relevant queries. Stay connected for more exciting guides and updates on the latest games.

Elden Ring Mods – List of 10 Best

elden ring mods guide

There is so much to do in Elden Ring with mods. Elden Ring modding allows you to go beyond the limits when you are in battle or simply just roaming around. Until now the modding community has released many Elden Ring Mods. With this feature, you can pretty much tweak up every single in-game function. Modding no doubt seems fun, but some players believe that it destroys the real gaming experience. For those who are interested in Elden Ring modding, let’s dive in and see the best Elden Ring Mods. The Best Elden Ring Mods The best Elden Ring mods give us full control over the game mechanics. Such as we can alter the difficulty levels, add up new spells and weapons, designing different areas of the map, altering multi-player options, more merchants, and other stuff. If you are really into the Elden Ring modding then here are the 10 Best Elden Ring mods for you. 10. Easy Mode For some players Elden Ring difficulty is said to be much harder, they prefer a little lower difficulty so that they can enjoy roaming around without being interrupted by a large number of threats. That’s where Easy Mode Mod steps in. With this mod enabled, players can make the game easier. This mod has 3 versions, Damage Edit Version, Damage Tweak Version, and Personal Edit Version. Each version has different tweaks that mainly work on lowering the difficulty level by altering various stats. 9. Prepare to Die Prepare to Die is a mod for those Elden Ring players who have been into the game for quite a long now and are looking to take the difficulty to the next level. This is actually a mod that increases the overall difficulty of the game. Prepare to Die is a hard-mode mod. Some of us like to enjoy ourselves freely while others want to test their fighting skills. For those who are up for pushing their limits, this mod will definitely get the job done. This mod not only boosts your enemy’s health and damage but it also takes all the other stats to a higher level. Now, you can taste the real difficulty level of Elden Ring. 8. Grand Merchant Now, you can spawn a merchant in Elden Ring with the Grand Merchant mod. This mod makes life a lot easier. You can equip many powerful weapons and craft tons of items right from the beginning. There is a whole dedicated crafting menu introduced in this mod where you can craft all sorts of items. Be sure to only use the mod when offline, otherwise you may get banned. 7. Elden Ring Reforged Have you ever felt bored with the Elden Ring mechanics or combats in any manner? Well, the Elden Ring Reforged mod is here. What it will do is recreate the gaming mechanics by working on most parts such as the bosses, animations, hitboxes, camera, enemies, and more. It won’t change the difficulty instead it brings out a new version of the game mechanics in a much more balanced state. Definitely worth checking out if you are looking for something new in Elden Ring. 6. Seamless Co-Op We all know about the toughest bosses of Elden Ring and most of the challenging situations. However, the game allows us to use its multiplayer system and call in allies for help. But the downside is that these allies are sent back to their world once a boss is defeated. But with Seamless Co-Op mod, you can call a number of players to your world for as long as you want. You can explore the world of Elden Ring together while this mod is active. If you are too looking for a new experience with other players then you should definitely try out this mod. 5. Item and Enemy Randomizer Item and Enemy Randomizer mod is perfect for those who have finished up the game but still, want to restart their journey. What this mod will do is change the default locations of all the items and bosses on the map. So, every time you start your journey with this mod activated, there will be a completely new beginning. Things won’t be the same anymore and you will have to add a little more effort plus it will get much more interesting. 4. Magic Overhaul We all have seen the Magical Spells in The Hogwarts Legacy, just like that we have those magical attacks in Elden Ring. Considering magic, Elden Ring is quite incomplete without it. Everyone loves the magical attacks and most importantly the animations and visuals we see while the attacks are being activated. Magic Overhaul is a mod that focuses on the illusions and visuals that are generated during the magical attacks. In the vanilla game, we see these magics quite in the standard form. However, when this mod gets activated things will become impressive. You will notice the visuals have become much more interesting. This mod is just simply amazing. Highly recommended for magic lovers. 3. Ranged Weapons Rework The best mod out there for ranged weapons. In the vanilla game, there is not much you can do with the ranged weapons, that’s only when you don’t have the Ranged Weapons Rework mod. Once you activate the mod, things will be dramatically changed. Ranged weapons will now have a new life. A balanced combination of attacking stats and scaling will be available for them. This means your ranged weapons are now much better. Go check it out to see new changes. 2. Unlock the Framerate This one mod is for frame rate changes. If you find the default settings of the game laggy or with low frame rates then you definitely need to Unlock the Framerate. It unlocks the limit of the frame rate that is set by default in the game. While the mod is active, its default limit will be 300 FPS. This can be customized based on your needs. Lock the frame rate and enjoy even better performance. 1. The Convergence The Convergence is the … Read more