GamersPlan

BG3 Zhentarim Shipping Crate – How to Get & Use It

bg3 zhentarim shipping crate

Baldur’s Gate 3 has tons of usable items; some are hard to find, while others don’t require much effort, though all of them have great uses. One such item is the Zehntarim Shipping Crate in BG3. There are many other useful items as well, such as Thieves’ Tools & Spoon of Saltiness. Zhentarim Shipping Crate is a great item to get if you want some additional stuff, such as potions and grenades, and you can get the parasites from it, too. But, using it requires some skills; otherwise, you will end up wasting its effects and the corresponding items.  In this guide, I have discussed the location of the Zhentarim Shipping Crate and how to use it correctly. Let’s jump in.  Where to Find the Zhentarim Shipping Crate in BG3 The Zhentarim Shipping Crate is found in the Moonrise Tower area. But, there are some more crates and cargo stuff around the Zhentarim Shipping Crate, so you have to look out for the right crate.  First off, get to the exact spot where the shipping crates are located. So, it’s actually on the dock side of Moonrise Towers. The docks are to the east of Moonrise Tower. The exact coordinates are X-Axis: -68 and Y-Axis: -185.  Once you are there, find the crates marked with the Zhentarim symbol. That’s the Zhentarim Shipping Crates.  How to Use Zhentarim Shipping Crates In BG3, the Zhentarim Shipping Crate is a one-time usable item. You can either destroy it with your attacks or throw it towards an enemy.  The first thing you gotta do as soon as you find the crate is get those 2 Mindflayer Tadpoles. These will be received automatically once you pick the crate. Afterwards, you can choose to use it by destroying or tossing it towards an enemy.  Throwing it towards an enemy will make it explode, and the area around it will be covered with Caustic Brine. This will deal 1d4 Acid Damage. It is a great item to use when there are multiple targets in front of you.  Simply, just throw it towards them and it will explode, creating a surface of Caustic Brine which will damage on its own.  Also, the barrel contains 3 random grenades. You can get these grenades too and use them to deal damage. But grabbing these grenades from the barrel is a bit tricky as they get destroyed with the barrel. So, you have to use some extra techniques to get them safely.  Moreover, these Zhentarim Shipping Crates are excellent for heavy battles where the enemies are surrounding you. With just a single use of this crate, you can easily target multiple enemies.  FAQs Can You Take the Tadpoles from Zhentarim Crates?  Yes, you can get the tadpoles from Zhentarim Shipping Crates in BG3. As soon as you pick up the crate, 2 or 3 Mind Flayer Parasite Specimens will be granted.  And if you destroy the crate, it will leave 3 dead Mind Flayer Tadpoles. So, it’s better if you pick up the crate first to get the tadpoles, and then you can destroy it.

Solve Data Altar of Sacred Analysis (First Galvanic Hymn)- Warhammer 40K: Rogue Trader

data altar of sacred analysis

Exploring in Warhammer 40K: Rogue Trader leads you to puzzles, and solving them gives you valuable stuff. Data Altar of Sacred Analysis is one such puzzle.  In the Mechanicus Temple, you will stumble upon Electrodynamic Cenobium, where you will need to solve the riddle to open a chest that gives you some useful stuff for your journey.  Here, you will be asked to perform the correct prayer so that the riddle gets solved and you get the rewards. What you actually have to do is recite the right First Galvanic Hymn for the solution. If your guesses have been wrong all this time, then hang on, follow the steps below to get it solved quickly.  Solve Data Altar of Sacred Analysis (First Galvanic Hymn) With Right Prayer If you want to solve Data Altar of Sacred Analysis, all you need to do is choose the right options from the choices given in the puzzle.  If you have got the clues already, then it’s not a big deal to pick the right ones. But if you haven’t, then guessing might not work because it will take a lot of time, and you might still not be successful in guessing the right prayer.  And if you really wanna get the clues and do it on your own, then I would suggest you look for the first clue on the west side of the cenobium, there will be some boxes stacked up that will require athletics to bypass. There is a panel behind the boxes that gives you a hint.  The rest of the hints are hard to get, especially for beginners, because they require knowledge of the Warhammer 40,000 universe. So, that’s for the clues. Now, here’s the correct sequence of the prayer for those of you who don’t wanna find the clues.  As soon as you pick these options, your prayer will be accepted, and the chest will open, which gives you the rewards.  Rewards from the Chest at Data Altar of Sacred Analysis The rewards from this chest are pretty neat, I mean, you will get some great items that will help you along the way. Here’s what you will be getting:  Arc-Rife and Pinpointing Visor are two exceptional items that go in your inventory, while the rest of the items go into cargo. The Arc Rifle is a perfect weapon if you want to target multiple enemies at once. Whereas the Pinpoint Visor gives you an advantage when targeting enemies with wounds less than 50%, you will have an additional 15% critical hit rate.  So, that’s how you open the equipment chest by using the correct prayer at the Data Altar of Sacred Analysis. It’s not that important to solve this riddle if you have already got the items in this chest. However, if you don’t have these items on you, then you should definitely grab them.

Palia Proof of Magic Quest – Full Walkthrough & Evidence Locations

palia proof of magic quest

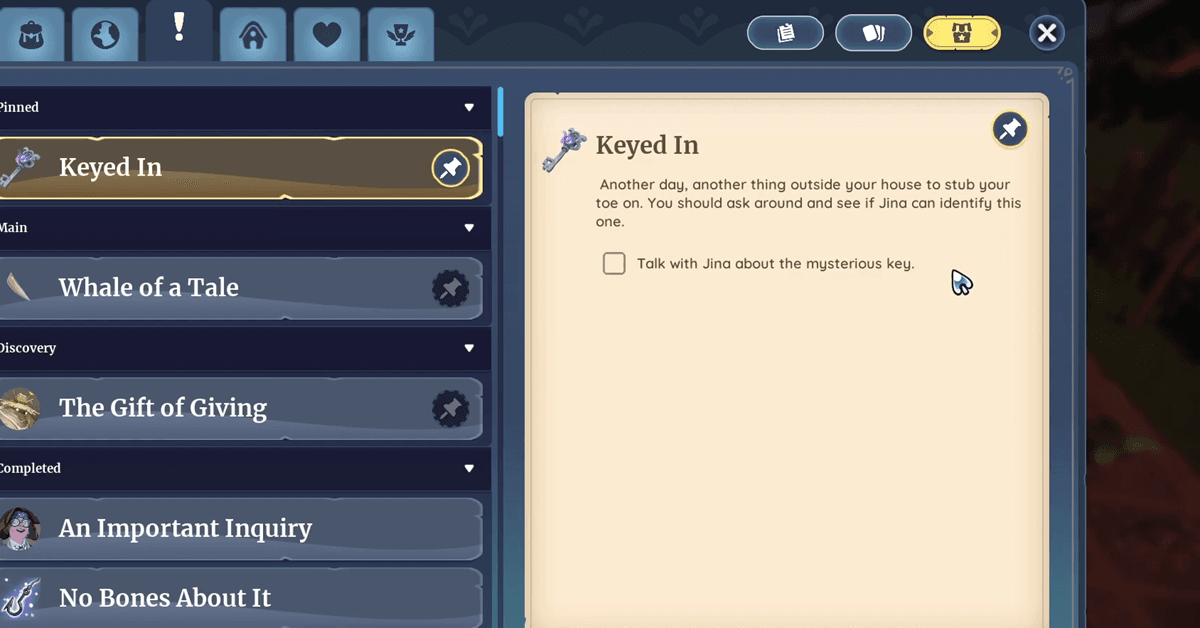
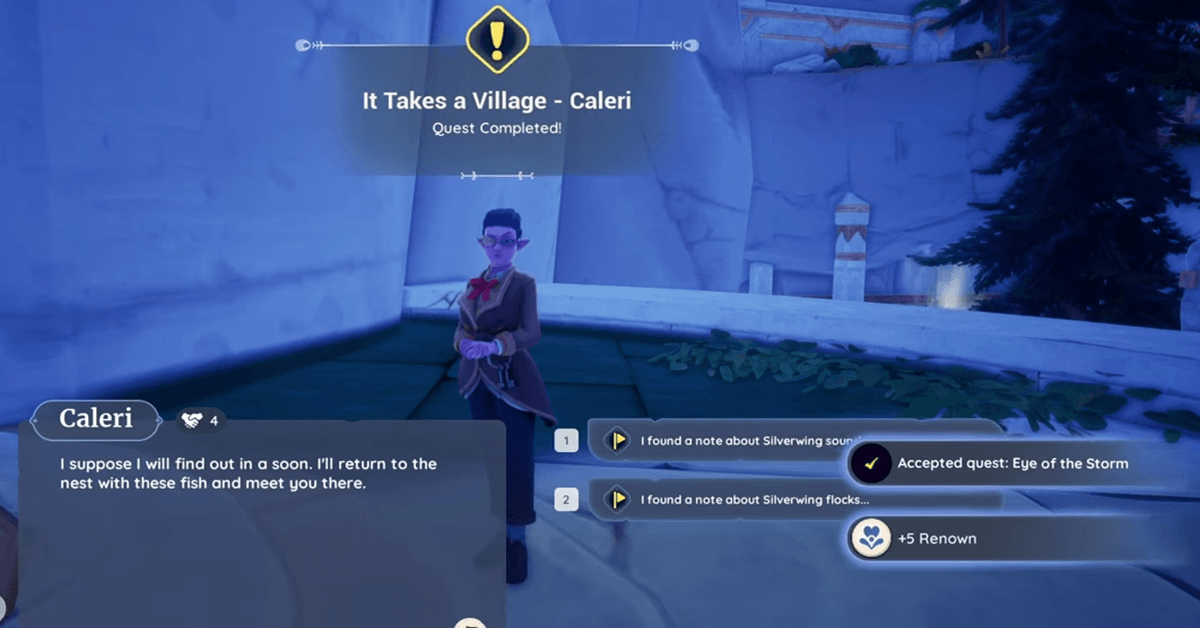
Proof of Magic is a sidequest in Palia, which Caleri and Elouisa assign at the beginning of the Silver-Winging It Quest.  You have to find out the 8 pieces of evidence in this quest, 4 for Caleri and 4 for Elouisa. It can be a bit challenging to find all of them since they are scattered around at different spots on the floating islands.   It was hard for me, too, at first, but with some effort and exploration on each island, I finally found all of them. And now I’m sharing the exact spots for this evidence.  Palia Proof of Magic – All Evidence Locations During the Proof of Magic quest in Palia, you will have a lot of spots to explore and uncover hidden areas. You will need to stay attentive while exploring those floating islands and gliding through the gusts of wind.  The evidence is hidden in different spots on floating islands like Bug Island, Fish Island, and Main Island.  Let’s begin with Caleri’s Evidence locations:  Silverwing Study 399 Evidence Location This is found on the Bug Island. You will have to find the orange tree and stump, which will be on the lower side of the flowstone portal. Once you spot the Orange Tree, look for it on the edge of a huge stone.  Silverwing Study 411 Evidence Location This is found on the main island’s backside of the flowgate. Look for a tree stump here. Once you have spotted it, go and grab this evidence from the inside of the stump.  Silverwing Study 425 Evidence Location  This evidence is on the Bug Island. For this, you will need to go to the upper section. Look for the ladders on the left side and climb them. Once you are up, on your right, find the rubble at the corner and look for the evidence right on the stones.  Silverwing Study 450 Evidence Location  This one will be on the main island. Look for that huge building and head towards it. Just climb up the staircase and close to its main door, there will be the evidence on the left side, right on the stairs.  Now, let’s jump to Elouisa’s Evidence locations:  Silverwing Study 125 Evidence Location  This evidence is on Fish Island. Once you are on the island, just head towards the ruins area by crossing the gap. Here, you will find the evidence on some of the rubble.  Silverwing Study 380 Evidence Location  This one is also on the same Fish Island. It is found close to the highest fish pond on Fish Island. You will need to climb up and head to the Cloudminnow Pond on top. Once there, search for it close to the big fish symbol. The evidence will be on the bench.  Silverwing Study 487 Evidence Location This evidence is found on the Bug Island. Climb up and reach the windmill, you will see gusts of wind around a tower, use these gusts to reach the higher level. Drop at the top level, where you will see some symbols. Now, get to the edge of this tower, and you will see the evidence.  Silverwing Study 500 Evidence Location  This evidence is found on the final island. You can see the rotating objects from the nest area, all you need to do is use the gusts of wind and boost yourself towards it.  While in the air, keep your direction towards the lower level of that island and on the left side. Upon reaching at this point, you will find the evidence on the huge stone.  So, these are the locations for evidence in Palia Proof of Magic Quest. Since this is a sidequest from the main quest Silver-Winging It, you will need to speak to Caleri and Elouisa at the end to finish the quest. Also, check out our guide on Palia Hunger Pains Quest.

Palia Silver-Winging It & Special Donations Quest Full Guide – Temple of Gales

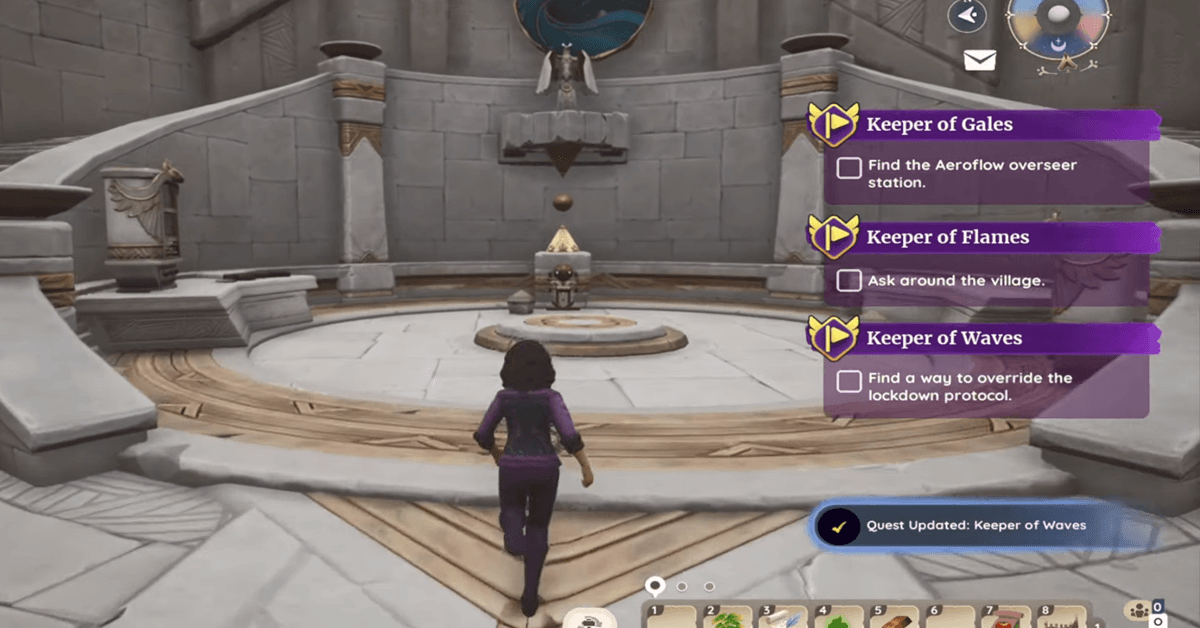
Silver-Winging It is quite a long quest in Palia, consisting of several steps that must be completed in the right sequence. This actually involves a full walkthrough of the Temple of Gales, which then finishes the quest at the end.  It’s obvious for most of the players to find it challenging while attempting to complete the quest. But don’t worry, I have covered the entire quest step by step. You can follow these steps to finish the Silver-Winging It quest in Palia.  How to Solve the Palia Silver-Winging It & Special Donations Quest  This entire quest, Temple of the Gale and Silver-Winging It is based on multiple side quests that must be cleared to progress in Silver-Winging It and finally finishing it as well.  Silver-Winging It is a main quest that will be assigned by Zeki once you have completed the quest Look to the Sky. It’s not like the rest of the quests, such as Found Item Quest Hunger Pains.  This is a long quest that requires effort to finish.  Entering the Temple & Starting the Quest To enter the Temple of Gales, you need to travel to Bahari Bay and head South of Windy Ruins. Here you can enter the temple.  At the temple, you will meet Caleri, Elouisa, and Zeki. They have quests for you. Speaking to Zeki will initiate the quest Special Donations, and interacting with Caleri or Elousia will begin the quest Proof of Magic.  Now, step through the platform and fix the Flowstone Gate as per the request of Zeki. Once it gets activated, interact to travel through it. Now, you will have an egg door puzzle in front of you. This needs to be solved to open the gate.  Solving the Egg Puzzle Door in Palia Right in front of you, there will be three pillars, each one has an egg it. Also, there are specific symbols on each pillar. All you need to do is place each egg on its corresponding symbol to solve the puzzle.  Now, if you have been unable to guess the right positions, then follow this. Starting from the left, place red, blue, and green eggs in a sequence. This will solve the puzzle, and the gate will open.  Head through the door and follow the passage to reach the floating island.  The Four Floating Islands Now, once you use your glider and reach the floating island, you will see that the mysterious island is divided into four floating islands.  You can explore each island to finish off the side quests, Proof of Magic, and Special Donations.  For the Special Donations quest, you need to find the required items to complete the quest, and similarly, for the Proof of Magic, you will need to collect Silverwing Study 125 and Silverwing Study 399. Four tablets for Caleri and four tablets for Elouisa must be collected. Starting off from the Main Island, collect the required items for Special Donations and for the Proof of Magic as well. The Temple Island, Fish Island, and Bug Island also need to be explored to get all of the items for both quests.  Pro Tip: When you are moving across the floating islands, you will notice the gusts of wind. These are your best friends when you want to quickly move from one spot to another. Use them efficiently to reach the next spot with your glider. Main Island Temple Island is blocked for now, so start off from the main island and explore it. Find the first item, Ancient Wine Barrel. You can find it at the top of the island within the building at one of its corners.  Now, from the same room, look out on the ground and you will see an item on the ground. It is Ancient Symbols Plaques, the second item for Zeki’s quest.  While on the main island, you will notice a huge curved arch and next to it, a small floating island. Get on that island and grab the third treasure item for Zeki, the Golden Egg. On this main island, there are three Silverwing Eggs scattered around. While exploring the island, look for them and grab all of them. Now, it’s time to head to Fish Island.  Fish Island Now, on Fish Island, you can find the rest of the Silverwing Eggs and Silverwing Study 125, which is the evidence for Elouisa and a requirement of the side quest Proof of Magic.  Additionally, you have to collect the fourth item for Zeki’s quest from this island. To get the Ancient Miniature Airship, move towards the southwest area from the flowgate. Keep following the path and reach the climbing ramp.  Now, look for the rocks on your right side and climb them. Finally, get around the tower and look for the Ancient Miniature Airship on the ledge.  On this island, you will have six Silverwing Eggs to collect. Make sure to explore the entire island until you find all six of them. Next up is Bug Island.  Bug Island Once you are on the Bug Island, just explore the island and grab the last Silverwing Egg, and you can head back to the main island. But before you go back, you can choose to finish another side quest, which will be given by Elouisa.  However, it’s not necessary to attempt this side quest. So, you may directly head to the main island in order to unlock Temple Island.  Temple Island Once you have travelled back from the flowstone gate of the bug island, rejoin your squad and place the Silverwing Eggs in the nest. Doing so will spawn a gust of wind, and you can use it to reach the final island.  Now, it’s time to grab the remaining treasure items for Zeki. Golden Ancient Fish can be found inside the tower here. Head towards the last doorway, which is close to the exit flowgate. From here, head towards the southeast and climb the rocks leading to the tower on the rise.  Get in the … Read more

Palia Hunger Pains – How to Solve the Quest? Full Guide

palia hunger pains

Hunger Pains is a Found Item Quest in Palia. It’s a bit challenging to begin the quest since there is no specific clue that points out the initiating spot.  You need to solve this thing on your own after Auni mentions the stolen blueberries from a cave. If you are stuck at this point, then don’t worry, as I was too, finding it hard to begin the quest.  In this guide, I have covered all the steps to solve the Hunger Pains Quest in Palia.  How to Solve Hunger Pains Quest in Palia Palia has so many interesting quests, some of them are main quests, such as Silver-Winging It, some are side quests, such as Proof of Magic, while others are item found quests like this Hunger Pains. This is quite a mysterious and fun quest in Palia, you have to find out who is actually stealing the blueberries and what does it wants from you to complete the quest. But first, you need to kick-start the Palia Hunger Pains Quest. For this purpose, blueberries need to be dropped at a specific spot. The quest technically takes place when Auni meets you and mentions that blueberries are mysteriously disappearing from a cave, and he really doesn’t know who is behind it. So, to catch the thief and to find out who it is you are gonna put the blueberries just outside the door of Night Sky Temple. Get to that area and you will see a specific spot, interact with it, and drop the blueberry from your inventory. Now, all you need to do is wait for the letter from the mysterious creature. Once you have dropped the blueberry, the letter will arrive in your mail. Here’s what that letter reads: “Dear (Player), Hello, friend. Thank you for bringing me tasties to fill the hole inside my belly. I sad because the more I eats, the bigger my tummy hole gets. Lately, I been smelling tasties from the barn where the woolies and cluck clucks live. It smells like sweet and warm. Can you bring it to me? Maybe that will make my tummy hole small again. Mystery Blueberry Lover” Now, is the real part of this quest, you will be assigned a task. Find out which item has a tasty, sweet, and warm smell in the barn. You may explore the barn to complete this task, but it won’t help since there is no right item. So, let me just make it easier for you. Head directly to Delalia and speak to her, she will reveal that it is a freshly baked Blueberry Pie that she left out for her husband. At this point, the quest journal will be updated, and your next task is to bake the blueberry pie and drop it at the same spot where the blueberry was dropped. Baking Blueberry Pie To bake blueberry pie, you need to have obtained its recipe, have all of its ingredients, and the crafters as well. First off, get the recipe from the Cooking Guild Store if you have reached Cooking Level 6. This would cost you 1,500 Gold. After that, collect the following ingredients: And the required crafters: When you have all of this stuff, just follow the recipe in the game and obtain the baked blueberry pie from the oven. As you get the baked blueberry pie, head to the main door of Night Sky Temple and place the pie at the same spot where you placed the blueberry earlier. Now, it’s time to wait for the next letter from the mysterious blueberry lover. Once you get the letter, it will read: “Dear (Player), Thank you for the tasty, friend. It was the tastiest tasty I ever put in my tummy. Unfortunately, my tummy hole got big again…so please bring me no more tasties for now. I hope you like the gift I made you…there aren’t many tasties to find here, but I tried really hard. Mystery Blueberry Lover” There you have the Palia Hunger Pains quest solved. As a reward, you will get 10 Renown and a Mud Pie in your mail. There is a known bug with the spot where you left the blueberry pie. Even after finishing the task, the spot will reappear when you visit the place, but placing the pie again won’t reward you with anything.

Open for Business Elden Ring – Find Location & NPC Behind It

open for business elden ring

In Elden Ring, we often stumble upon mysterious spots where we land on different signs. One such sign is Open for Business. It seems like someone is trying to do trade or stuff like that.  If you have also found out this sign, then you are not alone. Many players, including myself, have seen this sign, and it’s actually left by an NPC merchant who has a shop nearby.  Many players think that this has been left by another player, but that’s not the case. There is a merchant shop in Limgrave, Mistwood Ruins. In this guide, I have fully covered everything regarding this “Open for Business” message and the location of the NPC related to it.  “Open for Business” Elden Ring: Who Is Behind the Message? While traversing the lands in the Mistwood area, you might have seen a message “Open for Business” and felt strange, as there is nobody close to it.  So, this is actually a sign left by a Nomadic Merchant located in the Mistwood area. Elden Ring has plenty of Nomadic Merchants located at around different areas, selling lots of useful items like crafting materials, weaponry, and other stuff.  This is one of those Nomadic Merchants whom you can find in the Limgrave.  Nomadic Merchant Location in Limgrave, Mistwood Ruins The Nomadic Merchant of East Limgrave can be found on the eastern outskirts of the Mistwood area. Regardless of the message location, you need to explore the eastern side.  The message will actually appear on the road between Mistwood Ruins and Fort Haight. From here, you need towards the north-east side from this message.  While exploring this side, keep an eye on the campfire. He will be sitting right next to it. Once found, you can interact with him to purchase items, or you can even fight with him. If you kill him, he will drop the Nomadic Merchant’s Bell Bearing. Interacting With Nomadic Merchant East Limgrave Upon interacting with him, he will welcome you to his shop and also mention that the message was left by him. He would ask you to buy stuff from him with Runes, as he has been hungry for quite a long time.  And if you attack him and try to kill, he will use the words like “Bollocks! What the devil’s wrong with you?”. And if you kill him, he will say, “You dirty little thief… Melt away with the rest of it.” Now, it’s better not to kill him because there is no point in doing so. He is selling some useful stuff that you might need. Here’s what he has to offer you: some crafting material like Beast Liver, Lump of Flesh, Trina’s Lily, a Hand Axe, which is a weapon, some arrows and bolts like St. Trina’s Arrow, and some durable shields.  FAQs Where is the Mistwood Merchant in Elden Ring?  The Nomadic Merchant in Mistwood can be found between the Mistwood Ruins road and Fort Haight.  You will have to look for the campfire in this area. He is sitting next to it, waiting for the players to find him and purchase stuff. Although he is harmless at all points but you can still fight with him and even get him killed. But there is no point in doing that since he is simply selling stuff and helping players. You can purchase plenty of different items from him at different prices. Just make sure you have enough currency with you.  So, there you have the guide Open for Business Elden Ring message in the Limgrave Mistwood. It’s a merchant who has left a message for players so that they can find him. 

Where to Buy Thieves’ Tools & Lock Picks in BG3 Act 1, 2 & 3

where to buy thieves' tools in bg3 act 3

If you have been playing Baldur’s Gate 3 for a long time, you know that there are chests and locked doors that require lock picks, also called thieves’ tools, to open.  Now, in each act, you can buy them from different vendors. There will be times when you will get them in loot, only if you are lucky enough. Otherwise, you will need to find the vendors from whom these thieves’ tools, more specifically the lock picks, can be purchased.  Where to Buy Thieves’ Tools in Baldur’s Gate 3 (BG3)? Thieves’ Tools are a convenient item to unlock chests and locked doors. This is like many of the other items in BG3, such as Antique Key, Spoon of Saltiness, Zhentarim Shipping Crate, and others. However, thieves’ tools has quite a lot of uses in the entire game. Buying is a convenient option when you want to get some useful items for your journey in BG3. Like when you have run out of lock picks and cannot open any more locks, you can purchase them from vendors.  Merchants are your best friends when it comes to getting thieves’ tools. I was also using lock picks every now and then, and at a point, there were none left.  So, I had to find merchants in each act who were selling these lock picks. Here are those merchants’ locations for each act.  Where to Buy Thieves’ Tools (Lock Picks) in Act 1 During Act 1, you can loot the thieves’ tools on the Risen Road. It will be hidden inside the wooden barrel.  Once you wake up on the beach, move on through the ship crash site and head towards the Overgrown Ruins teleport point. You will see some wooden boxes by the seashore. Check out these boxes, you will find the lock pick in one of these.  Another spot is on the opposite side of the crashed ship. Here, look for a wagon that has a locked box on it. Get the thieves’ tools from this locked box, and you are good to go.  Now, when you proceed in the game and use these obtained lock picks, you will need to purchase more from the merchants. Here are the vendors you can find in Act 1.  Here is a tip: get as many lock picks as you can during Act 1 because as you proceed towards Act 2 and then Act 3, there will be very few spots where you can buy these.  Where to Buy Thieves’ Tools in Act 2 Act 2 has not many merchants who offer Thieves’ Tools. There is just one who sells it, and he is Roah Moonglow. He is a young merchant, you will meet him during Act 1 as well.  This time, you will be required to head into the Moonrise Towers, where you can find him and purchase Thieves’ Tools. He will offer you 3x Thieves’ Tools.  Where to Buy Thieves’ Tools in Act 3 Luckily, in Act 3, we have two different spots where you will meet merchants. They will sell you Thieves’ Tools along with multiple other items.  So, these are the locations from which you can buy Thieves’ Tools (Lock Picks) in Baldur’s Gate 3. If you are currently in Act 1, stack up as many lock picks as you can to use them in Act 2 and Act 3.  These tools will help you a lot in progressing through various quests and even in getting useful items. Some chests contains valuable loot and they can only be unlocked if you have Thieves’ Tools with you. So, you need to have these with you all the time. FAQs What Are Thieves’ Tools For in Baldur’s Gate 3? Thieves’ Tools are especially for unlocking locked doors and chests. These are also called the lockpicks. Like many other items, thieves’ tools are quite useful and are not just decorative items. The only downside to these is that they are one-time use; once you have unlocked a chest or a door, it will be discarded. So, you will always need to make sure that you have got enough of it in your inventory. The best thing you can do is grab as many as you can when looting, or you can also visit the merchants and purchase from them. But only the specific merchants have thieves’ tools for sale.

The Sims 4 Furniture CC Collection – Absolute Best For Your Sims Home

sims 4 furniture cc

It’s true that furniture brings new life to your home, and it’s no different in Sims 4. This article has tons of furniture packs that fit best in every other home style.  No matter which style your Sims home is built with, here you will definitely find at least one that suits your home. All of these furniture packs below include various furniture items, you can choose to pick any of the items that you want.  So, let’s jump in and explore the best furniture items! Cozy Nook by Yaya-Sims The Cozy Nook furniture pack is from Yaya-Sims and includes 12 items. You can choose from multiple swatches and see which looks most pleasing with your home style.  This furniture set is all about the cozy vibes, setting it up in a corner of your home will set up a space for a chill time where you can spend time reading or doing something cool.  The pack contains a rocking chair, sideboard, fireplace, bookshelf, and other deco items. Check it out and try placing it in your home to see what it’s all about.  Cozy Set by Hydra This furniture set is from Hydra, the pack contains 15 items. But the main furniture in this pack is the cozy bed. The other items are much like non-furniture ones.  All in all, each item of this set comes in dozens of swatches. This set gives the best comfort to your Sims after a long, tiring day.  You can set other items, such as pillows, art, rugs, blankets, and other items, in your own style.  Dopamine Set by lalaLANA Your exploration for an adorable bedroom furniture set comes to an end! Here is the most appealing bedroom furniture set, cc by lalaLANA.  This entire set includes 16 items in total. You can give your Sims’ room a pretty look with these items. It has a bed, shelf, chair, desk, fan, light, and various other deco stuff.  The set is perfect for a girl’s room, your sim will thank you for this absolutely charming set of furniture.  Ribbons & Reveries Set by kirikasims This lovely girl’s bedroom furniture set is definitely the one everyone looks for. Kirikasims has put a lot of hard work and dedication into this cc pack.  For a combo of charming and cozy vibe in your Sims’ room, this set is a perfect pick. In this set, you can find a cozy & comfy double bed, a wardrobe, a seat, and a few other cool items. Dressed Up Dresser by Plutosims Does your Sims’ room have a dresser? If not, then here is the find for you. This one is from Plutosims and comes with 15 swatches.  The dresser has 5 drawers where you can put a variety of daily-use clothes and other items. The dresser is already in a cool-looking form, yet the swatches it comes with make it even cooler.  Now, your Sims’ clothes are fully organized with this wooden dresser. Set it up in your Sims room and thank me later.  Arti Set by Soloriya Do your Sims love doing art stuff, and you haven’t set up an art room for them? Here’s an art furniture pack to set up an art room for your Sims.  Spark your Sims’ creativity with these classy furniture items. The pack contains all of the essential items an artist needs. From stool to table and shelf to cabinet, this set is perfect for an art room.  Your Sims will love spending time in a room where they can spend time making cool art pieces. Plus, this would give your home a new look.  Senna Toddler Room Furniture Set by Pinkbox AnYe Is your toddler sims’ room not finished yet? Or maybe you are planning to redesign it? This set by Pinkbox AnYe should be your pick.  The set has all the essential items that a toddler’s room needs. With this cool-looking crib and a big, cozy toy, the toddler will stay happy all day long. While the rest of the items will add a cooler look to the room.  A dresser is a must-have addition to any room, and this one has three drawers to store lots of clothing items. The best part is that this set has 13 swatches to match your room’s vibe.  Outhouse Stories Set by LightDeficient Outhouses are great for spending your free time, and what could be cooler than setting them up with unique furniture items?  This set by LightDeficient includes some of the best pieces to make your outhouse toilet stand out and be fully ready for usage. The set includes a rustic toilet, a makeshift sink, decoration pieces, surface items, lighting, and building stuff such as a crescent door, plank flooring, and plank wallpaper.  Sweet Cream Set by lalaLANA A nice and cool look of your bedroom can be achieved if you pick this Sweet Cream Set by lalaLANA. This set gives you a fresh and cozy vibe, perfect for giving your Sims bedroom a new makeover.  The set consists of 18 cc items that come in a total of 12 swatches. Items such as a full bed, table, bed curtain, gaming chair, computer, and many more.  Early My Little Princess Set by ssiat Young Sims are always in need of items like a crib, stroller, and potty. All of these are available in this set by ssiat.  The set has a total of 5 items, including a doll stroller, crib, pumpkin chair, potty, and fabric wall poster. All of these items have multiple swatches, so it is easy to pick the best match. Giving your little Sims’ room a new and fresh look is now easy.  Cozy Cushion Sofa by Omostarz-Sims Comfort and style both are top notch in the Cozy Cushion Sofa by Omostarz-Sims. The entire set includes 3 items: sofa, cushion, and blanket.  Each of these items has 7 swatches. If your Sims are tired of old sofas or if you are looking to renew the look, then these … Read more

Sims 4 Male Hair CC Packs – The Only Male Hair CC Collection You Need

Let’s be honest, we all know the secret to building an unforgettable sim not only lies in their killer wardrobe but also includes a dashing hairstyle. That’s why a great hairstyle can change our Sim by a lot.  Based on my experience, I have dived a lot deeper into the Sims 4 CC universe and found the best male hair CC. For your convenience, I have added them here. I’m pretty sure you will end up adding these to your CC folder.  Let’s begin! Randall Hairstyle by Simcelebrity00 Man just look at the haircut, it speaks for itself. I have been a huge follower of Simcelebrity and their collection of CCs is just never-ending. It was hard to pick the best one but I just managed to do so.  Here’s the Randall Hairstyle for you, perfect for any male sim out there. This messy mid-long hair with clean sides and back is definitely a must-pick for your sim. Give your sim a modern look with this CC. Cali Waves by CEEPRODUCTIONS We have another long hairstyle for our male sim, but this time it’s from CEEPRODUCTIONS. This one is a much thicker style and it comes in two versions, with strands and without strands.  So, if you are not looking to add strands than you can go with the second version. Plus the best thing is it has 24 swatches. This is a must-try style for your male sim.  Ulrich Hair by Aladdin-The-Simmer Here is the full-length hairstyle. This one is from the one and only Aladdin-The-Simmer, all thanks to him for giving us such a perfect long hairstyle.  It’s a clean style rather than a messy one which is why it is much better. It looks perfect the way it is. Also, the 24 swatches that come with it are worth trying.  Vedro Hair by JNY This is another hairstyle from JNY. I know it’s a long one again but this time it is quite different from previous ones. It has short bangs at the front and has kind of a mid-length at the back which is why I picked this one.  You should try out this on your sim to see if it suits him. It also has 24 different colors so it will definitely be a great match.  Chid Haird by JNY Another killer-looking hairstyle by JNY. This one is a must on my list and probably you would too love it.  Chid Hair showcases the short hairstyle with strands included. As you can see the look of a male sim with this style is worth trying it out. The short sides and back add more nice look to it.  Salem Hairstyle by Simcelebrity00 I have tried this one by Simcelebrity00 and thought you might like it as well. So, I end up adding it to this list.  This slick back style has a clean and smooth look. Especially, the short length strands at the back make it extra nice.  Rio – Short Curly Hairstyle by AurumMusik I mean who doesn’t love curly hair? On a male sim, they look outstanding. You can get an idea of how good they would look on your sim just by looking at the example above.  I would recommend you try this hairstyle by the talented AurumMusik. The 30 swatches this style has will definitely match up with your sim.  Matthew Hair by Monharicot All credit goes to Monharicot for such brilliant work. This extra bold hairstyle will turn your sim into a handsome and masculine man.  It’s a short-length curly hairstyle that fits best with almost any face look. I have tried it on my sim and now it’s your time to add to your CC folder.  Nikolas Hair by JohnnySims A nice and clean short hairstyle by Johnny Sims. This one has nice and clean sides and back with a short hair length on top and front.  The crisp strands make it so much fresh. What you think? Do you like it? Then go on and take it straight to your Sims 4 CC folder.  Hair No. 36 V1 by Hezeh A nice, clean, and high-quality hairstyle by Hezeh. Just look at the finishing of this style. It looks more realistic.  The finishing and looks of this style made me add it to this list plus it looked awesome on my sim. They have added 77 swatches with it so it will for sure match with your sim.  Big Loc Twists by Khadijah551   Are you a fan of full-length braided hairstyle? Look no further, this hairstyle by Khadijah551 is your full stop.  Apply it on your sim and see the magic. The long braided style is my go-to choice for almost every day. And it would probably be for you as well.  Hair No. 17 by Hezeh Hezeh has already blown us away with tremendous hairstyles and this one too is mind-blow. This man bun has got all my attention, plus the long strands at the front, are incredible.  I’m pretty sure you will try it out and most probably keep it as a permanent style for your male sim.  Calvin Hair by Tricoufamily  Here is one more medium-length hairstyle for your sim. This is from the Tricoufamily is an all-rounder haircut that suits best with oval, diamond, or round-shaped faces.  All of the elements of this cut make it a perfect style for your male sim. My sim was rocking this cut and I expect that it would look great on yours too.  Hadeon Hair by Wistful Castle A bold and handsome look can be achieved with this Hadeon hairstyle by Wistful Castle. The style presents a clean look at the back and sides while it has a bit of lengthy hair at the front with strands all over.  What else is needed for a style to look this good? We can’t ask for more. Try it out on your sim and see how it transforms him.  Lysander Hair by JohnnySims Just by the first look, you … Read more

Pokemon GO Fest 2025 is Bringing the Heat with Volcanion, Zacaian, Zamazenta, and a Global Raid!

Are you guys ready to take on the heat of Pokemon GO Fest 2025? Niantic has just announced massive news for Pokemon die-hard fans. Yes! This breathtaking event is happening with global raids and legendary debuts of Pokemon. Here are the full details of the biggest Pokemon GO event for this year.  The Debut of Volcanion The mythical steam Pokemon, Volcanion is finally making its way into Pokemon GO! It is known for its Fire/Water type nature. This beast Pokemon will take on the event with full grace. GO Fest 2025 will be presenting this first-ever mythical Pokemon to debut in global raids.  It will be a game-changing move for most of the players out there. This has been one of the rarest Pokemon until now, but with its debut, it will definitely be a historical moment for GO Fest.  Zacian and Zamazenta Are Coming Back That’s right! The Galar’s Dynamic Duo, Zacian, and Zamazenta are returning back into five-star raids. This one is huge for Pokemon GO fans. There is a rumor that they will be rocking the exclusive moves to shake up the PVP meta. Also, team up and be ready because they won’t be here for long.  GO Fest 2025 Event Schedule Pokemon GO Fest 2025 is coming to big cities starting in May. It will be hitting with In-Person and Global events across various cities around the world. So, players from around the globe will have the chance to attend these events.  In Osaka, Japan the event will be happening in the month of May. In Jersey City, it will be hitting at the beginning of June, and finally, in Paris, the events will take place during the middle of June. For exact dates, you can visit the official website of Pokemon GO.  Experience the Real Fun with Ticket Add-Ons The event is offering some add-ons that you can purchase along with your tickets. These add-ons are perfect to take your event experience to another level. Here’s what it’s all about:  These add-ons will definitely add a layer of neer ending fun to your day at the event. Each of them comes at a different price. You will need to purchase them with your ticket to avail the benefits they are offering.  Mark your calendars and be ready to catch the event at any of the three destinations. This is gonna be a huge event for Pokemon lovers. Let’s Go Team Pokemon!