GamersPlan

BG3 Jar of Mystic Carrion’s Heart & Other Parts – Where to Find Them

jar of msytic carrion's heart

Completing the Thrumbo quest requires killing Mystic Carrion, and that can be done by finding the Jar of Mystic Carrion’s Heart & other body parts. You simply need to find all of the jars and destroy them.  This will allow you to continue the quest and move forward. But you will need the exact spots where all of these body parts of Mystic Carrion are found.  Here, in this guide, I have mentioned all four spots where you can find the Jars of Mystic Carrion’s body parts and potentially destroy them.  Jar of Mystic Carrion’s Heart & Other Body Parts Location Advancing in the Find the Mystic Carrion’s Servant quest requires killing Mystic Carrion himself, and that can be done by finding the jars of his body parts and destroying them.  These jars are one of the many other miscellaneous items in Baldur’s Gate 3, such as the Spoon of Saltiness, Zhentarim Shipping Crate, and Thieves’ Tools. But each item has its own specific use. There are four jars in total, and destroying each one of them will make him weaker, and eventually, he will die when all four are destroyed.  Find these jars here:  Jar of Mystic Carrion’s Heart This is found inside Thrumbo’s body, so you have to kill him to obtain this specific jar. You can also convince Thrumbo that there is the Jar of Mystic Carrion’s Heart in his body.  But for this, you will need to head into the basement of Philgrave’s Mansion and read the book in there. This will update the quest and help in convincing Trumbo. Also, you must side with him if you want to obtain the heart this way.  Jar of Mystic Carrion’s Brain  For this jar, you will need to enter the Ancient Lair. Once you are in, move forward and keep going until you reach the Under City waypoint, the jar will be close to it.  The exact coordinates are X-Axis: -1394 & Y-Axis: 80. Jar of Mystic Carrion’s Liver This jar is also located in the same spot as the brain. In the Ancient Lair, you will find the Sacrophagus, and close to it will be a Glided Chest. Interact with the chest to get the Jar of Mystic Carrion’s Liver.  The exact coordinates are X-Axis: -1395 & Y-Axis: 78.  Jar of Mystic Carrion’s Lungs This is found in the Lower City’s Graveyard area. Enter the graveyard and head to the Mortuary Cellar. Look for a table with plants on it. This same table will also have the Jar of Mystic Carrion’s Lungs.  The exact coordinates are X-Axis: 1259 & Y-Axis: 867.  Once you collect all of them, you can destroy them either by throwing or by attacking them. As you destroy each jar, Mystic Carrion will become weaker. 

BG3 Zhentarim Shipping Crate – How to Get & Use It

bg3 zhentarim shipping crate

Baldur’s Gate 3 has tons of usable items; some are hard to find, while others don’t require much effort, though all of them have great uses. One such item is the Zehntarim Shipping Crate in BG3. There are many other useful items as well, such as Thieves’ Tools & Spoon of Saltiness. Zhentarim Shipping Crate is a great item to get if you want some additional stuff, such as potions and grenades, and you can get the parasites from it, too. But, using it requires some skills; otherwise, you will end up wasting its effects and the corresponding items.  In this guide, I have discussed the location of the Zhentarim Shipping Crate and how to use it correctly. Let’s jump in.  Where to Find the Zhentarim Shipping Crate in BG3 The Zhentarim Shipping Crate is found in the Moonrise Tower area. But, there are some more crates and cargo stuff around the Zhentarim Shipping Crate, so you have to look out for the right crate.  First off, get to the exact spot where the shipping crates are located. So, it’s actually on the dock side of Moonrise Towers. The docks are to the east of Moonrise Tower. The exact coordinates are X-Axis: -68 and Y-Axis: -185.  Once you are there, find the crates marked with the Zhentarim symbol. That’s the Zhentarim Shipping Crates.  How to Use Zhentarim Shipping Crates In BG3, the Zhentarim Shipping Crate is a one-time usable item. You can either destroy it with your attacks or throw it towards an enemy.  The first thing you gotta do as soon as you find the crate is get those 2 Mindflayer Tadpoles. These will be received automatically once you pick the crate. Afterwards, you can choose to use it by destroying or tossing it towards an enemy.  Throwing it towards an enemy will make it explode, and the area around it will be covered with Caustic Brine. This will deal 1d4 Acid Damage. It is a great item to use when there are multiple targets in front of you.  Simply, just throw it towards them and it will explode, creating a surface of Caustic Brine which will damage on its own.  Also, the barrel contains 3 random grenades. You can get these grenades too and use them to deal damage. But grabbing these grenades from the barrel is a bit tricky as they get destroyed with the barrel. So, you have to use some extra techniques to get them safely.  Moreover, these Zhentarim Shipping Crates are excellent for heavy battles where the enemies are surrounding you. With just a single use of this crate, you can easily target multiple enemies.  FAQs Can You Take the Tadpoles from Zhentarim Crates?  Yes, you can get the tadpoles from Zhentarim Shipping Crates in BG3. As soon as you pick up the crate, 2 or 3 Mind Flayer Parasite Specimens will be granted.  And if you destroy the crate, it will leave 3 dead Mind Flayer Tadpoles. So, it’s better if you pick up the crate first to get the tadpoles, and then you can destroy it.

Where to Buy Thieves’ Tools & Lock Picks in BG3 Act 1, 2 & 3

where to buy thieves' tools in bg3 act 3

If you have been playing Baldur’s Gate 3 for a long time, you know that there are chests and locked doors that require lock picks, also called thieves’ tools, to open.  Now, in each act, you can buy them from different vendors. There will be times when you will get them in loot, only if you are lucky enough. Otherwise, you will need to find the vendors from whom these thieves’ tools, more specifically the lock picks, can be purchased.  Where to Buy Thieves’ Tools in Baldur’s Gate 3 (BG3)? Thieves’ Tools are a convenient item to unlock chests and locked doors. This is like many of the other items in BG3, such as Antique Key, Spoon of Saltiness, Zhentarim Shipping Crate, and others. However, thieves’ tools has quite a lot of uses in the entire game. Buying is a convenient option when you want to get some useful items for your journey in BG3. Like when you have run out of lock picks and cannot open any more locks, you can purchase them from vendors.  Merchants are your best friends when it comes to getting thieves’ tools. I was also using lock picks every now and then, and at a point, there were none left.  So, I had to find merchants in each act who were selling these lock picks. Here are those merchants’ locations for each act.  Where to Buy Thieves’ Tools (Lock Picks) in Act 1 During Act 1, you can loot the thieves’ tools on the Risen Road. It will be hidden inside the wooden barrel.  Once you wake up on the beach, move on through the ship crash site and head towards the Overgrown Ruins teleport point. You will see some wooden boxes by the seashore. Check out these boxes, you will find the lock pick in one of these.  Another spot is on the opposite side of the crashed ship. Here, look for a wagon that has a locked box on it. Get the thieves’ tools from this locked box, and you are good to go.  Now, when you proceed in the game and use these obtained lock picks, you will need to purchase more from the merchants. Here are the vendors you can find in Act 1.  Here is a tip: get as many lock picks as you can during Act 1 because as you proceed towards Act 2 and then Act 3, there will be very few spots where you can buy these.  Where to Buy Thieves’ Tools in Act 2 Act 2 has not many merchants who offer Thieves’ Tools. There is just one who sells it, and he is Roah Moonglow. He is a young merchant, you will meet him during Act 1 as well.  This time, you will be required to head into the Moonrise Towers, where you can find him and purchase Thieves’ Tools. He will offer you 3x Thieves’ Tools.  Where to Buy Thieves’ Tools in Act 3 Luckily, in Act 3, we have two different spots where you will meet merchants. They will sell you Thieves’ Tools along with multiple other items.  So, these are the locations from which you can buy Thieves’ Tools (Lock Picks) in Baldur’s Gate 3. If you are currently in Act 1, stack up as many lock picks as you can to use them in Act 2 and Act 3.  These tools will help you a lot in progressing through various quests and even in getting useful items. Some chests contains valuable loot and they can only be unlocked if you have Thieves’ Tools with you. So, you need to have these with you all the time. FAQs What Are Thieves’ Tools For in Baldur’s Gate 3? Thieves’ Tools are especially for unlocking locked doors and chests. These are also called the lockpicks. Like many other items, thieves’ tools are quite useful and are not just decorative items. The only downside to these is that they are one-time use; once you have unlocked a chest or a door, it will be discarded. So, you will always need to make sure that you have got enough of it in your inventory. The best thing you can do is grab as many as you can when looting, or you can also visit the merchants and purchase from them. But only the specific merchants have thieves’ tools for sale.

BG3 Ambush the Convoy: Should you Really Do it?

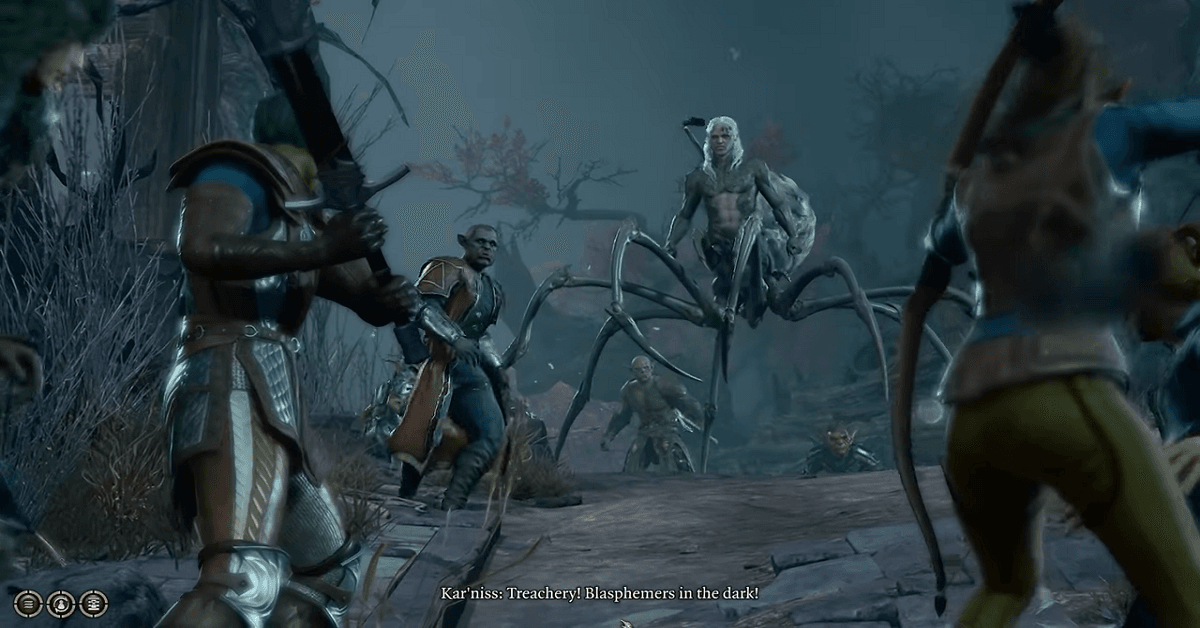
During the Quest Follow the Convoy, a group will ambush the convoy and you will have two choices either to protect the convoy or team up with the group and defeat the convoy.  This is where most of the players get confused because they are not aware of the consequences. That’s why I have explained in this guide what could be the consequences of each of these choices.  Keep on reading to find out everything about it.  BG3 Ambush the Convoy Walkthrough & Possible Outcomes Making your way through the Mountain Pass at the end of Act 1 will take you to a group that is looking for a true soul.  When you reach there, they would assume that you are the True Soul who can summon their guide and hence lead the group.  Here, you should have the Spider’s Lyre because that’s what would allow you to spawn the guide. Now, you must have obtained this previously and there are multiple ways to do that.  There will be an Orc known as Kansif, he asks whether you have Spider’s Lyre. Here, you are going to use it in order to spawn the guide.  Bonus Tip: If you don’t have the Spider’s Lyre, Illithid Powers can be used to summon the guide.  Soon after, a guide would appear whose name is Kar’niss. He has a lantern and we all know what’s that, it’s a Moonlantern.  He would lead you to the Moonrise Towers under the light of Moonlatern. Just make sure to stay away from the shadows at all times.  While moving along, you will reach a point where the convoy will stop and Kar’niss will mention that he doesn’t feel right. And he will ask that whoever is there show themselves.  And as he feared, a group of harpers will appear. This is the point where you have the option to either protect the convoy or ambush the convoy by teaming up with harpers. Consequences of Both Options Now, since we all wanna know what would actually happen if we Ambush the Convoy then let’s see that first.  As soon as you betray the convoy and side with the harpers, you will have to finish the convoy, and then the harpers will ask you to visit the Last Light Inn. Moreover, the Moonlantern which Kar’niss had will be taken by the harpers.  Now, you must visit the Last Light Inn and meet Jaheria. Upon meeting her, you must gain her trust to get access to the upper floor where you will have to speak to Cleric Isobel.  Now, with Moonlantern in your hands, you can advance towards the Moonrise Towers while keeping yourself safe from the shadow.  There will be a bit of inconvenience for you when reaching the towers. The guards must be convinced in a manner that they believe you are true souls. Once you successfully do that, the access to area will be granted.  Now, here is what would happen if you protect the convoy from harpers ambush. Protecting the convoy will result in advancing towards the Moonrise Towers without any issues.  Since Kar’niss has the Moonlantern, he would lead the way after you have wiped out the ambush group. And you won’t be interrogated by the guards at the entrance. By following this path you will end up straight into the Moonrise Towers area.  That’s all the information for this guide. We have also prepared guides on Facemaker Boutique & Inquisitor’s Chamber Statue Puzzle. Check them out as well!

BG3 Dominate the Brain – The Consequence & How to Deal

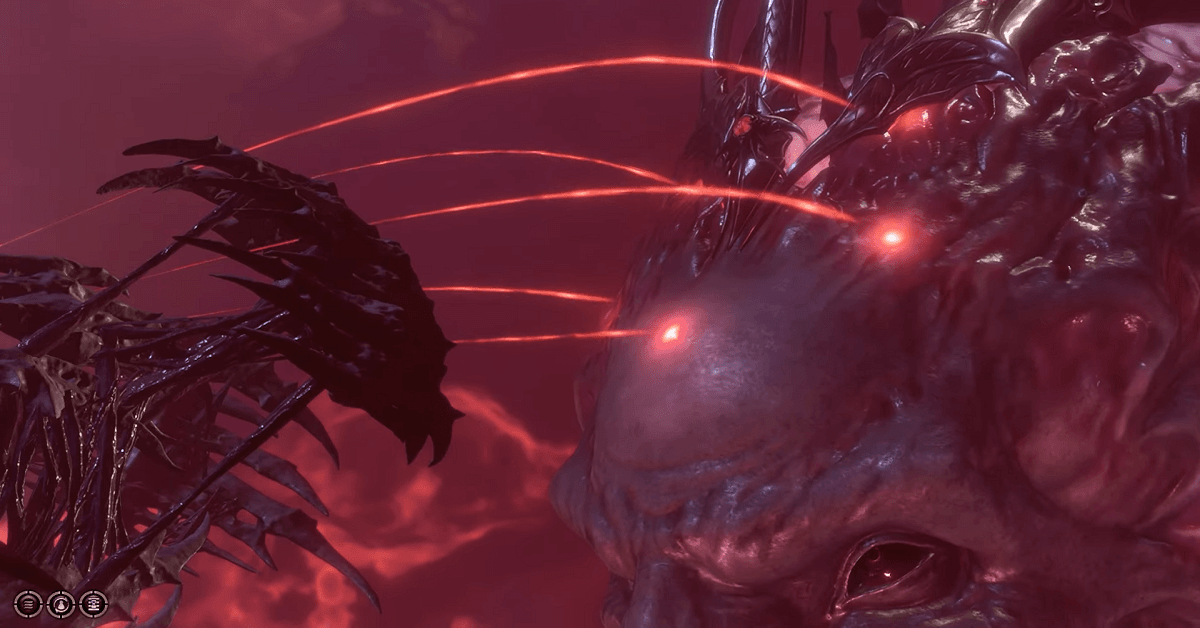
Dominate the brain is one of the options that you get during Confront the Elder Brain Quest in Act 3. In Baldur’s Gate 3, there will be multiple times when players meet the talking brain, the very first time is at the beginning during the prologue.  But this time, you are confronting the brain as your opponent and it will be the only way of getting rid of tadpoles.  Confront Elder Brain is quite a long quest that is based upon several different sub-quests. Control the Elder Brain is one part of it, here you get the option to Dominate the Brain along with a few others.  If you are too curious about what happens when choosing this option then keep on reading to find it.  Dominate the Brain in Sub-Quest Confront Elder Brain  When confronting the Elder Brain, the game gives you several different options and almost all of them have pretty much the same consequences.  Except Dominate the Brain. It doesn’t matter which option you choose the Elder Brain is extremely powerful and none of the options will harm him.  However, if you try and choose the option Dominate the Brain, you will get the (Strength) DC 99 check. Upon passing it with a critical success, apparently, there won’t be any difference but trust me this would help you out in the final battle with Elder Brain.  What this option actually does is it will put a debuff on Elder Brain called Against all Odds. It will take away it’s health by 20%. So, in the final battle, it will be a lot easier to defeat him.  As soon as you choose this option, you will be presented with the DC 99 Check. Upon passing, a cutscene will be played where your character will shoot fire shots toward the brain by assembling three gems.  These shots will land on Elder Brain’s head and it will get the debuff although there won’t be any appearance of that. Soon after that, the Emperor will spawn beside you and take you along with your entire party to the Astral Prism.  After that, you can continue the quest from Astral Prism. There will be tons of action in the Astral Prism that will involve the Emperor, Orphic Hammer, and Raphael.  Also, you will have to free Orpheus. He will then talk about the Githyanki Egg. He will then become your party member for a little while.  The next phase will be in the Upper City where the real deal will happen. This will be the beginning of the final battle with Elder Brain.  Here, you will meet various NPCs throughout the city. And eventually, you will meet the brain and defeat him. This is where your Dominate the Brain would help you. During the battle, the Elden Brain will have 20% less health than its original.  To be honest, it’s gonna make a huge difference. Just make sure to pass that Strength DC 99 Check of Dominate the Brain. It will be a game-changer for you.  FAQs Is it Possible to Dominate the Brain in Baldur’s Gate 3? Dominate the Brain is actually an option that you get while confronting the Elden Brain in the first stance. It won’t let you dominate the brain at that point instead it will put a debuff on it which will prove to be a great move for the final battle.  What Happens if You Fail to Dominate the Brain in BG3? No worries, if you fail at dominating it then you will simply be transferred to the Astral Prism by the Emperor. Even if you choose any other option, the outcome will be the same.  However, Dominate the Brain option can put a debuff on the Elder Brain if you successfully pass the DC 99 Check.  So, that’ everything regarding the Dominate the Brain guide in Baldur’s Gate 3. Also, check out our other Baldur’s Gate 3 guides. Selune Temple Puzzle & Hhune Mausoleum Puzzle. And if you want to know how you can get thieves’ tools, then read our exclusive guide on it.

How to Stop Astarion From Ascending in Baldur’s Gate 3

how to stop astarion from ascending

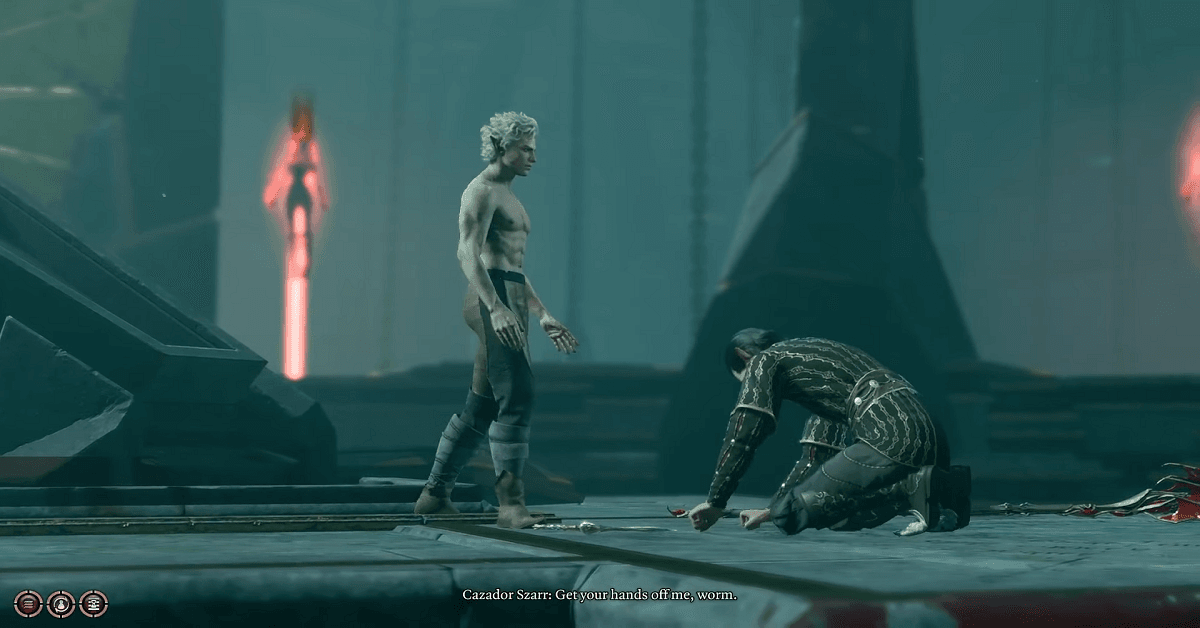
Astarion will have an ascension part in the Act 3 at the Cazador’s Palace. Here, you will have a series of options to choose from. Each option will have a different impact on his personality.  If you want to stop him from ascending then this guide is for you. I have covered how you can do that and also discussed the rest of the options and their consequences.  Stopping Astarion from Ascending Astarion is a vampire spawn and he has been living a life of a slave under Cazador. Meeting Cazador during Act 3 will take Astarion to perform the ascension.  But, here he will ask you to help him out in the ascension process. This is where you will have a series of choices including stopping him from ascension.  Here’s how you can do that.  Persuade Astarion This option is to Persuade Astarrion to Stop Ascension. You will have to go through a DC18 Persuasion Check. And those who are romancing him will have an advantage. They can use the DC 20 Insight with an advantage and after that a lowered DC 15 Persuasion Check.  Once you have passed the checks, Astarion will finish Cazador and won’t leave your party. This is the best option to stop him from ascending and keeping him from leaving your party.  Choosing this option will make Astarion become a good person and he will be happy with your decision. This will also make him realize that becoming a Vampire Ascendant would have caused so much trouble for him. He will be thankful to you for helping him out.  Refuse to Help Him  This is another option to stop him from ascending but choosing this will result in Astarion’s drop from your party. So, choose wisely.  During the conversation scene, you can choose the option “I’m not doing this”. Doing so will make Astarion finish off Cazador and he will also leave your party.  It doesn’t matter if you were romancing with him or not, he will leave the party for the rest of the game.  So, these are the two main options from all four to stop Astarion from ascending. He will be happy with the first option that we have discussed above but to be honest, you will be missing out on some great powers of Astarion that can only be achieved by letting him become a Vampire Ascendant.  Helping Astarion Become Vampire Ascendant If you choose to help Astarion become a Vampire Ascendant he will have some of the most powerful skills for the rest of your journey.  If you agree to help Asatarion with this then he will sacrifice Cazador, all the spawns, and even his siblings.  After that, he will have the following changes.  FAQs How do I Convince Astarion to Not Ascend? By keeping Astarion from Ascending, you are missing out on some new features that Astarion will get such as Ascendant Bite and Misty Escape.  However, if you still want to do it then go for the Persuasion Check. If you are romancing then you will have an advantage on this check otherwise, you will have to perform a DC 18 Persuasion Check. We have also prepared guides on Selune Temple Puzzle and Inquisitor’s Chamber Statue. Check them out as well!

Baldur’s Gate 3 (BG3): Selune Temple Puzzle Solution – Full Guide

bg3 selune temple puzzle

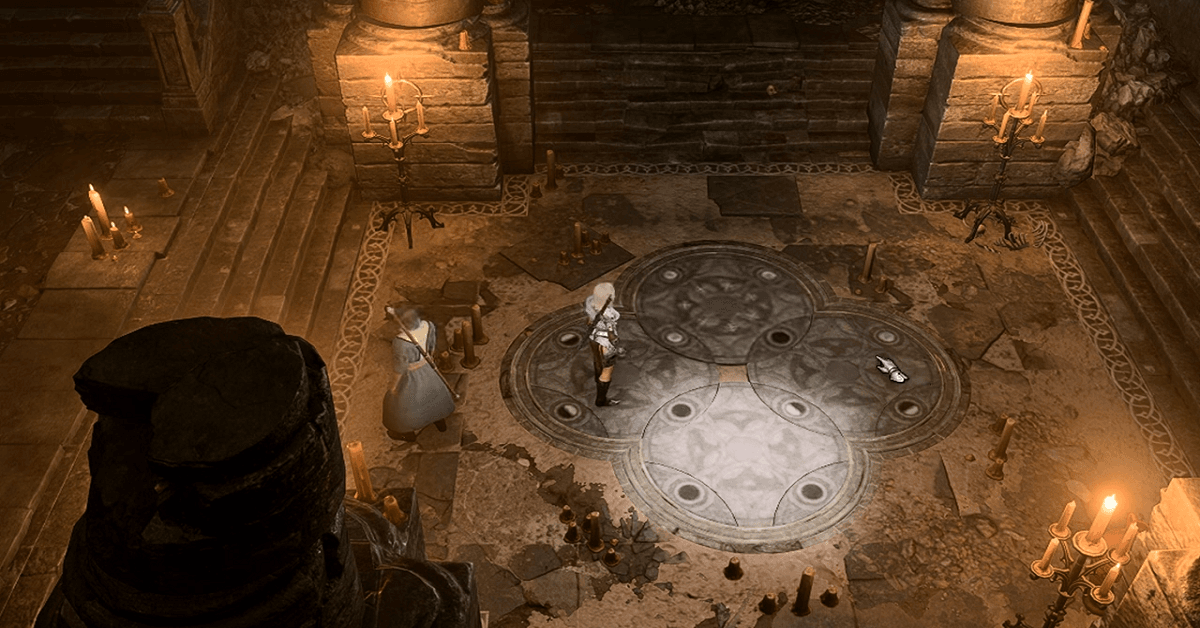
The first act in Baldur’s Gate 3 takes you to various places where your route ends up on a puzzle, Selune Temple (Defiled Temple) is one of them. Here, you have to solve a Moon Puzzle which grants you access to Underdark.  The puzzle has actually four plates on the floor with four holes in each. Now, they must be aligned in the correct order to solve the puzzle. If you have tried everything and are still unable to guess the right pattern then we have got you covered.  This puzzle is not just one that you encounter in BG3, but there are many of them like the one you will see in Hhune Mausoleum and lots of others. For now, let’s dive in and see how you can solve this Selune Temple Moon puzzle.  Moon Puzzle Location in Selune Temple (Defiled Temple) Baldur’s Gate 3 The Moon Puzzle is located within the Selune Temple which is under the Goblin Camp. Here, you will have to speak with True Soul Priestess Gut and follow with a fight in which you have to defeat her. Loot her body and grab the Priestess’ Key.  Once you have grabbed the key, move ahead and enter Priestess Gut’s chamber which is unlocked with the key. Inside the chamber, you are going to encounter Gut’s bodyguard. Finish the work in this chamber and head into the bedroom if you want to grab that Selunite Journal which states the secret words regarding Moon Puzzle.  This journal will be in the cabinet, interacting with it will show you the secret note that says:  “Thus the interlocking circles will bring the full moons to match the stars, while casting darkness where it belongs at the bottom. That chasm to the Underdark will stay sealed.” After that, you can head directly into the puzzle area which will be down from the passage. Here, you will see the puzzle area with four plates on the ground.  Moon Puzzle Solution in Selune Temple (Defiled Temple) Now, before you start interacting with the puzzle, make sure to ungroup your party members because they will make it a bit confusing when you are rotating those plates.  So, what you actually need to do is turn the panels in a pattern so that all four dark spots align under the spotlight. For this, you must follow the right rotating order. Follow the steps below in the exact order:  Once you have correctly aligned all four dark spots under the spotlight by following the steps above, a passage to the Selunite Temple in the Underdark will appear.  Secret Method to Avoid Solving Moon Puzzle You might not know this but you can use the alternate method to open the passage that leads to Underdark. In this method, you don’t need to interact with the puzzle on the ground.  Walk up to the North side of the room where a statue has fallen. Here, you will have to pass a Perception check. Any of your party members can attempt to pass it. Once it does, a secret lever will appear on the wall.  Upon interacting with it, you will find that it’s locked, but you can use the lockpick to gain access. Astarion can help you out in this situation, if he is at your party then you are good to go. Upon success, a passage to the Selunite Post in Underdark will be revealed.  Entering the Underdark Selunite Outpost Solving the moon puzzle in Selune Temple takes you to a new area called the Underdark, to be specific, you will be at the Selunite Outpost. Here, you will meet plenty of NPCs such as Artimezt and Moy. Moreover, Selunite Post is connected to two of the major quests in Act One. The first is Find the Nightsong and the second is The Adamantine Forge. Apart from this, Selunite Post has some of the most important items like the Helmet of Smiting, Luminous Armour, and Staff of Moonmaiden. So, take your time and explore the entire post to find all the valuable items, meet with NPCs, and finish the quests. There will be two main locations that you can visit, Ancient Battlefield and Petrified Battlefield. They are located in the North and South areas of the outpost respectively. FAQs How to Solve the Circle Puzzle in Baldur’s Gate 3? The Circle Moon Puzzle in Selune Temple has four plates on the floor and each plate has four dots on it. The key to solving this puzzle is hidden in the rotation of plates in the right order so that the four black dots align under the spotlight.  For this purpose, all you need to do is follow the right pattern. You can check out the steps we have explained above to solve it.  How Do I Get Through the Temple of Selune? For this purpose, you need to solve the moon circle puzzle on the floor after which you will get access to the passageway, which takes you directly to the Underdark area.  Alternatively, you can skip the puzzle and instead use the hidden lever near the fallen statue in the same puzzle room. You will have to perform a perception check and unlock the lever to interact with it. 

Spoon of Saltiness BG3: Where to Find & How to Use It

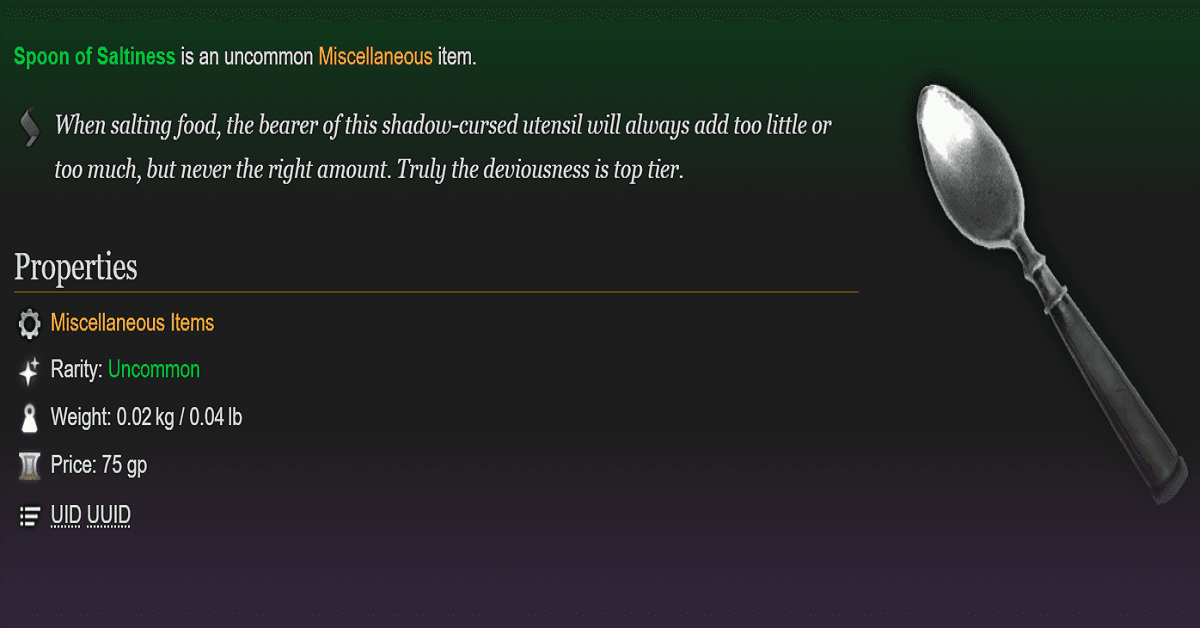
Baldur’s Gate 3 offers a variety of items some of them are even weird, like the Spoon of Saltiness. This is one of the uncommon miscellaneous items that you can get from an NPC. However, it does not have any important use in the game like other items such as Thieves’ Tools. So, it’s just pretty much a collectible that you can obtain during your journey.  We have covered in this, where you can get this spoon, and what other items you can get from that tiefling NPC. So, let’s jump in.  Finding Spoon of Saltiness There’s only one way to obtain the Spoon of Saltiness in Baldur’s Gate 3 and that is by visiting the tiefling Mattis. He is a young trader who loves to collect valuable items. You will find dozens of other things in his collection.  During Act 2, Mattis will have his trading shop close to the entrance of the Last Light Inn. Visit him in his store, and you will find the Spoon of Saltiness in his trading list. Once you see it, simply make the purchase, and it will be yours.  Apart from this spoon, he will also have various items for sale. Here is the full list:  These are all the items Mattis will offer in his store during Act 2.  Apart from Act 2, Mattis will also be available during Act 1 and Act 3. During Act 1, Mattis can be found near the Emerald Grove. He will be in his store, where he will be selling a variety of items. He must survive during Act 1 to reappear again in Act 2, where he will offer the Spoon of Saltiness.  Usage of Spoon of Saltiness When you purchase the Spoon of Saltiness, Mattis will mention that this spoon has some hidden powers of abilities that can alter your stats. But that’s not the thing, Spoon of Saltiness is nothing more than a collectible.  You can keep it in your collection of valuable items. It won’t help you out in any battle or provide you with any magic. It’s just another unique item like many others that you will find during your journey of Baldur’s Gate 3.  When you check the details of Spoon of Saltiness, it will have details saying: “When salting food, the bearer of this shadow-cursed utensil will always add too little or too much, but never the right amount. Truly the deviousness is top tier.” This means that the spoon has some sort of dark curse from the past that keeps the user from using the right amount of salt. However, it’s just a description of this spoon, you don’t need to use it for salt in any way.  FAQs What is the Spoon of Saltiness in BG3? Spoon of Saltiness is an uncommon miscellaneous item that you can get from Mattis during the Act. He would mention that it has some sort of magical powers, but it’s not true.  Spoon of Saltiness is just a collectible item like many others that you will find in different places. Such items have their own unique value, but they don’t have any specific usage in the gameplay, like during the battle or outside of it.  Does Mattis Sell Anything Good in BG3? Yes, Mattis has many useful things to offer; you can meet him during all three acts. When you visit him for the first time near the grove, make sure that he survives during that act. Otherwise, he won’t be available in Act 2 and Act 3.  If this guide helped you out, then you would definitely like our other Baldur’s Gate 3 guides. Don’t forget to check out the Ancient Altar & How to Stop Astarion from Ascending guide.

BG3 Inquisitor’s Chamber Statue Puzzle & Find Blood of Lathander

bg3 inquisitors chamber statue puzzle

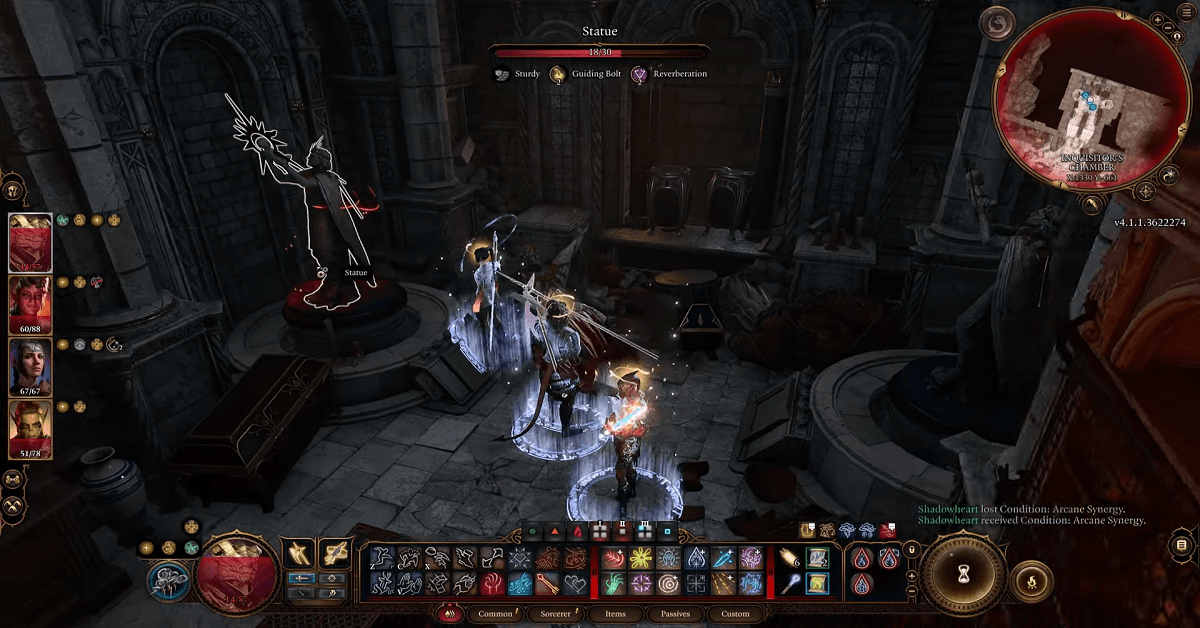
When visiting the Inquisitor’s Chamber in Baldurs’ Gate 3 you will encounter two statues that act as a puzzle blocking your way. They must be rotated in the right direction in order to get access to the hidden area where you can find Blood of Lathander.  This puzzle is part of the quest called Find the Blood of Lathander. In this guide, we have covered the chamber statue puzzle solution and a bit highlight on how you can move forward in the secret area to obtain Blood of Lathander. Baldur’s Gate 3 has many more little puzzles such as the one you will find in Balthazar’s Room, that’s in the form of Ancient Altar.  For now, let’s see how we can solve this Inquisitor’s Chamber puzzle.  Heading to Inquisitor’s Chamber Statue Area The two puzzle statues are located within the Inquisitor’s Chamber and this can be accessed from the Githyanki Creche. Once you are in here, head into the area called the Monastery basement, it’s quite close to the Creche area.  The monastery basement is actually located under the Creche Y’llek area. Moving forward in this place can be a bit tricky as githyanki are quite suspicious towards strangers. However, if you have Lae’zel in your party then she can help you out moving ahead from the guarded area.  Now, you need to enter the Captain’s Chamber but again there will be a blocked path by Githyanki Barrier Disruptor. Now, all you need to do is obtain Gith Shard from Kith’rak. To do that, you can either steal it or simply defeat Kith’rak.  Once you have got that, insert it and you will get access to the Inquisitor’s Chamber. Entering the chamber will proceed you to a conversation with the inquisitor, but you can skip this part and move on with your quest.  Solving Inquisitor’s Chamber Statue Puzzle Enter the hallway on the western side and you will find two statues. One is on the north side while the other is on the south side. The one on the north needs to be turned towards the east whereas the southern one should be turned to the western side.  Now, the northern one is free to move whereas the southern statue is stuck. So, to solve this issue you can either cover the statute in grease or you can simply attack on it to move it. That’s it! The puzzle will be solved and a hidden path will be revealed. This path leads to the secret area where the Blood of Lathander Mace is hidden.  Finding the Blood of Lathander Mace Heading into the secret path and traversing the stairs will take you into an area where your path will be blocked by some barriers and traps. Here, you need to deactivate those traps and also the energy sources that are powering up the barriers.  There are multiple energy sources, the first one is on the left side where the barrier is located. It will be hanging from the ceiling, and hitting it with several attacks will destroy it. Once it’s down, the barrier will disappear and a path will be revealed.  Go to the next area and you will find another barrier blocking your way. Now, it’s time to disable some traps and destroy the rest of the energy sources. There are two Dawnbreaker traps, the first one can be a lethal trap so stay cautious. Destroy it and move towards the southern side, there is another trap, destroy that and also the trap.  Now, you are left with just the last energy source, look for it on the northern side of the hall. Finally, you can enter the last room from where the barrier is destroyed. There is a Crest Panel in the center, you need to insert the Dawnmaster’s Crest in that panel. After that, your reward the Blood of Lathander Mace will become available.  So, there you have the Inquisitor’s Chamber Statue Puzzle solved! If this guide helped you out then you might also be interested in the Psionic Presence & Spoon of Saltiness guide.

Ancient Altar BG3: What to Put in It & How to Enter Balthazar’s Room

ancient altar bg3

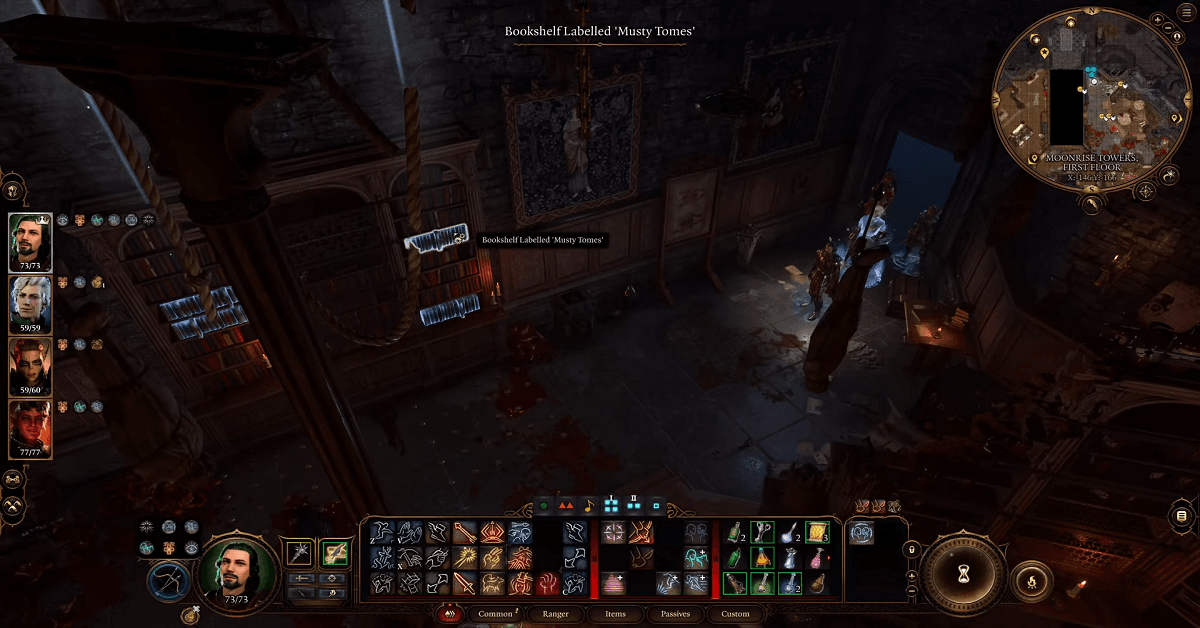
Ancient Altar is kind of a little puzzle in Baldur’s Gate 3 that you find in the Balthazar’s Room. The trick to solving this puzzle involves a simple thing to do, yet most of the players find it difficult.  In this guide, we have covered everything in the Balthazar’s Room including what to put in the Ancient Altar and the exclusive rewards you will obtain from the secret passage. This little puzzle is just like the others you will encounter in BG3 such as the Selune Temple Moon Puzzle. Accessing Balthazar’s Room BG3 Now, the Ancient Altar is located in Balthazar’s Room and to access that room we have a few different ways such as breaking the lock, but I would suggest you go with the most suitable method.  Right off the bat when you enter the Moonrise Towers, speak up with Disciple Z’rell. You would find her upstairs. Just interact with her and make your way around to gain her trust through conversation. Once she is convinced, she will give you the keys to Balthazar’s Room.  Now, that you have got the keys, head straight to the room which is on the east side of the tower. Unlocking the room with the keys won’t get you in any trouble and it’s the most ethical way to enter the room.  Ancient Altar in Balthazar’s Room BG3 Once you are in the room, a huge bookshelf will be in front of you. This shelf is the exact place where the Ancient Altar is hidden. Although you can interact with different parts of it to reveal various elements, since we are looking for the Ancient Altar, it can be revealed by interacting with the upper right section labeled as “Musty Tomes”. The Ancient Altar can now be used by putting in the right item. For those of you who are wondering what would go on in the Ancient Altar, Let me tell you the exact item you are gonna use here. It’s the heart that is accepted by the Ancient Altar. Nothing else will work here except two more items that you can’t get from the Moonrise Tower. These two items are the head of Nere and Karlach and the hand of the Gale. Since these items cannot be obtained from your current location, it’s obvious to go with the heart.  Now, if you don’t have a heart with you in your inventory then don’t worry. There are lots of bodies around you, interact with any of them and pick the heart. Use it in the Ancient Altar and a secret passage will be revealed.  The passage takes you to the secret room of Balthazar where you can collect the exclusive rewards which will help you a lot in your journey.  Rewards in Balthazar’s Room  Balthazar’s Room has various items available for loot. As soon as you enter the room you will notice that there are broken Moonlanterns and dead pixies on the floor. The dead pixies are not of any use here. However, the Moonlantern is an important item that you should not miss.  If you have Gale at your party, head to the ritual circle in the same room and you will get the option to turn Moonlatern into Shadowlantern. But this can only be done by Gale. He will use his engineering skills to make a Shadowlantern.  If you keep the Moonlantern, you can use it later to travel around in the shadowlands safely. This lantern will protect your entire party in the shadowlands from all sorts of threats. So, you know it’s a really important item at this point.  Apart from that, don’t forget to unlock that locked chest. Inside it, there are two essential items, the Coldbrim Hat and Elixir of Necrotic Resistance. The Coldbrim Hat is so special that you can find it only in two places and one of them is your current spot. The other one is Sorcerous Sundries.  This has a unique ability that is entitled to its wearer. It will allow the wearer to inflict 2 turns of Encrusted with Frost, this will happen once per turn. There is another special ability that comes with it. It’s called the Coldbrim Chill, your target will be affected with 2 turns of Encrusted with Frost if it gets inflicted with any spell condition.  Once you have collected all the items you can move towards the Ketheric’s Room.  Ketheric’s Room  Balthazar’s Room also gives you access to the Ketheric’s Room. However, there are a few other ways to get into this room as well. But since you are done with Balthazar’s Room, why not head to the next room? It’s easier to access it from here.  Just head to the balcony of Balthazar’s Room and look for a metal door, it takes you to Ketheric’s Room. The room is being protected by Squire. You will need to pass ability checks in order to remove Squire from the guarding position.  Once you do that, you can freely explore the room and collect various items. There is a book called Elder Brain Domination. There is also an uncommon cloak called Cloak of Elemental Absorption. You can use it during the battles to absorb some amount of magical damage and then use it as an attack in the next turn. It’s a pretty useful item. You will also find some letters in the room related to Enver Gortash and Balthazar. FAQs What Do You Insert Into the Ancient Altar BG3? You can try out various body parts to insert in the Ancient Altar but none of them will work. The heart is the only item that can be used in the Ancient Altar. If you have the head of Nere and Karlach or the hand of Gale then you can also use these in the Ancient Altar.  Where is the Ancient Altar in BG3? The Ancient Altar is hidden in the bookshelf of Balthazar’s Room. This room is located in the Moonrise Tower. By interacting with Ancient Altar you … Read more