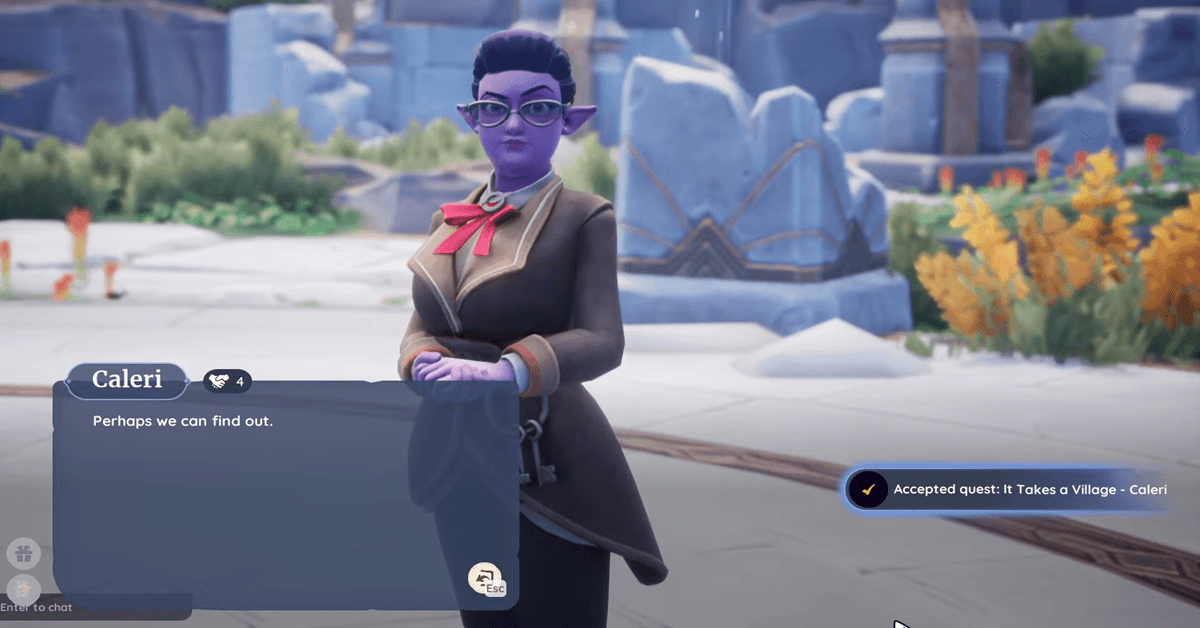
GamersPlan

Sims 4 Male Hair CC Packs – The Only Male Hair CC Collection You Need

Let’s be honest, we all know the secret to building an unforgettable sim not only lies in their killer wardrobe but also includes a dashing hairstyle. That’s why a great hairstyle can change our Sim by a lot.  Based on my experience, I have dived a lot deeper into the Sims 4 CC universe and found the best male hair CC. For your convenience, I have added them here. I’m pretty sure you will end up adding these to your CC folder.  Let’s begin! Randall Hairstyle by Simcelebrity00 Man just look at the haircut, it speaks for itself. I have been a huge follower of Simcelebrity and their collection of CCs is just never-ending. It was hard to pick the best one but I just managed to do so.  Here’s the Randall Hairstyle for you, perfect for any male sim out there. This messy mid-long hair with clean sides and back is definitely a must-pick for your sim. Give your sim a modern look with this CC. Cali Waves by CEEPRODUCTIONS We have another long hairstyle for our male sim, but this time it’s from CEEPRODUCTIONS. This one is a much thicker style and it comes in two versions, with strands and without strands.  So, if you are not looking to add strands than you can go with the second version. Plus the best thing is it has 24 swatches. This is a must-try style for your male sim.  Ulrich Hair by Aladdin-The-Simmer Here is the full-length hairstyle. This one is from the one and only Aladdin-The-Simmer, all thanks to him for giving us such a perfect long hairstyle.  It’s a clean style rather than a messy one which is why it is much better. It looks perfect the way it is. Also, the 24 swatches that come with it are worth trying.  Vedro Hair by JNY This is another hairstyle from JNY. I know it’s a long one again but this time it is quite different from previous ones. It has short bangs at the front and has kind of a mid-length at the back which is why I picked this one.  You should try out this on your sim to see if it suits him. It also has 24 different colors so it will definitely be a great match.  Chid Haird by JNY Another killer-looking hairstyle by JNY. This one is a must on my list and probably you would too love it.  Chid Hair showcases the short hairstyle with strands included. As you can see the look of a male sim with this style is worth trying it out. The short sides and back add more nice look to it.  Salem Hairstyle by Simcelebrity00 I have tried this one by Simcelebrity00 and thought you might like it as well. So, I end up adding it to this list.  This slick back style has a clean and smooth look. Especially, the short length strands at the back make it extra nice.  Rio – Short Curly Hairstyle by AurumMusik I mean who doesn’t love curly hair? On a male sim, they look outstanding. You can get an idea of how good they would look on your sim just by looking at the example above.  I would recommend you try this hairstyle by the talented AurumMusik. The 30 swatches this style has will definitely match up with your sim.  Matthew Hair by Monharicot All credit goes to Monharicot for such brilliant work. This extra bold hairstyle will turn your sim into a handsome and masculine man.  It’s a short-length curly hairstyle that fits best with almost any face look. I have tried it on my sim and now it’s your time to add to your CC folder.  Nikolas Hair by JohnnySims A nice and clean short hairstyle by Johnny Sims. This one has nice and clean sides and back with a short hair length on top and front.  The crisp strands make it so much fresh. What you think? Do you like it? Then go on and take it straight to your Sims 4 CC folder.  Hair No. 36 V1 by Hezeh A nice, clean, and high-quality hairstyle by Hezeh. Just look at the finishing of this style. It looks more realistic.  The finishing and looks of this style made me add it to this list plus it looked awesome on my sim. They have added 77 swatches with it so it will for sure match with your sim.  Big Loc Twists by Khadijah551   Are you a fan of full-length braided hairstyle? Look no further, this hairstyle by Khadijah551 is your full stop.  Apply it on your sim and see the magic. The long braided style is my go-to choice for almost every day. And it would probably be for you as well.  Hair No. 17 by Hezeh Hezeh has already blown us away with tremendous hairstyles and this one too is mind-blow. This man bun has got all my attention, plus the long strands at the front, are incredible.  I’m pretty sure you will try it out and most probably keep it as a permanent style for your male sim.  Calvin Hair by Tricoufamily  Here is one more medium-length hairstyle for your sim. This is from the Tricoufamily is an all-rounder haircut that suits best with oval, diamond, or round-shaped faces.  All of the elements of this cut make it a perfect style for your male sim. My sim was rocking this cut and I expect that it would look great on yours too.  Hadeon Hair by Wistful Castle A bold and handsome look can be achieved with this Hadeon hairstyle by Wistful Castle. The style presents a clean look at the back and sides while it has a bit of lengthy hair at the front with strands all over.  What else is needed for a style to look this good? We can’t ask for more. Try it out on your sim and see how it transforms him.  Lysander Hair by JohnnySims Just by the first look, you … Read more

Pokemon GO Fest 2025 is Bringing the Heat with Volcanion, Zacaian, Zamazenta, and a Global Raid!

Are you guys ready to take on the heat of Pokemon GO Fest 2025? Niantic has just announced massive news for Pokemon die-hard fans. Yes! This breathtaking event is happening with global raids and legendary debuts of Pokemon. Here are the full details of the biggest Pokemon GO event for this year.  The Debut of Volcanion The mythical steam Pokemon, Volcanion is finally making its way into Pokemon GO! It is known for its Fire/Water type nature. This beast Pokemon will take on the event with full grace. GO Fest 2025 will be presenting this first-ever mythical Pokemon to debut in global raids.  It will be a game-changing move for most of the players out there. This has been one of the rarest Pokemon until now, but with its debut, it will definitely be a historical moment for GO Fest.  Zacian and Zamazenta Are Coming Back That’s right! The Galar’s Dynamic Duo, Zacian, and Zamazenta are returning back into five-star raids. This one is huge for Pokemon GO fans. There is a rumor that they will be rocking the exclusive moves to shake up the PVP meta. Also, team up and be ready because they won’t be here for long.  GO Fest 2025 Event Schedule Pokemon GO Fest 2025 is coming to big cities starting in May. It will be hitting with In-Person and Global events across various cities around the world. So, players from around the globe will have the chance to attend these events.  In Osaka, Japan the event will be happening in the month of May. In Jersey City, it will be hitting at the beginning of June, and finally, in Paris, the events will take place during the middle of June. For exact dates, you can visit the official website of Pokemon GO.  Experience the Real Fun with Ticket Add-Ons The event is offering some add-ons that you can purchase along with your tickets. These add-ons are perfect to take your event experience to another level. Here’s what it’s all about:  These add-ons will definitely add a layer of neer ending fun to your day at the event. Each of them comes at a different price. You will need to purchase them with your ticket to avail the benefits they are offering.  Mark your calendars and be ready to catch the event at any of the three destinations. This is gonna be a huge event for Pokemon lovers. Let’s Go Team Pokemon!

Crafting Boost OSRS (Old School RuneScape): Full Guide

Crafting Boost in OSRS is no doubt the best feature when it comes to taking your crafting game to the next level. Without crafting items you are pretty much halting your progress. So, it’s necessary to keep working on your crafting levels.  Aside from that, we have a crafting boost that gets activated temporarily by using various items. Now, if you are looking for details on these items then you are at the right place.  This guide covers all the important details that you should know. Let’s dive in! Crafting Boost Items in OSRS In Old School RuneScape we have a total of 4 items that give you a crafting boost, and they also give various other stats boosts.  Moreover, each one of them is obtained through a different method and has various requirements.  Crafting Cape The most powerful crafting boost item is Crafting Cape and it’s also hard to get. It’s because it only becomes available when you have reached level 99 crafting. We all know it’s quite challenging to reach that spot.  But, once you have done that, this Crafting Cape can be yours. It becomes available at the Crafting Guild, there will be an NPC Master Crafter who sells it for 99,000 coins.  As soon as you have got the Crafting Cape, you will be granted the boosts. As for the crafting, you have the option to perform unlimited teleports to the Crafting Guild.  Additionally, you will receive the defense stat boost. This will be different for trimmed and untrimmed versions of Crafting Cape.  Poison Chalice  Poison Chalice is a free-to-get crafting boost item. Just visit Stankers and get it from him. Drinking it will leave you with a random effect. Each effect has a different stat boost.  Although you will get a random effect this is all based on chance. The top 3 effects based on the chances are You feel a lot better, You feel a little strange, and It has a slight taste of apricot.  The first effect gives you healing of 15% of the total hitpoints and it also boosts your Thieving ability by 1. The second effect lowers attack, defense, and strength by 1 and boosts crafting by 1. The third effect has no boosts.  Mushroom Pie This is another crafting boost item that also gives you a healing boost. It is the second-highest crafting boost item in OSRS. Consuming it will heal 16 hitpoints and you will also recieve a temporary crafting boost of 4.  Now, to get this Mushroom Pie, you will need to prepare it at the Cooking Range. But you should have level 60 Cooking on you.  Once you have access to Cooking Range, just bake the Uncooked Mushroom Pie and you will have Mushroom Pie that can be consumed.  Spicy Stew (Orange Spice) Spicy Stew is the fourth and last crafting boost item in OSRS. This can be obtained by only those who have finished Freeing Evil Dave subquest in Recipe for Disaster.  To prepare a Spicy Stew you will need to get the regular stew and spices. Now, do remember that each of the spice boosts different skills.  For crafting boost, you will need to use Orange Spice with regular stew. Also, using the Spicy Stew doesn’t guarantee a boost. You can either get an increase or decrease in level by +5 to -5. It’s a totally random thing.  FAQs What Can Boost Crafting OSRS? There are a total of four items that can be obtained and used to boost crafting in OSRS. Each item is obtained through a different method and has a different level of boosting.  The best-boosting item is Mushroom Pie followed by Crafting Cape and Poison Chalice. And the last item is Spicy Stew. We have explained these items above in detail.  What Spice Boosts Crafting in OSRS? It’s the Orange Spice that can boost the crafting in OSRS along with other skills. But, you know it’s quite random that you get the boost. Sometimes you may get a decrease in level.  It is not guaranteed that you will receive a boost every time, it is totally random and you can receive it anywhere between +5 to -5. 

BG3 Dominate the Brain – The Consequence & How to Deal

Dominate the brain is one of the options that you get during Confront the Elder Brain Quest in Act 3. In Baldur’s Gate 3, there will be multiple times when players meet the talking brain, the very first time is at the beginning during the prologue.  But this time, you are confronting the brain as your opponent and it will be the only way of getting rid of tadpoles.  Confront Elder Brain is quite a long quest that is based upon several different sub-quests. Control the Elder Brain is one part of it, here you get the option to Dominate the Brain along with a few others.  If you are too curious about what happens when choosing this option then keep on reading to find it.  Dominate the Brain in Sub-Quest Confront Elder Brain  When confronting the Elder Brain, the game gives you several different options and almost all of them have pretty much the same consequences.  Except Dominate the Brain. It doesn’t matter which option you choose the Elder Brain is extremely powerful and none of the options will harm him.  However, if you try and choose the option Dominate the Brain, you will get the (Strength) DC 99 check. Upon passing it with a critical success, apparently, there won’t be any difference but trust me this would help you out in the final battle with Elder Brain.  What this option actually does is it will put a debuff on Elder Brain called Against all Odds. It will take away it’s health by 20%. So, in the final battle, it will be a lot easier to defeat him.  As soon as you choose this option, you will be presented with the DC 99 Check. Upon passing, a cutscene will be played where your character will shoot fire shots toward the brain by assembling three gems.  These shots will land on Elder Brain’s head and it will get the debuff although there won’t be any appearance of that. Soon after that, the Emperor will spawn beside you and take you along with your entire party to the Astral Prism.  After that, you can continue the quest from Astral Prism. There will be tons of action in the Astral Prism that will involve the Emperor, Orphic Hammer, and Raphael.  Also, you will have to free Orpheus. He will then talk about the Githyanki Egg. He will then become your party member for a little while.  The next phase will be in the Upper City where the real deal will happen. This will be the beginning of the final battle with Elder Brain.  Here, you will meet various NPCs throughout the city. And eventually, you will meet the brain and defeat him. This is where your Dominate the Brain would help you. During the battle, the Elden Brain will have 20% less health than its original.  To be honest, it’s gonna make a huge difference. Just make sure to pass that Strength DC 99 Check of Dominate the Brain. It will be a game-changer for you.  FAQs Is it Possible to Dominate the Brain in Baldur’s Gate 3? Dominate the Brain is actually an option that you get while confronting the Elden Brain in the first stance. It won’t let you dominate the brain at that point instead it will put a debuff on it which will prove to be a great move for the final battle.  What Happens if You Fail to Dominate the Brain in BG3? No worries, if you fail at dominating it then you will simply be transferred to the Astral Prism by the Emperor. Even if you choose any other option, the outcome will be the same.  However, Dominate the Brain option can put a debuff on the Elder Brain if you successfully pass the DC 99 Check.  So, that’ everything regarding the Dominate the Brain guide in Baldur’s Gate 3. Also, check out our other Baldur’s Gate 3 guides. Selune Temple Puzzle & Hhune Mausoleum Puzzle. And if you want to know how you can get thieves’ tools, then read our exclusive guide on it.

SHONEN ONLINE 2 Official Trello Page Link

shonen online 2 trello

The Trello page of SHONEN ONLINE 2 provides tons of useful stuff regarding the in-game controls, events, races, and much more. That’s the only place where you can learn everything to know everything about the game.  SHONEN ONLINE 2 was released in March 2023 by ASR Studio. Until now it has made its strong presence in the Roblox world.  If you are too preparing to become a master in SHONEN ONLINE 2 then there is no better place to start than its official Trello page.  What is Shonen Online 2 Trello The Trello page of SHONEN ONLINE 2 is packed with everything that you would find in the game. It doesn’t matter if you are a newbie or an old player who is looking for something that has been missed.  The Trello page will help you find everything that’s giving you a tough time.  The page is divided into multiple sections and each one has useful stuff. Such as there is a section of rules that tells the major rules to play the game. Then there is a commands section that talks about the controls.  As you move forward, you will some other spaces such as different clans, races, skills, fighting styles, weapons, artifacts, and tons of other stuff. It’s more like a wiki for SHONEN ONLINE 2.  Trello & Discord Links So, enough of the game’s intro, here are the links you have been looking for.  SHONEN ONLINE 2 Trello SHONEN ONLINE 2 Official Roblox Game How to Use Shonen Online 2 Trello It’s quite easy to start with Trello of SHONEN ONLINE 2. When you visit the board, it will be based on different sections. Each section has detailed info that will help you get familiar with the game’s features.  If you ask me what’s the best way to use Trello? I would recommend using it side by side with your game. Right off the bat, get to know the basic controls. Once you have learned that, move on to another section.  You can try out the scrolls and artifacts or maybe the items. Gradually move toward the right-side sections of the Trello page and eventually, you will master the entire game mechanics.  The Game Information section contains the major rules and features of the game around which the game revolves. Such as Capture the Flags, Rank Requirements, Scooping, and Rules. The next section is Starting Out that gives you the answers to basic questions regarding the game’s playstyle and stuff like that. Moving on, you will see In-Game Events that will talk about the different events that you can join. Next to it, is the Villages and Arenas section, it’s actually the playing grounds where the real stuff happens. Then we have Clans, Race, Skill Tree, Fighting Styles, NPCs, Armor, Weapons, Scrolls, Talents, Specialities, and any other sections. Just dive in and get yourself familiar with everything. So, that’s everything for Shonen Online 2 Trello. Visit the Trello and enjoy the game. Also, check out our other Trello links for Roblox games.  SHINDEN Trello LOCKED Trello SAISEI Trello

Hook of Time in Sea of Stars: How to Get & Use it?

Surely, obtaining the Hook of Time can be a mind-boggling task in Sea of Stars. Players want to enjoy the experience at Golden Pelican but they can’t get access to it just because they don’t have the invitation.  That very invitation can be found with the help of Hook of Time and some other tasks linked with True Ending. Also, Garl is the guy who would give you the Hook of Time.  But, how can you actually get your hands on it? Well, that’s what I have covered in this guide. Keep on reading to discover the method.  Obtaining the Hook of Time  Obtaining the Hookk of Time involves completing some pre-requisites. You must have already collected all the 60 Rainbow Conches and defeated the Fleshmancer’s Lieutenant.  Lighting up all the 7 pillars on the Moorland Ruins is essential. This involves various tasks which are actually the part of main storyline and also the True Ending. Here is the list:  Once you have done all of it by completing the tasks linked to True Ending, you can visit the campsite where you must talk to Garl Twice and he will give you the Hook of Time.  Using Hook of Time to Obtain Glided Invitation  After getting the Hook of Time, you can use it to fish on an island with the “???” in the southern area. This will get you the Glided Invitation for Golden Pelican.  So, with the Hook of Time head to the fish-shaped island with the “???”. Jump into the fishing spot and look for the shiny object in the water. Use the Hook of Time to pull it out, this will bring out a secret cave entrance.  Enter the cave and take down all the enemies, on the north side there will be a locked door. Now, head towards the southwest and dive into the water. Look for the whirlpool, and use it to go to the other side.  Here, you will end up in a room with a chest. Loot the chest to get the Fishing Dungeon Key. Grab the key and go back to that locked door. Unlock it and you will be in a pool area with fish in it.  You need to catch that glowing golden-colored fish, either use the hook or jump in and catch it with your hands. Grab the key from the fish and head towards the north side using the stairs.  Clear the area from enemies and keep on moving towards the north until you end up in a room with a pool. This exact pool has a huge fish in there, take out your fishing rod and catch that fish. It might be a bit harder but you have to catch it.  As soon as you catch the fish a scene will be played and you will eventually get the Gilded Invitation for Golden Pelican.  FAQs How to Use Hook of Time in Sea of Stars? The Hook of Time is used in pools inside the hidden cave on the fish-shaped island with “???” on it.  Here, you can use the hook to catch multiple fish that have keys to locked doors for the hidden cave and also the Glided Invitation for Golden Pelican restaurant.  How do you get Garl Back in the Sea of Stars? I know Garl is a super important character when it comes to getting Hook of Time. You can revive him if you have completed all the sidequests plus you have collected all 60 Rainbow Conches. Also, don’t forget to read our guides on Turbo Cookie, Artful Gambit, and Spa Worker.

Spa Worker & How to Run Spa in Sea of Stars

spa worker sea of stars

Spa is a building in Sea of Stars that you can use for a stat boost, but this needs to be run by a spa worker. And even before that, you must construct it by performing various tasks.  Sea of Stars has attracted thousands of players to it due to the features and storyline it offers. Being such a fun game, it sometimes becomes challenging for players. Like when they are finding some stuff such as Turbo Cookie, Artful Gambit, and other items.  However, due to its unique story players find it super interesting to dive in deeper even with the challenging situations. Suppose you are too having a hard time with the Spa, especially in finding the Spa Worker then I have got you covered.  Let’s dive in and see where this NPC is hiding. Finding the Spa Worker in Sea of Stars Spa can prove to be a helpful location for you in Sea of  Stars. In order to run it, you need assistance from someone and that is Chi. He would help you in taking care of your spa. But, it’s not that straightforward, if you want him to be at your spa, you must give him something in return. And that is helping him out on his Stonemasons Outpost on Sleeper Island. The problem here is that the water flow of this island has been cut off somehow and you have to restore it.  This might seem a tough thing to do but all you need to do is explore around the outpost area and look for a Jade Tap. Interacting with it will restore the water flow of Stonemasons Outpost.  Once you do that, head back to Chi at the Stonemasons Post where he will be bathing. Speak to him and he will eventually make his way to the Mirth and at your spa.  Building Spa in Sea of Stars The Spa can be built by obtaining those building plans and then interacting with Jirad at the Mirth. For this purpose, you need to get those 39 Rainbow Cnoches and hand them over to Conch Merchant in Lake Docarria.  Doing so will get you the building plans. Now, I would recommend you to head to the Mirth and speak to Jirad the Constructionist. He will build all 4 buildings for you. But, in order to run them, you will need to bring in an NPC for each of them.  For Spa, we have already covered the above. Once Jirad has completed the construction, follow the above method to ask Chi to move into your spa and run it.  The spa has a fee that must be paid by each user, this fee is 250 Gold. Did you know that each of your teammates can use the spa in order to get a stat boost? Well, that’s what the pa is used for.  Each one of your teammates will get a specific stat boost. Here, have a look.  So, in my opinion, it’s truly worth it to get the spa on Mirth and use it to get a bonus stat boost. This is gonna help you in battles around the different parts. Most importantly, during the boss battles you will notice the difference.  FAQs Where is the Spa Worker in Sea of Stars? The Spa Worker is an NPC named Chi in Sea of Stars. Just like for the rest of the buildings, you would need him to run the spa.  Chi can be found at Stonemasons Outpost but he would require you to open the water supply of the outpost. Once you do that he will disappear from the the outpost and reach your spa.  Is the Spa Worth it in Sea of Stars? For sure, the Spa is worth your little effort. It will give your characters a predefined stat boost that is immensely helpful in fights.  Each of the characters you have in the game will get a specific stat boost. Although, it will cost you some Gold. But, I would say, it’s truly worth it.

Artful Gambit Sea of Stars: Get & Use in the Best Way

Sea of Stars offers dozens of relics and Artful Gambit is one of them. It is packed with immense power but it comes at a cost. The user will lose most of their health when it is equipped but they will get its true power that can even destroy high-end bosses.  In this guide, we have covered everything important about Artful Gambit and also how you can use it effectively against most of the bosses. Keep on reading to find out everything.  How to Obtain Artful Gambit in Sea of Stars Artful Gambit is obtained from a location that becomes available after you have activated the Speedball Network Station at Es’tristae’s Lookout.  Once you have done head to the Cerulean Island which is accessible from Cerulean Expanse, here you will have to reach the exact location of Throne of the Queen That Was. At this spot you can have two major items, the first is Artful Gambit Relic and the second is Rainbow Conch.  The place has a specific mini-boss that you can choose to fight with. Also, this place has a main story “The Cerulean Expedition”.  How to Use Artful Gambit Effectively Against Bosses Now, using Artful Gambit in boss battles and even in normal fights can be extremely rewarding but you should know how to use it in the right way. This is a pretty hard-to-control relic that can make you die if not used correctly.  So, here are some important tips. You can activate or deactivate it at any time, I would recommend to activate in the boss battles. Doing so will give you tons of additional damage. You can choose to activate it when you are roaming around but it can be painful sometimes. However, you can still knock down the enemies with just a single hit if it is landed at the right time.  Make sure not to activate it right after you have obtained it. Doing so might bring out the trophy. So, roam around for some time and then try activating it when in a tough battle.  Artful Gambit can become even more effective when it is paired up with various trinkets. Here are some of them:  If you try to equip trinkets that boost HP, you will notice that they are not useful here. Because Artful Gambit decreases the user’s HP by 95% even including that comes from equipped items.    To make this relic even more powerful, try equipping other relics with it, such as Sixth Sense and Double Edge. The first one will give you a chance of auto block while the second one will lower the target’s defense.  This is everything for the Artful Gambit guide. Also, read our guide on Turbo Cookie in Sea of Stars.

Escape from Tarkov: Survivor Class Complete Guide

escape from tarkov survivor class

You might have seen a Survivor Class in your statistics tab, and you would be wondering what this actually is. Well, the survivor class is basically a term that defines your overall playstyle in Tarkov.  Now, there are multiple survivor classes in Tarkov and each one comes entirely from a player’s playstyle like what they are doing in the game, their activities, and every other thing they have been doing in the game. To know more about it in detail, we have prepared this exclusive guide. So, let’s dive in! Survivor Class in Escape from Tarkov Most of the Escape from Tarkov players don’t even know about the survivor class. It is something that is directly connected to your gameplay style. We all know there are tons of things to do in Tarkov.  It is an extremely realistic game with dozens of features. That’s exactly what plays an important role in differentiating the gameplay style of each player. Some players like to loot stuff, some are more towards hunting and killing with different weapons, while some like to do unique stuff.  So, in short, your survivor class is based on the experience that is coming from different things. Such as if you are more towards killing then most of your XP comes from killing similarly, if you are more engaged in finding stuff and looting then most of your XP comes from that.  Based on these you will get a corresponding class which can be changed over time if your activities are changing. Let’s say if you switch your playstyle then it will change your survivor class after some time.  This is what survivor class is all about. For now, let’s have a look at all the possible survivor classes in Escape from Tarkov.  Marauder (Rat) This is the first and a major survivor class. The game assigns you this class when you spend more time looting items and gain experience from that. The players will get a tag of “Rat” if they are in Marauder class.  Neutralizer (Chad) This next is another major survival class in Escape from Tarkov. This class is mainly assigned to players who spend most of their time in killing and hunting. It can be either PVP, PVE, or taking down bosses.  Anything that involves killing and you get most of your XP from it then you will get this survivor class. The players will also get a tagline of “Chad”.  Survivor Class This is another class and it is exactly based on what its name suggests. Yes, the “Survivor Class” comes from the survival tactics that you use in the game. When all of your experience is coming from survival, you will gain this class.  Paratrooper or Paramedic Players who are getting most of their XP from healing get this survivor class. Now, if you get a lot of damage from different things and heal yourself eventually then you will definitely obtain Paratrooper class.  However, this class is quite challenging to obtain. Because when you heal yourself, you don’t get a lot of experience points. And this could be taken over by other activities. So, if you are planning to get Paratrooper then you should carefully notice your activities and focus on obtaining experience mainly from healing. So, these are all the survivor classes in Escape from Tarkov. Now, if you are not seeing any of these classes in your stats then the chances are you are lower than level 20. Once you hit level 20 or above, you will be assigned one of the above classes based on where most of your XP came from.  FAQs What Does Survivor Class Mean on Tarkov? Survivor class is a tagline that is assigned to you based on your gameplay style. Currently, there are four survivor classes, Paratrooper, Survivor, Neutralizer, and Marauder.  Each one of these comes to you based on your activities and from which activities you are getting the most experience.  What are the Different Classes in Tarkov? Escape from Tarkov has four different classes, Paratrooper Class, Neutralizer Class, Marauder Class, and Survivor Class.  Players are assigned these classes based on their activities. Paratrooper is given to those who get most of the XP from healing. Neutralizer is assigned to those who get most of the XP from killing. Survivor is assigned to those who get most of the XP from surviving. And finally, Marauder is assigned to those who get the most XP from looting.

Sea of Stars Turbo Cookie: Where to Find & How to Get It – Full Guide

how to find turbo cookie in sea of stars

Turbo Cookie is an early-game item that you need to find after a request from an NPC ghost or you can find it before the ghost requests it. It’s a side quest just like many other quests you will meet in Sea of Stars.  For most of the beginners, it becomes a little challenging to find Turbo Cookie. But with a little effort and a bit of exploration, it can be found. We have covered everything related to Turbo Cookie in this guide. Keep on reading to discover its exact location and more.  How to Start Side Quest Find Turbo Cookie in Sea of Stars I’m pretty sure most of the newbies would spend hours and still won’t find Turbo Cookie, however, it’s not that hard to find. That happens because they don’t know the exact spot where to look for it.  As mentioned earlier, you will need to have a conversation with an NPC ghost who would request you to find Turbo Cookie although, it’s not necessary, you can also speak to him after finding the Turbo Cookie.  As for the ghost, he is specifically in the graveyard area in the Town of Lucent. When you talk to him, he will ask if you have seen his Turbo Cookie and then request that you find it for him. At this point, you will need to explore the area to find the cookie.  One thing to notice here is, that it is not required to speak to the ghost before finding the cookie, you can find the cookie first and then visit the ghost.  Turbo Cookie Location in Sea of Stars So, let’s jump on to the main part, where you should look for it. In order to find Turbo Cookie you will need to reach the central area of Lucent. And look for the attic, specifically the First Stage of Grief (Inn). Here you can see a chest, somewhere around the dust and webs.  But you can only reach this place if you have Graplou. It will help you traverse through ledges that lead to the central area of Lucent and the attic. So, first off, work towards the main story of the game until you have got the Graplou.  Once you have it, head back to the Lucent and move ahead following the route until you reach the bridge which will be on the eastern side of Lucent. Here, you can use your Graplou to reach the upper area.  Keep on moving in this area on the left side and then downwards, you will eventually end up on the roof. From here, enter the attic area and look for that chest. Search it and grab the Turbo Cookie.  Now, head back to the ghost NPC and hand it over to him. Right after that, you will have to defeat him. It won’t be a tricky battle, finish him off and search the graves around them to grab the Shed Key. This will allow you to unlock one of the locked shacks in the area.  Usage of Shed Key in Sea of Stars Completing this side quest will also allow you to get access to the exclusive Quiz Master’s Game Room. This is when you use the Shed Key in one of the locked shacks in the same area near the bridge. This shack takes you to the exact place where Quiz Master’s show is going on. Here, you can interact and participate in the game. You will be asked 11 different questions. Answering correctly each one of them will reward you with different items. So, make sure to correctly find the right answers to get the rewards. In the end, when you have answered all 11 questions correctly, you will be rewarded with Filmsy Hammer which is a bonus reward. What is Turbo Cookie in Sea of Stars Turbo Cookie is a unique item in Sea of Stars. When you start your journey in Sea of Stars, there will be dozens of items that you will find. Each one has a specific purpose and will prove to be super helpful in your journey. Turbo Cookie is not any consumable item, rather it’s just a special and unique item which is required by an NPC in the Town of Lucent. It is sort of essential thing to find this cookie and give it to the right NPC after which you can continue in the main story. It is you can say connected with other important parts of the game. Like if you are unable to find the Turbo Cookie then you cannot obtain Shed Key which takes you to the Quiz Master’s show. That show is really important because that’s where you get useful items which are needed in your journey ahead. If you don’t get those items, you won’t be able to progress in the game. So, in short you have to complete this Turbo Cookie side quest at all costs. FAQs Where to Find Turbo Cookie in Sea of Stars? To find Turbo Cookie you will need to head towards the roof side of the Inn in the Lucent. From here, enter into the room that looks like an attic. Look for the chest that contains Turbo Cookie and head back to the place where that ghost enemy is located.  Give him the Turbo Cookie and defeat him. Afterwards, search the graves to find Shed Key which you can use to unlock one of the shacks in the area.  That’s all for Turbo Cookie Guide in Sea of Stars. By completing this, you will get access to Quiz Master’s game room which is an essential part of the story. So, make sure you finish this part.