
GamersPlan

ACNH Beach Design Ideas – The Best Ideas For Your Island

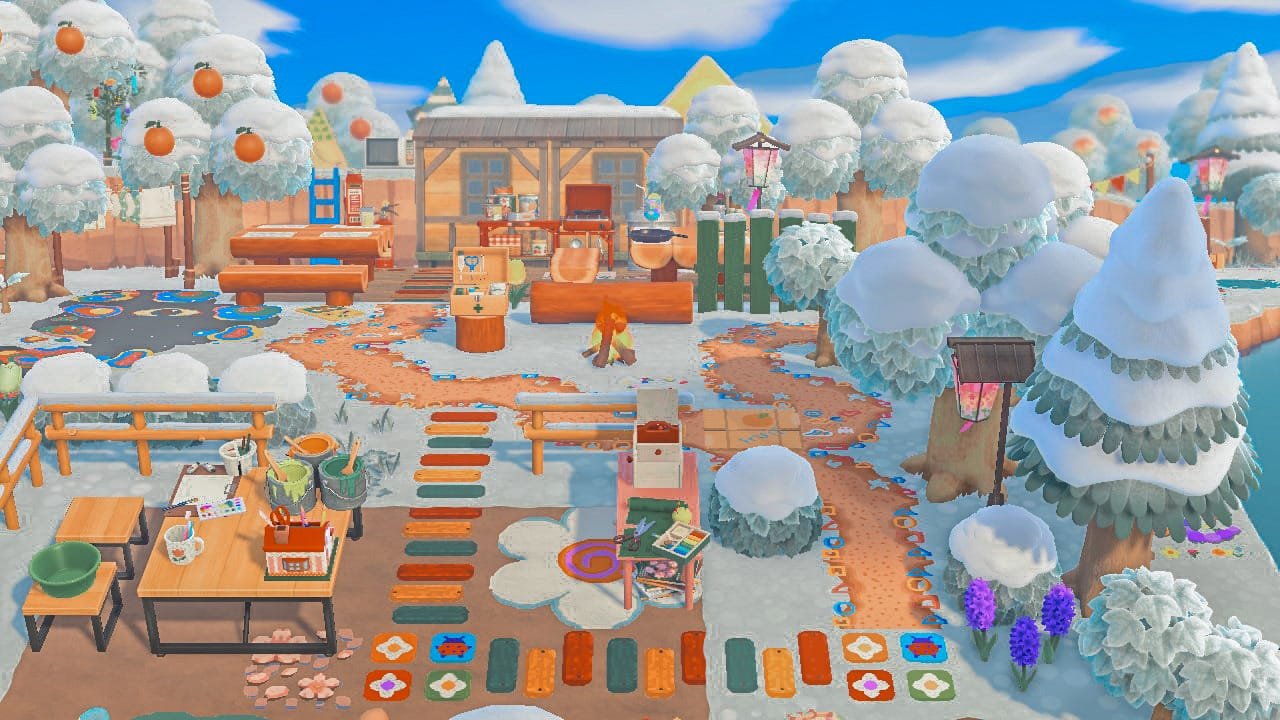
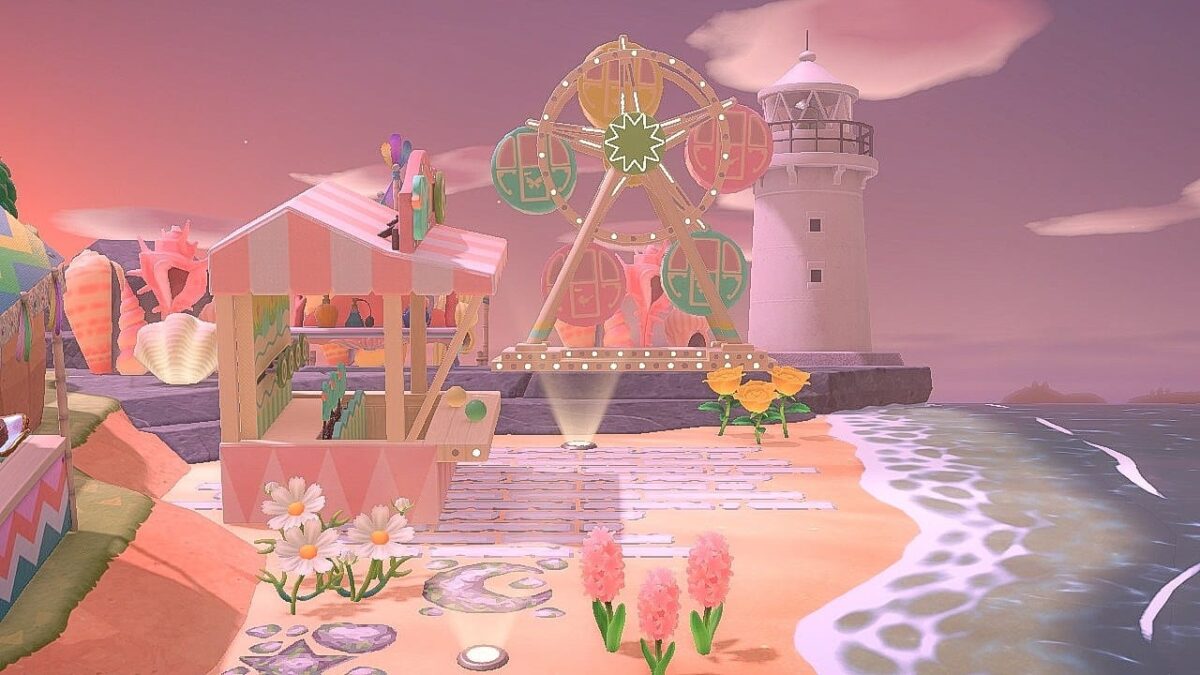
Sometimes it can be frustrating to come up with great ideas when designing your island in Animal Crossing.  All we need is a little spark and we are good to go. Keeping that in mind, we have made a list of over 15 great ideas to make your island alive.  Go through our list and see which one of these ideas amazes you. Let’s have a look! Cozy Camps This simple yet elegant beach camping idea is enough to stun anyone. If you want to give this look a try, grab two uniquely designed tents alongside cushions and two rugs. To complete this look, you can also add a basket, a plant pot, and an antique lantern. Boho Breeze Seaside Lounge This is the perfect little getaway spot right on the rocky part of the beach! It uses lots of light wood and pastel colors to keep things feeling airy and bright. The hammock between the palm trees is super inviting, but the coolest part is the backdrop that looks like macrame hanging chairs. It’s such a clever optical illusion! With the cute rug, the tasseled umbrella, and little candles, it’s the ultimate place to sip some coffee and watch the waves roll in. Pastel Beach Picnic Spot This setup is just so sweet and summery! The creator used lovely custom designs to make those big pink and sage green blankets right on the sand, they look perfect with the fringe edges. It’s a great mix of relaxing items like the white kid’s tent, the hammock, and those comfy Moroccan poufs. I love the little details like the fish drawn in the sand and the sandcastle. It looks like the perfect spot for Bree and Flurry to spend a lazy afternoon by the ocean! Tropical Surfside Cafe This little strip of beach has been turned into the cutest surf shack and snack bar! The creator used the Azumaya gazebo perfectly to create a shaded hut, and that flowery surfboard really adds to the tropical island vibe. I love the small seating area with the blue umbrella, it matches the ocean water so well. The best detail is the log bench serving as a counter for those yummy-looking popsicles. With all the lush wheat fields and bushes lining the path, it looks like a hidden paradise, and Broccolo definitely seems to be enjoying his ice cream there! Sunny Boardwalk DIY Market This is such a smart way to handle extra DIY recipes! The creator made a lovely boardwalk area right on the sand using a custom wooden deck design. It feels like a little community trading post with those stalls set up to display the recipe cards. I love how cohesive it is, everything uses that light birch wood, from the log bench to the garden wagon filled with flowers. It’s organized, bright, and super welcoming for any visitors stopping by to learn something new! Coconut Shop Who wouldn’t want to enjoy a uniquely designed beach bar? Set up a bar front with some available cocktail drinks and a few bar stools.  You can also place chairs and tables in the rest of the space with some flower plants. Zesty Beachside Juice Bar This spot looks so refreshing for a hot island day! The creator set up an adorable juice stand using a stall with a bright orange slice pattern, and the simple panel acting as a menu is such a smart detail. I love how they placed the fruit water dispensers and coconut drinks everywhere, it really sells the tropical vibe. With those comfy log lounge chairs right next to it, it’s the perfect place to grab a cold drink and relax by the waves! Pool Party This relaxing and calming beachfront will bring you immense joy! To create this idea you need two sun loungers, a small inflatable pool, a radio, and a bunch of decorative flowers! You can finish this look by adding a couple of other things as well, like a surfing board, colorful ball, and sand castle. Minimalist Seaside Coffee Patio This design is all about those clean, neutral tones! That faded white brick path creates a perfect little patio right on the beach without feeling too heavy. The matching director’s chairs and the umbrella table make it look like a high-end resort spot or a peaceful place for breakfast. It’s really nice how the white flowers and the hay beds frame the space to keep it cozy. Small touches like the sandals, the towel basket, and the lace umbrella make it feel like someone just stepped away for a swim. With the party lights strung up above, this place must look just as good at night as it does in the sunlight. Dirt Beach Looks like your unique dream-like beachfront is about to get real!  You can easily pull this look by setting up a couple of sun loungers under a ground umbrella.  You can also incorporate deco pieces like tubes, flowers, plants, and trees. Turquoise Resort Boardwalk This spot is totally giving luxury vacation vibes! The creator used amazing custom designs to turn the flat ground into sparkling turquoise water, making the wooden path look just like a boardwalk over the ocean. It’s such a clever optical illusion that transforms the area into a high-end resort. Francine looks perfectly at home sitting in that white rattan chair with her popsicle, enjoying the view. The garden lanterns lighting the way and the little duck floating on the sandy “shore” add so much charm to the whole scene. It really feels like a fancy getaway to the Maldives! Urban Home This small resort-like home is no less than heaven! You can create this look by setting up a tile ground paired with a couple of plants.  Create and lay out a house at the corner with a bench at the front! That’s it! Relaxing Beach Spot This design is super simple yet extremely gorgeous. I’m a huge fan of simple designs and this is one … Read more

Sims 4 (TS4) Rugs & Carpets CC – Best Home Decor Finds

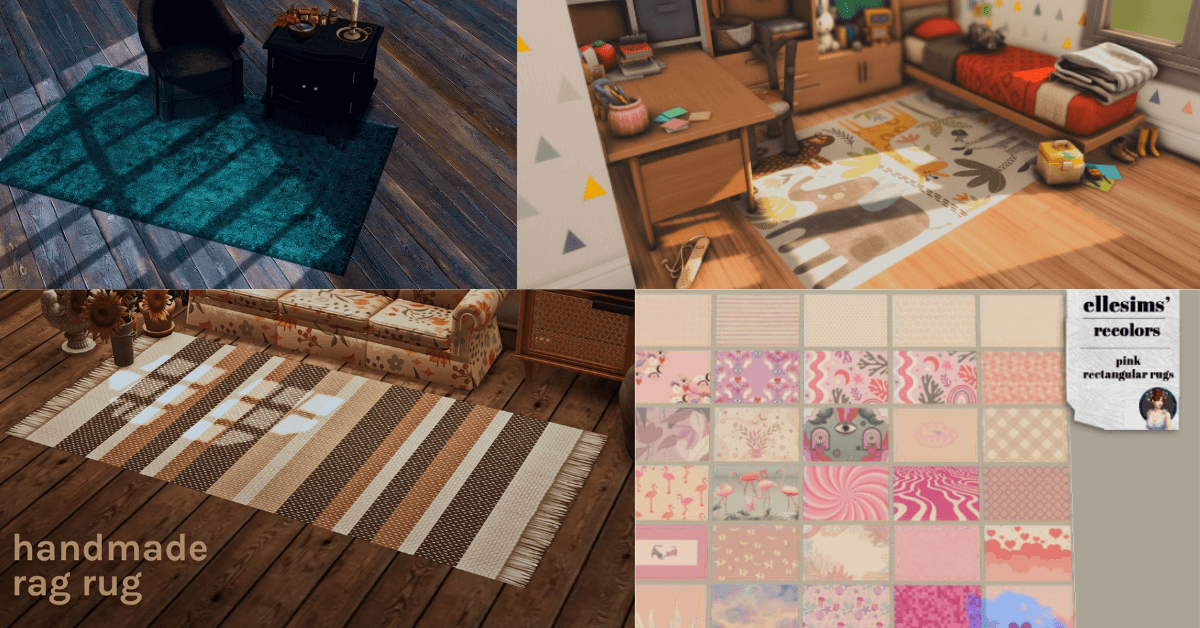
Rugs and carpets are something that will add tons of style to your sim’s home. Find out the best rugs & carpets in this downloadable list that I have created.  This list is based on some of the unique rugs & carpets finds that you can’t resist adding to your home.  They will add lots of style plus they will bring up the vibes of your room. You can find rugs for rooms, bathrooms, door mats, and even carpets for every room.  The list has all sorts of different designs and patterns, pick the one that matches best with your theme.  Parenthood Rug Recolours by Olivisims This rectangular-shaped rug might seem a simple one but trust me this will add tons of looks to your room.  Olivisims has put all the hard work into this rug cc. The best part? It comes in 10 unique swatches and all are downloadable. Pick the one that suits best your room or wherever you are planning to place it.  Fuzzy Loft Rug by amoebae Check out this outstanding piece created by Amoebae. The color of this rug is what made me stare at it. Perfect for living room with any theme.  Its huge size fits perfectly with almost all room sizes. What makes it cooler is its color and edges which are definitely not plain.  Donut Co. Rainboho-tastic Throw Rugs by noideabutsims Look at this rainbow-colored rug, I mean it doesn’t even look like a rug, it’s more like a real rainbow. Who wouldn’t like to add it to their room?  This one is an excellent pick for the kid’s room. It comes in two different designs, one is in the above picture and the other is a shooting star. Definitely one of my favorites. Interior Rug by scodeeyodee Check out these interior rugs by scodeeyodee. They have designed 45 different designs, 30 of them are area rugs while the rest of them are runner rugs.  They have designed some of the most elegant rugs you can find out there for your Sims home. Even they have full-size rugs that you can add to your living rooms.  Cute Rugs by DESCARGAS SIMS These cute rug collections will bring tons of cozy and cute vibes to your room. No matter for which room you choose these rugs, they will greatly fit.  DESCARGAS SIMS has made 25 Swatches for these rugs and trust me each one of them has a unique style. You can find all sorts of shapes, pizza, mushroom, heart, frog, rainbow, you name it.  Morris & Co Greens Rounds by Elizabakersims Do you love and adore round-shaped decor in your house? This could be the greatest rug find for your room.  These round-shaped green-colored rugs will bring a touch of elegance and modernization. It comes with a total of 5 swatches and the best thing is all of them have shades of green.  Totally Tykes Rugs Collection by Simmillercc Are you still finding a cute collection of rugs? Your findings should halt here. Just look at these warm colors and unique designs.  These Totally Tykes Rugs have a sleek and cozy texture that your sims will fall in love with. They can fit in any room since they have 19 different styles. From cute animals to lovely shapes, you can find it all.  Tumbling Toddlers Round Rugs by Simmillercc We have got another collection of super cute and cozy round-shaped rugs, but this time they are for toddlers.  Your little sims will stay safe with these rugs. These rugs come with 15 swatches. From beautiful butterflies to fluffy pandas, you can pick any animal and give your little ones’ room a cozy and safe look.  Hand Made Rage Rug by Kirsicca Give your Sims 4 home a cozy upgrade with this charming handmade rag rug! The vibrant colors and unique patterns will add a warm, inviting feel to any room in your sim’s home. Perfect for creating a snug, lived-in vibe! It’s ideal for a rustic cottage or a trendy modern space. It’s those little touches that make a house feel like a home. This handmade rug collection has 10 swatches.  Velouria Rugs by Periipheral It’s time to transform your sim’s living spaces into something more attractive and lively. These rugs by Periipheral are designed with tons of texture and unique patterns.  They have vibrant and natural colors which are perfect for any space. Each one of them is a unique piece of art. Pick from a huge collection of 79 swatches. Colorful Rugs by RhiannonAR Are you obsessed with multicolor patterns? Well, this is what you should try. These rugs are masterpieces when it comes to multicolor unique patterns.  All thanks to RhiannonAR for such beautiful work. They are definitely worth adding to your sim’s home.  Higher Powers Rugs by Kirsicca Do you like zodiac signs, compasses, or stuff like that? We have just found a collection of round rugs by Kirsicca that fits best your needs.  This collection has 5 swatches in total and all of them are based on extremely unique patterns. I’m sure you won’t find these rugs anywhere else.  Yellow Rectangular Rugs by Ellesims These yellow-colored rectangular rugs are something entirely different from every other rug out there.  These stunning designs with shades of yellow that is making my sim’s house an outstanding space. Wanna try it out? Pick the one that you think will go perfectly with your theme.  Kids Room Rugs Recolour by Midsummermoon20 Are you still looking for kids’ room rugs? You should check out these colorful yet mesmerizing rugs by Midsummermoon20.  Bring up the looks of kids’ rooms with these rugs. They are bigger than the standard rugs, so they cover more space and hence add more fresh look to a room.  Pink Rectangular Rugs by Ellesims Your hassle of finding pink rugs ends here! Just look at this huge collection of rugs by Ellesims. All shades of pink are easily available in this collection.  They will give your sims’ living a … Read more

Alan Wake 2: Follow the Devil’s Trail Guide

follow the devil's trail alan wake 2

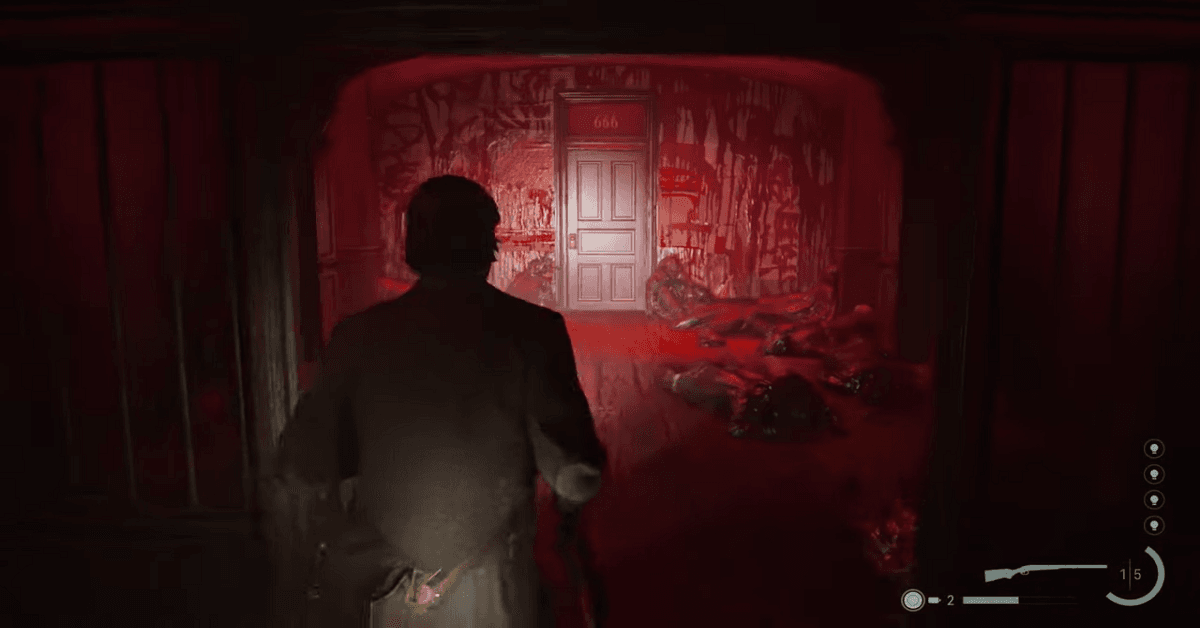
Alan Wake 2 takes you to places where you have to investigate the scenes, Follow the Devil’s Trail is a part of your investigation in Initiation 5: Room 665. This scene is followed in a hotel where you have to jump in and investigate different rooms.  There is a murder at the hotel and you are here to look into the matter and solve it. You will begin the scene from the neon lights sign of the hotel and then you make your way to the ballroom and room 665.  In the end, Follow the Devil’s Trail will be the finishing point of this scene. It will take you out of the hotel and end up all the mess. If you are stuck at this devil’s trail spot then we are here for the rescue. Let’s have a look at how you can get through it.  Alan Wake 2: Follow the Devil’s Trail in Oceanview Hotel  The Devil’s Trail actually starts from the Ballroom area, so once you have begun the Initiation 5: Room 665 and entered into the hotel. Complete the required checkpoints such as investigating the murder site and others.  After all of this, when you have reached the room with a TV which is probably room 224. From here, you can pick up the collectible item.  Now, we need to head back into the Ballroom. Once there, open the plot board and select the Devil on the Ballroom scene. Doing so will transform the entire Ballroom into a place full of shadows. Be ready for some attacks, shadows might attack you. Using your weapons against them can be helpful here.  Echoes will begin surrounding you. If you are being attacked by the shadows deal with them and move towards the backstage area.  From here, you will see two corridors, take the right one, and head straight until you reach the end. A room will be on your right side with an open door. You can choose to save your game at this point to avoid losing progress ahead.  Now, look for another door in this room, this door takes you into a bathroom. Once in there, exit through the next door which takes you to a different room. Now, get out of this room and enter the corridor.  Head on to your left side where you can see a trail of blood and a dead body on the floor. This takes you to the Final Scene. Now, you need to open the plot board and select The Devil on Final Scene. You will see that the blocked way is now opened but unfortunately, the door is blocked by a dead body.  So, you need to turn around and head through the other way following the blood trail on the floor. This is where you end up in the Entrance Hall. Be cautious, there will be shadows in the Entrance Hall ready to attack.  Open the plot board and choose The Devil on Entrance Hall. This is where a passage will appear that takes you to the upper floor and the shadows will start attacking you. Use the flare and Shotgun to deal with all the shadows.  Once they are all finished use the stairs to reach the top floor. Enter the floor and take the right passage. Keep on moving on this corridor following the blood trail on the floor. You will see the big entrance on the left.  Head in there and take the right-side route, move a bit ahead, and then once again turn towards the right side.  Just a few steps ahead and on your left you will see plenty of bodies on the floor and a door to room 666. That’s where you want to go and finish up this scene.  That’s all for Alan Wake 2 Follow the Devil’s Trail Guide. Do check out our guide on A Mother Crow Sits on Her Nest Puzzle.

Fae Farm Queen Bee – How to Get & How to Use Her? Full Guide

fae farm queen bee

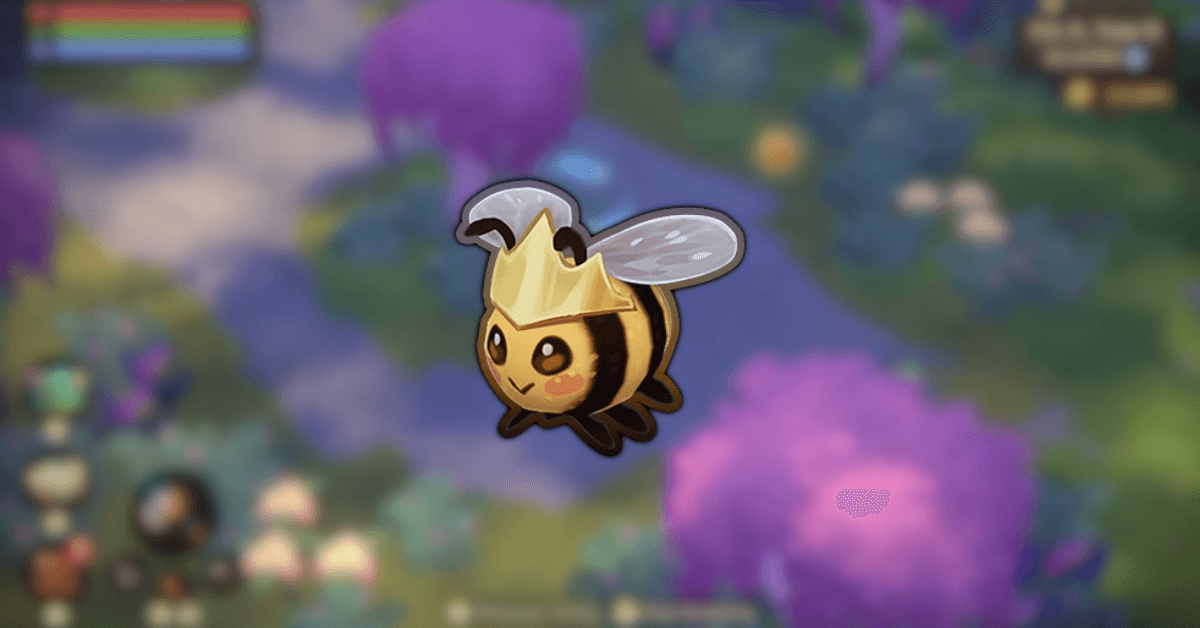
Queen Bee is a critter in Fae Farm that you can catch and use for different purposes. Like you can do the beekeeping stuff and other things, but, before you do that, you must have already got one of these.  Fae Farm has many other critters but almost all of them are caught the same way. If you are having a hard time with the Queen Bee then this guide will definitely solve most of your problems. Let’s dive in! Where to Find Queen Bee in Fae Farm So, basically, Queen Bee flies around all of Azoria and the Fae Realm region. There is no specific spot where you can always find her. The only that I can recommend to you is to explore every single spot in these two regions.  Since Queen Bee is a rare critter it can be tough sometimes to spot her. If you are lucky enough then you might find her right at the start of your exploration. But, nobody knows if it might take longer than expected. So, the best thing you can do is when you are looking for her, make sure to also keep an eye on other things that you want to collect from the same region. Such as you might want to find Worker Bees as well or maybe some resources like Violet Jellycaps or similar stuff. This will save you time and also the effort. What you wanna do is collect every other thing along the way that you see during the journey.  You don’t need to wait for any season or a specific time in order to spawn her, she spawns at any time or season. So, you can find her anytime you want. Being a bit more specific on its location, you can try it out in the Lowlands. The chances of finding her there are quite high.  What makes her different from the worker bees is her Golden Crown, since she is Queen Bee, she can be identified with her Gold Crown on her head. Once you have spotted her, get close and swing Critter Net on it. Make sure to do it right after you have spotted her or else you might miss a chance to get her.  How to Use Queen Bee in Fae Farm  Queen Bee is an essential part when you are planning to produce honey on your farm. You will need her to construct Honey Hive which is a crafting station. Without it, you cannot produce honey.  Here’s the full recipe for constructing Honey Hive.  Collect all of these items and you can have Honey Hive. After that, you can produce Honey Comb in it but you are still missing one thing and that is Worker Bee.  Now, the only thing that is required is to bring those Worker Bees from the wild. These are also found in the same region and are caught the same way as the Queen Bee. Just make sure to catch some of these as well when you are on a hunt for Queen Bee.  FAQs Where Can You Find Queen Bee in Fae Farm? Queen Bee is found anywhere in Azoria and the Fae Realm. They are easy to spot since they have a different appearance than worker bees. Look for the shimmer around them and also the Gold Crown on their head.  Plus, they are a bit bigger in size than worker bees. Most of the time you will see them near the flowers or green area where the trees and plants are.  Can You Have Bees in Fae Farm? Yes, you can have bees in Fae Farm. You can craft a Honey Hive at your farm where you can produce Honeycomb with the help of Queen Bee and Worker Bees.  But, first, you need to catch the Queen Bee and all the required items to craft Honey Hive, it’s a crafting station. After that, you will need to bring in worker bees to start producing honeycomb. 

Fae Farm Violet Jellycaps – Where to Get & How to Use It – Full Guide

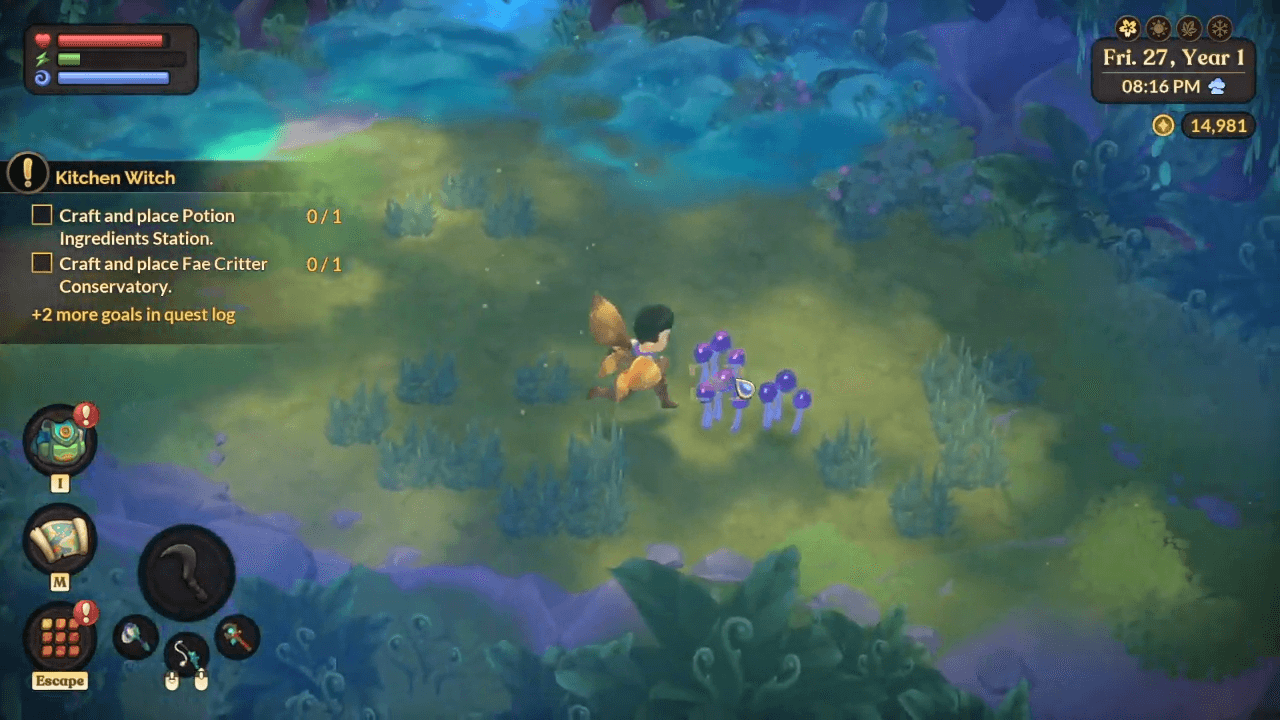
Violet Jellycaps are one of the materials in Fae Farm, mainly used in cooking. What’s great about Fae Farm is that it allows players to do tons of activities like cooking and other stuff.  Obtaining Violet Jellycaps isn’t that hard, they can be found in Fae Realm. In this guide, we have covered all the details on it like where you can exactly find them or how you can use them. So, let’s start! Where to Get Violet Jellycaps in Fae Farm  Violet Jellycaps spawn randomly in the entire Fae Realm region, so you can find them anywhere within this area. All you have to do is keep an eye on them and their identity to quickly spot them.  These are mushrooms that have a shiny Purple color. With this striking color, they are easy to spot. And as far as their farming is concerned, you don’t need any tools. They are directly picked with bare hands.  Just like Violet Jellycaps, there are hundreds of other materials in Fae Farm that you can collect for different purposes. Such as Rough Amethyst and Spriggan Leaf, which also serve different purposes.  How to Use Violet Jellycaps Violet Jellycaps are forage materials, so you only need them when you are cooking at crafting stations. And there is just one recipe that needs Violet Jellycaps and that is Twilight Salad.  Preparing this recipe requires some other ingredients as well. Here is the full list:  All of these ingredients together create a Twilight Salad that gives you 1+30 energy. Now, if you don’t want to prepare this recipe, you can directly consume Violet Jellycap to get a boost of +5 energy.  Also, you can sell them out in the market, each of them sells at a price of 5 Gold. And yes, if you plan to prepare Twilight Salad then make sure you have fulfilled the pre-requisite for it. It requires Cooking Hearth which is actually a crafting station.  Other Cooking Recipes in Fae Farm Fae Farm has dozens of other recipes, and all of these recipes are designed to give players a boost of energy upon consuming them. Each one of these recipes requires different ingredients as we saw in Twilight Salad.  Here are some of those recipes:  So, these are some of the recipes that we picked. Whatever recipe you choose, you need to gather the first like the Violet Jellycap and then you have to bring in all of the required ingredients at the crafting station to prepare it.  That’s the full guide for you regarding Violet Jellycaps in Fae Farm.

Fae Farm: Rough Amethyst & Amethyst Seal Guide – Everything You Need to Know!

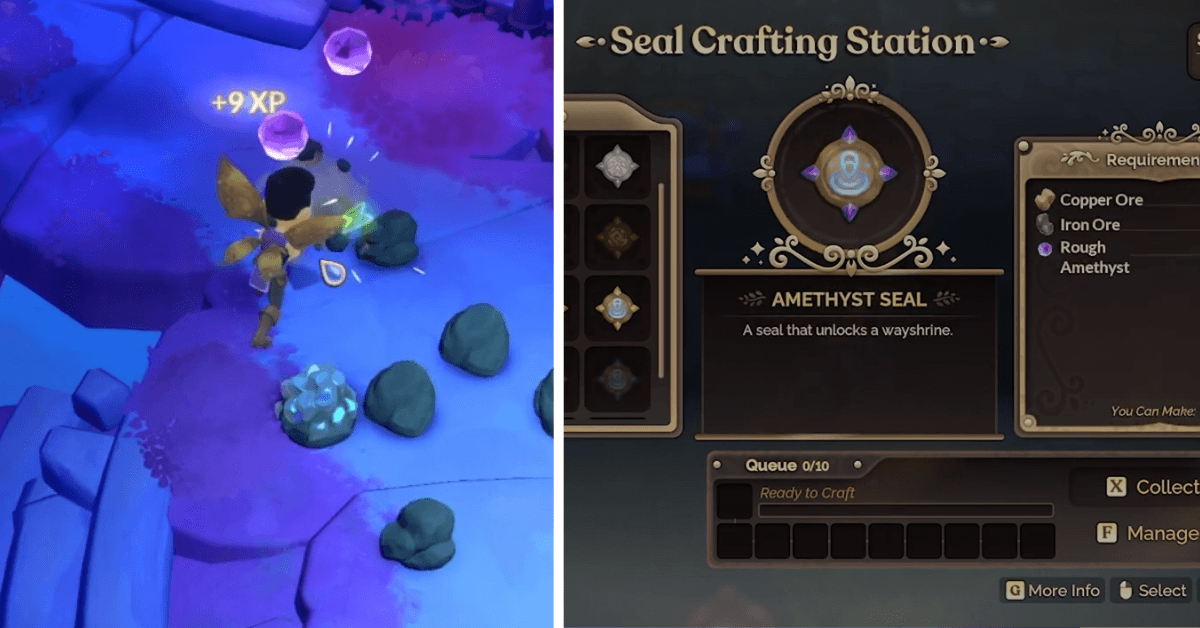
Fae Farm has many different resources and materials like Rough Amethyst and Amethyst Seal, each of these items has their own usage in the game. Rought Amethyst is a crystal whereas the Amethyst Seal is a Dungeon Seal.  Both of these items are found at different locations and are required for different purposes. If you have been looking for details on these items then you are at the right place.  Fae Farm Rough Amethyst Rough Amethyst is a crystal and works as a resource or a material in the game just like Spriggan Leaf and others. It’s a rare resource that can only be found in the Floating Ruins.  Now, if you don’t know then let me tell you, Floating Ruins has 25 floors in total. And if you are planning to grab some Rough Amethyst Crystals then you should explore floors 5-11. Here, you can definitely grab dozens of Rough Amethyst crystals.  Now, these crystals are engraved in the ground or walls so you have to mine them. For this purpose, we are gonna use the tool Iron Pickax. Hit the crystals with Iron Pickax and the crystals will be collected.  Once you have mined enough amount of it, you can take it back to your place for your use or you can also sell them out to earn some Gold. Each Rough Amethyst has a selling price of 30 Gold.  Fae Farm Amethyst Seal  Amethyst Seal is a type of key that you can use to access a wayshrine at the Floating Ruins. Once that wayshrine is activated, you can use it to fast travel to Floating Runes.  Now, we need to grab that Amethyst Seal and this can be done at the Seal Crafting Station. Here, you will need to bring in the required materials and the Dungeon Seal will be crafted. At this station, you can craft many other Dungeon Seals as well.  For the Amethyst Seal, you will need the following materials:  With these, items, you can craft an Amethyst Seal and take it to the Floating Ruins. Look for the wayshrine and use the seal on it to activate the fast travel point.  Similarly, there are dozens of other seals that you can craft at this station and use at their corresponding wayshrines to activate fast travel in that area.  Other Similar Crystals Like Rough Amethyst Rough Amethyst is a crystal we all and we get it from mining. But, that’s not the only crystal that you can mine in Fae Farm. There are a lot more crystals that you can mine and use for different purposes. Here are the rest of the crystals from Fae Farm. All of these crystals are obtained through mining and you will have to explore three different mines in order to get all of them. These mines are Saltwater Mines, Floating Runes, and Scorched Caverns. Just don’t forget to store that required tool for mining these crystals. Fae Farm also has rocks and ores that can also be mined. Every single item is used for a specific purpose. So, it’s a good thing to store them early on and use them whenever they are required. FAQs  Where Do I Get Amethyst in Fae Farm? If you are looking for Rough Amethyst Crystals then you should head into the Floating Ruins. This place has 25 floors in total, but not all of them have Amethyst.  You specifically have to explore only the floors 5-11. These floors have mining spots where you can mine Rough Amethyst Crystals using an Iron Pickax. 

Spriggan Leaf in Fae Farm – Where to Get & How to Use it

Spriggan Leaf is one of many ingredients that Fae Farm has. We all know ingredients are an essential part when it comes to recipes. So, Spriggan Leaf is one such ingredient that we are gonna need for alchemy.  So, the question is where can we get the Spriggan Leaf? Well, this leaf is actually obtained from Spriggan. In this guide, we have covered all the details regarding Spriggan Leaf and Spriggan. So, let’s start.  How to Get Spriggan Leaf in Fae Farm  Spriggan Leaf is obtained from an animal called Spriggan. This is another cute animal in the game, it might not look like an animal since it has a flower body. It would look more like a huge flower came to life.  In order to get Spriggan Leaf, all you need to do is purchase a Spriggan from the market. Once you have bought the Spriggan, it will be on your farm. You can register it on your Fae Pen where it will grow and produce Spriggan Leaf.  After you have obtained the Spriggan Leaves, it’s up to you whether you want to use them for alchemy or sell them out. If you are low on Gold then you can sell them to earn some Gold. Each Spriggan Leaf has a value of 12 Gold.  Where to Buy Spriggan in Fae Farm  Spriggan can be purchased from Reyglor who sells animals. The buying price of Spriggan is 400 Gold. Once you have purchased it, you will need a Fae Pen where you can raise it. Spriggan will eat Clover Feed, make sure you get enough of it in your inventory.  Once it starts eating, it will produce Spriggan Leaf for you. Now, if you are planning to breed Spriggan then you can do so at Temael Breeding Services. He is the brother of Reyglor. Temael also helps in the breeding of Lunen. If you plan to breed any of these two animals then you should definitely visit him.  And yes, at Fae Pen you can keep Lunen with Spriggan. Fae Pen works in the same way as the Coop Ledger and Barn Ledger.  FAQs What is a Spriggan Leaf Fae Farm? Spriggan Leaf is an ingredient that is produced by Spriggan, an animal that can be purchased. Spriggan is a flower-shaped animal that is purchased from Reyglor.  You can raise it at Fae Pen where it will produce Spriggan Leaf for you. Later on, you can choose to sell those leaves or use them in alchemy.  Where Do I Buy a Spriggan Fae Farm?  To purchase Spriggan, you will need to visit the shopkeeper Reyglor. He sells Sriggan for 400 Gold. You can also purchase Lunen from him which is sold at the same price. It will produce Silk.  That’s all the detail for Spriggan Leaf in Fae Farm. Let us know if we have missed anything in the comment section. Also, check out our guide on Queen Bee if you are planning to get some honey.

Coop Ledger in Fae Farm – Complete Guide

coop ledger fae farm

Coop Ledger in Fae Farm works as a registration counter where you can register your new animals. It is essential to register your newly purchased animal in the Coop Ledger before you use these livestock to get the products.  In this guide, we have covered full details regarding the Coop Ledger and how you can register your birds and animals on it.  Registering Animals on Coop Ledger in Fae Farm  If you haven’t found the Coop Ledger yet then you can find it a bit farther side your farm. You can see a small barn with a table outside of it. On the table, you can see a register and a feather in an inkpot. That’s the Coop Ledger, interact with it to open the menu where you can register your animals.  Upon opening the menu, you will see six slots. Any of these slots can be used to register your Chickoos or Cottontails. Choose any slot and then hit the button on the right to register your animal. That’s it, your newly purchased animal is now registered in the coop.  Now, if you want to take out the animal from the coop, you can use the same Coop Ledger. Also, it can be used to sell your animals.  Barn Ledger in Fae Farm There is another ledger in Fae Farm and that’s called Barn Ledger. In this ledger, you can register animals such as Woolyhorns and Mamoos. But, in order to obtain this ledger you must clear the mist from the hill which is on the east side of your forest farm.  This works the same way as the Coop Ledger. Once you have got access to it, the Barn Ledger will be available at your farm. Interact with it and register your livestock animals to get products or breed them.  This would have the same options in the menu. You will have those six slots with a confirmation button on the right. Just select any slot for your animal and then hit that confirmation button to add your animal to the Barn Ledger.  FAQs Where is Your Coop Ledger in Fae Farm? In Fae Farm, you can start your game with Coop Ledger and Barn Ledger where you can register your animals. After you have purchased your animals, they will spawn at your farm and will follow you.  You can simply head to the ledger which will be on the bit farther right side of your farm. Interact with it to open the menu and choose the empty slot to register your animals.  If you are looking to register your Chickoos and Cottontails then you should use the Coop Ledger. And if you want to register Woolyhorns or Mamoos then you should use the Barn Ledger. So, there you have all the details regarding Coop Ledger in Fae Farm. We have also made a detailed guide on Violet Jellycaps & Queen Bee in Fae Farm. Don’t forget to check them out as well.

Alan Wake 2: A Mother Crow Sits in Her Nest Puzzle Solution

A Mother Crow Sits in Her Nest is the last riddle that you will find in the Cauldron Lake area. Solving this riddle will result in getting a reward that gives you a massive weapon upgrade.  Solving this Mother Crow puzzle requires the three dolls from the previous riddles. These dolls must be placed in the correct order to solve the riddle. In this guide, we have covered the full solution. So, let’s dive in.  Solving Riddle A Mother Crow Sits in Her Nest First off we need to find the spot where the riddle A Mother Crow Sits in Her Nest is located. For this, you can head to the Private Cabin. This exact location will be on the east of Crow Riddle and South of Hero and Wolf Riddle.  Search the back area of the house and you will see the riddle on the ground. There will be different figures drawn with the chalk.  Here’s the full rhyme is:  A mother-crow sits in her nest Guarding her babies, doing her best To protect her home from the Beast coming to feast But only a Hero brave of heart can keep the two apart. When you see these symbols and riddle on the floor, you can interact with them to place the dolls. Now, the important part.  The three dolls are now required to be placed on the right symbols. The first doll is the Crow Doll, place it on the cracked egg symbol. Place the Hero Doll on the heart symbol. And lastly, the Wolf Doll, place on the house symbol.  As you finish placing all three dolls, a black trail will appear. This takes you to a red model house which will be close to Witch’s Hut. Here you can collect your rewards. The reward you will get is Kalevala Knights Motorcycle Charm.  This is actually an upgrade for your Flare Gun. It will boost the area and duration of the Flare Gun. This is one of the best upgrades for your weapons.  Obtaining the Dolls The three dolls that we used in this riddle can be obtained from the Cauldron Lake area. For the Crow Doll, you will need to search the area just on the left of Cauldron Lake’s entrance. It will be placed on the picnic table.  The next is Hero Doll, for this, you need to head towards the Witchfinder’s Station. Get in there and look for the playpen on the upstairs. The Hero Doll and Wolf Doll, both of them will be close to playpen.  FAQs How Do the Nursey Rhymes Work in Alan Wake 2? Nursery Rhymes in Alan Wake 2 are actually the riddles that are solved by placing the dolls on the right symbol. Cauldron Lake’s riddle A Mother Crow Sits in Her Nest is one of these riddles that you are going to solve.  Each of the riddles is a step that helps you in making progress. Collect the required dolls first and then solve the riddles., but make sure that you place them on the right symbol. Otherwise, it won’t get solved.  Also, visit our guide on Follow the Devil’s Trail in Alan Wake 2.

Whitney Animal Crossing – Details You May Have Missed

whitney animal crossing - whitney in acnh

Whitney ACNH is one of the most attractive animal-crossing villagers and you can’t miss out on not knowing about her! Whitney didn’t only make waves in ACNH but she also shook things up in a Japanese animated film related to animals crossing new horizons. Wanna know more details about Rockstar Whitney animal crossing? Hang on till the end of this “Whitney Animal Crossing” guide to find out interesting facts about Whitney! Who is Whitney in Animal Crossing New Horizons (ACNH) Whitney is a snooty wolf villager found in the Animal Crossing series. She made her very first appearance in Animal Crossing Wild World and in a Japanese animated film named “Gekijōban Dōbutsu no Mori” on animal crossing. Whitney is an attractive villager but not popular or rare. Her name is likely attributed to her white fur color. In Animal Crossing New Horizons, Whitney is seen as a fashion icon. She carries a pink purse with a white flower over it alongside a certain headwear or accessory item. She shows up in the animal crossing track in Mario Cart 8 Deluxe. Animal Crossing Whitney’s Appearance Whitney is a light blue colored wolf with blue eyes, a red-brown nose, and magenta makeup, unlike in “Gekijōban Dōbutsu no Mori” where she has lavender eyes and a deep brown nose. She also has precisely done grey eyebrows alongside a wavy tuft of hair on her forehead. Her makeup involves grey eyeshadow with winged eyeliner and grey mascara.  Whitney’s tail is long, blue, and spiky at the end. The appearance of her ears from the inside is pink. In Gekijōban Dōbutsu no Mori, Whitney has a dazzler cosmos flower at her right ear, but in Animal Crossing she doesn’t seem to have any flower. Whitney ACNH House Whitney’s house in City Folk is decorated with a circular carpet and a stone wall. Her house elements include a classic bed, classic clock, classic wardrobe, cabana lamp, and baby bear. Whitney seems to be a fan of chic items and white furniture; once you speak to her enough, she will let you know about her preferences. While Whitney’s house doesn’t have any music, if you give her a stereo she will play Lucky K.K. Her other favorite songs include K.K. Stephe, K.K. Soul, and K.K. Lovers. In New Horizons, Whitney Animal Crossing House has a completely different interior. She has a purple rose bed, a black framed wooden full-length mirror, a pair of black vinyl round-toed pumps, a ring, an iron hanger stand, a white wooden block stool, a purple animal print coat, a retro radiator, a Hi-Fi stereo streaming K.K. Soul. her house also has a fireplace alongside fragrance sticks placed over it and a wall-mounted television overhead. She also houses two pieces of rattan furniture including a rattan wardrobe and a rattan end table. The wall is blue and the floor is painted blue. Whitney Animal Crossing Personality Whitney has a snooty personality. In simple words, she loves doing makeup and gossiping about others. While conversing, Whitney will talk rudely—belittling and criticizing normal villagers. Being snooty, Whitney behaves rudely bragging about her own self when a player interacts. Whitney also speaks about other female villagers, making fun of their dressing sense and fashion.  Whitney hit it off well with other smug, big-sister, cranky, and snooty villagers because of their similar arrogant personalities. But she will not get along with normal villagers due to their kindness and jock villagers who will comment on her physical appearance. FAQs Is Whitney a good villager in animal crossing? Whitney is a snooty wolf who doesn’t get on with normal and kind villagers. She is generally rude and likes to gossip about others. Whitney also appears to be self-centered and mocks others’ dressing sense. Is Whitney from animal crossing rare? Whitney is not rare in animal crossing. There might be a lot of people desiring her but that doesn’t make her rare. Even if you get her on your island, you might end up removing her if a villager like Judy appears. What kind of villager is Whitney? Whitney is a snooty and arrogant villager who is all about herself and her appearance. She disregards and insults other kind villagers but gets along well with other rude villagers. Wrap Up Whitney might be rude in the animal crossing game but we all want to have her on our islands. Her arrogant and snooty personality alongside her fashion sense makes her one of a kind.