Bring Your Sims’ Spaces to Life with These Playful and Practical Clutter CC Packs
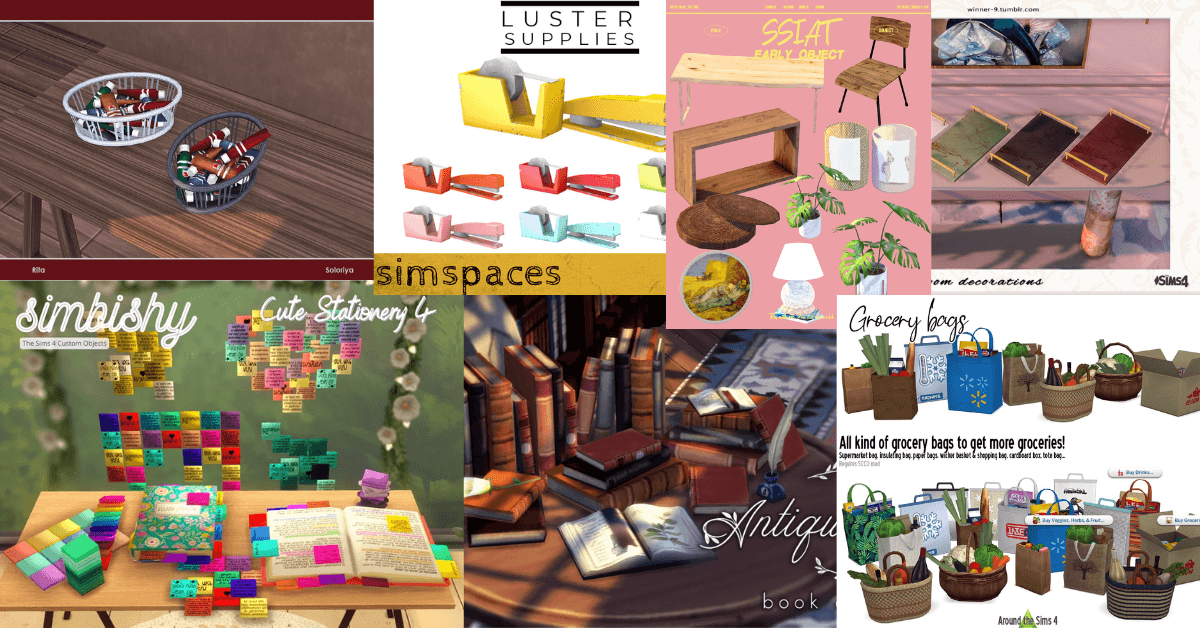
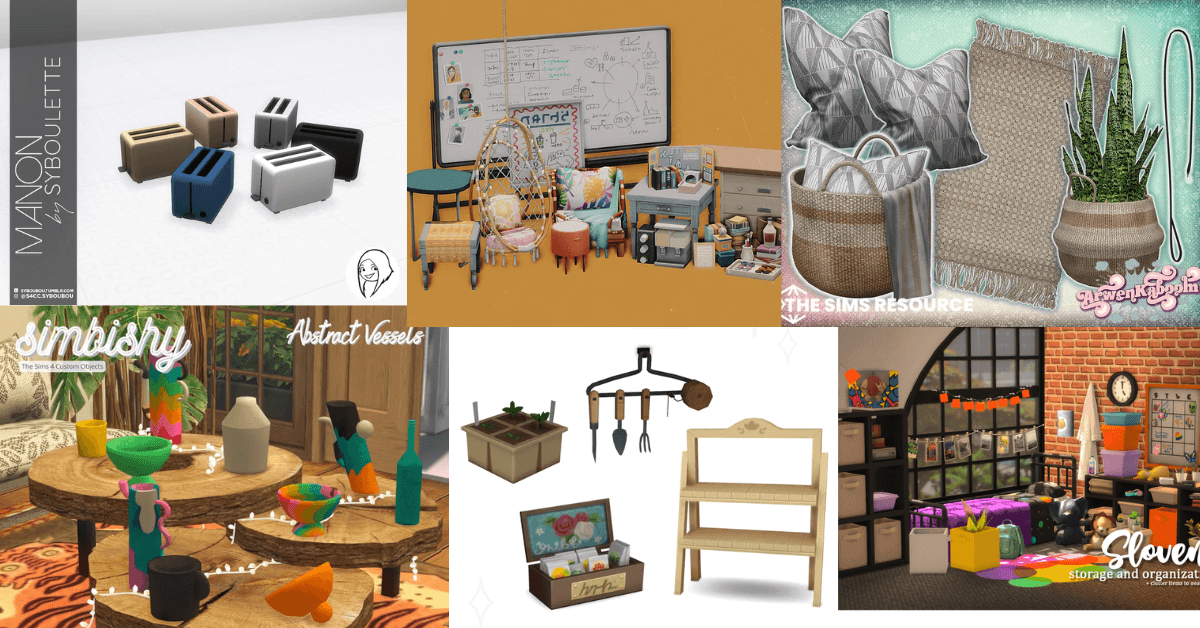
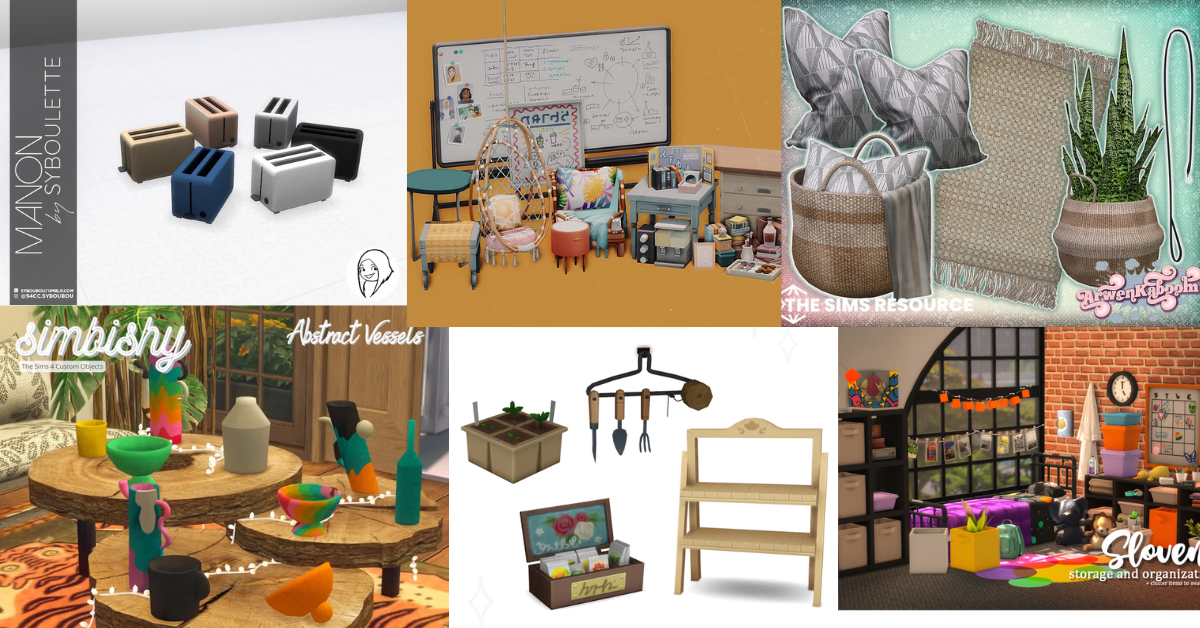
Clutter is what turns a house into a home, and these Sims 4 CC packs do it beautifully. From artsy studios to cozy kitchens, stylish desks to relaxing bathrooms, each set adds personality, color, and charm. Your sims’ rooms instantly feel lived-in, fun, and full of life with these versatile and eye-catching pieces. Rita. Watercolor Paint Tubes – Clutter CC by soloriya These watercolor tubes are such a vibe for any creative space. The buckets come in bright, cheerful colours that make mixing and matching a breeze. Pair them with brushes in a holder, and your sim’s art corner instantly feels alive. They really capture that playful, artistic energy. Cute Stationery 4 Clutter CC by simbishy Post-it heaven! This set brings tiny splashes of color to desks, walls, and books. Flat piles, high stacks, and scattered notes give every sim’s study space personality. It’s perfect for organizing projects or just adding that chaotic-but-charming school vibe. Every corner feels alive with little sticky surprises. Luster Mini-Office Supplies – Office Clutter CC by simspaces This mini desk set is so fun and vibrant. The tape roll, stapler, and other supplies look used and loved, adding realism to your sims’ workspaces. Perfect for a kid tackling homework or a young professional working from home. Bright colours make organizing feel stylish and cheerful. Antique Stacks Clutter CC by Magnolian Farewell Book lovers will adore this set. Open lexicons and antique stacks in multiple swatches give a cozy, classic feel. They work well on coffee tables or bookshelves, adding layers of depth and charm. Your sim’s reading nook will feel instantly sophisticated and lived-in. Selling Sunset set Clutter CC by ssiat This nine-piece set adds instant flair. Plants, lamps, paintings, and accent furniture come together to create a curated, modern home. Every piece feels intentional and stylish, transforming ordinary rooms into polished, inviting spaces that your sims will love spending time in. Grocery bags Clutter CC by Sacs d’épicerie From delivery boxes to paper bags, this set captures the everyday joy of grocery runs. Toss veggies in baskets, leave bags on counters, or scatter totes for a lived-in look. Your sims’ kitchens instantly feel practical, busy, and welcoming, like someone just popped out with groceries for dinner. Regal Tray – Kitchen Clutter CC by Winner9 This marble-and-gold tray elevates any surface. Use it for charcuterie, desserts, or as a bath caddy. Fun colours and elegant handles make it versatile for kitchens, bathrooms, or displays. Small details like this instantly make spaces feel luxurious and thoughtfully decorated. Beauty Guru make-up clutter CC by PlumbobGalore Bring iconic makeup vibes to your sim’s room. Lipsticks, palettes, and brushes create a trendy, store-like feel. This set is perfect for beauty-focused sims or a chic vanity display. Every item looks stylish and realistic, giving that curated, influencer-worthy energy to your sim’s setup. Daisy Set Clutter CC by Aira This set is bursting with charm. Colorful plates, mugs, and bowls mix with vases, mirrors, and candles to brighten any table. The soft color blends add personality, making kitchens and dining spaces cheerful. Every item feels like it belongs in a cozy, well-loved home. January ’22 – streamON – Clutter CC by zynoox Turn your sim into a streaming star. Iconic gaming chair, ring light, mic, and panel lights create a full streamer setup. Perfect for gamers who want authenticity in their rooms. The attention to detail makes it feel like a real broadcast corner, ready for live action. Glassary Deco Clutter CC by ArwenKaboom Bathroom clutter has never been this cute. Soaps, plants, candles, towels, and toothbrushes add depth and personality. Frames and holders give spaces structure while still feeling cozy. Small details like these transform bathrooms into more than functional rooms, they become personal, styled corners. Skara Deco Bathroom Clutter CC by ArwenKaboom Add warmth and character to any bath. Striped mats, towels, and soap dispensers combine with wooden accents to create a lived-in feel. Hanging brushes and thoughtful décor give charm without overdoing it. This set makes even a tiny bathroom feel inviting and styled. Lemons decorative set – Clutter CC by Severinka_ Fresh vibes in every piece. Lemon branches, bowls, and pitchers instantly brighten counters or tables. Lemonade jugs and fruit displays feel playful and seasonal. This set works perfectly for kitchens, dining spaces, or outdoor setups, giving your sim a cheerful, summery touch. Decorate on a Dime: University Add-ons – Clutter CC by hula-zombie Dorm life made fun. Milk crates, traffic cones, and a record player add personality to student spaces. Items are playful, eclectic, and youthful. Perfect for creating that lived-in campus feel without cluttering the room too much. Sims instantly feel part of a vibrant college environment. vintage coffee set – Clutter CC by wirefiish Mid-century charm captured perfectly. Florals, soft colors, and elegant shapes make kitchens or coffee corners stylish. Each piece feels thoughtful and nostalgic. This set transforms coffee routines into moments of aesthetic pleasure, adding warmth and sophistication to your sim’s space. Sole Mates Shoe Clutter CC by ravasheen Shoe paradise unlocked. Casual sneakers, heels, and stylish boxes fill closets beautifully. With 23 pairs, your sims’ closet feels luxurious and curated. Perfect for dressing rooms or entryways, this set turns ordinary storage into a fashion showcase your sims can show off. Baepsae set – Desk organizer – Clutter CC by Syboubou Modern organization done right. Sleek and adorable, it’s perfect for home offices, teens, or university sims. Compartments hold essentials while still looking cute. This set makes working or studying feel stylish, functional, and organized without losing any personality in the space. skin; 9 fenty beauty inspired skincare items – Clutter CC Pack by simkoos Rihanna-inspired skincare brings sleek, polished vibes. Fat water, highlighter, body cream, and more are ready to display. Each piece looks premium and trendy, perfect for vanity setups or bathrooms. It adds that subtle, luxury feel that makes your sim’s self-care corner stand out effortlessly. Shoe Decor – Mega Pack – Clutter CC by Madlen Over 20 … Read more