During the Quest Follow the Convoy, a group will ambush the convoy and you will have two choices either to protect the convoy or team up with the group and defeat the convoy.
This is where most of the players get confused because they are not aware of the consequences. That’s why I have explained in this guide what could be the consequences of each of these choices.
Keep on reading to find out everything about it.
BG3 Ambush the Convoy Walkthrough & Possible Outcomes

Making your way through the Mountain Pass at the end of Act 1 will take you to a group that is looking for a true soul.
When you reach there, they would assume that you are the True Soul who can summon their guide and hence lead the group.
Here, you should have the Spider’s Lyre because that’s what would allow you to spawn the guide. Now, you must have obtained this previously and there are multiple ways to do that.
- Can be looted from Minthara’s corpse when she was killed at the Goblin’s Camp.
- Get from Minthara as a reward after siding with her in Raid the Grove.
- Get from Nere during Free True Soul Nere.
There will be an Orc known as Kansif, he asks whether you have Spider’s Lyre. Here, you are going to use it in order to spawn the guide.
Bonus Tip: If you don’t have the Spider’s Lyre, Illithid Powers can be used to summon the guide.
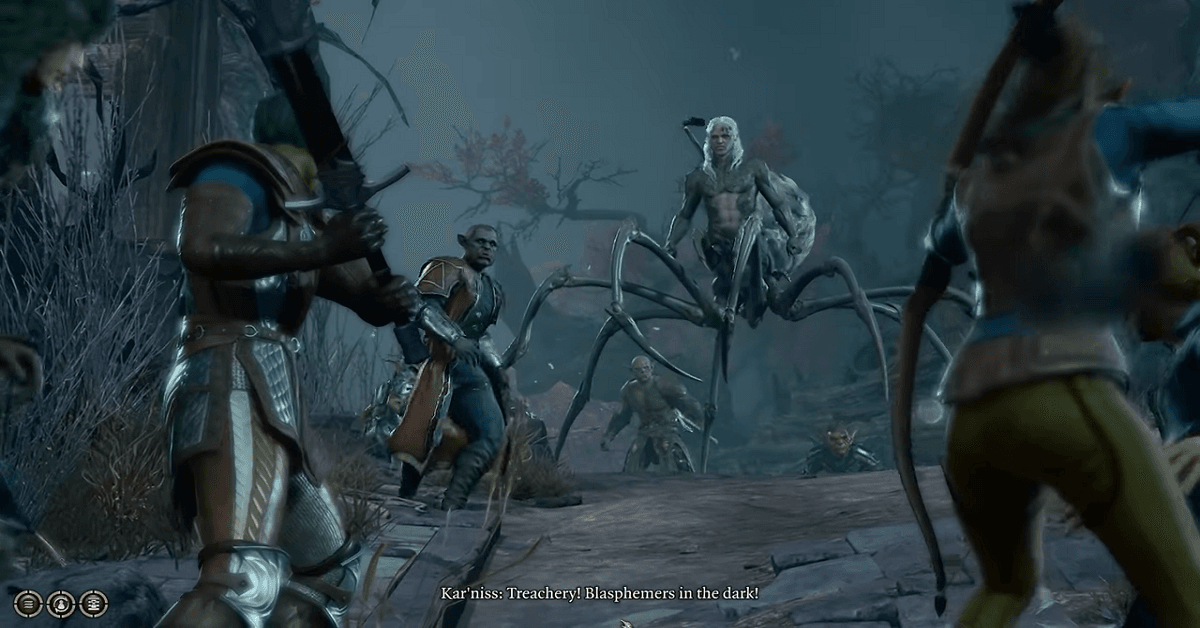
Soon after, a guide would appear whose name is Kar’niss. He has a lantern and we all know what’s that, it’s a Moonlantern.
He would lead you to the Moonrise Towers under the light of Moonlatern. Just make sure to stay away from the shadows at all times.
While moving along, you will reach a point where the convoy will stop and Kar’niss will mention that he doesn’t feel right. And he will ask that whoever is there show themselves.
And as he feared, a group of harpers will appear. This is the point where you have the option to either protect the convoy or ambush the convoy by teaming up with harpers.
Consequences of Both Options

Now, since we all wanna know what would actually happen if we Ambush the Convoy then let’s see that first.
As soon as you betray the convoy and side with the harpers, you will have to finish the convoy, and then the harpers will ask you to visit the Last Light Inn. Moreover, the Moonlantern which Kar’niss had will be taken by the harpers.
Now, you must visit the Last Light Inn and meet Jaheria. Upon meeting her, you must gain her trust to get access to the upper floor where you will have to speak to Cleric Isobel.
Now, with Moonlantern in your hands, you can advance towards the Moonrise Towers while keeping yourself safe from the shadow.
There will be a bit of inconvenience for you when reaching the towers. The guards must be convinced in a manner that they believe you are true souls. Once you successfully do that, the access to area will be granted.

Now, here is what would happen if you protect the convoy from harpers ambush. Protecting the convoy will result in advancing towards the Moonrise Towers without any issues.
Since Kar’niss has the Moonlantern, he would lead the way after you have wiped out the ambush group. And you won’t be interrogated by the guards at the entrance. By following this path you will end up straight into the Moonrise Towers area.
That’s all the information for this guide. We have also prepared guides on Facemaker Boutique & Inquisitor’s Chamber Statue Puzzle. Check them out as well!
Adam is a gaming guides writer at GamersPlan. His love for gaming has led to become a writer to show off his years of expertise in RPG and Action games. He has used almost all of the consoles, from NES to PlayStation 5. There is no console that he has not played on. Some of his favorite games include Red Dead Redemption 2, GTA V, and Baldur's Gate 3.